
I’ve been asked by several lovely readers for a pattern for a knitted cupcake. To make it accessible to beginners as well as the more advanced the cupcake is made on straight needles.

The cupcake is knitted using double knitting yarn (I’ve used cotton as it photos well) and 4mm (UK size 8) needles. It consists of 4 pieces, the cherry, cupcake case side, cupcake case base and a cake top with its delicious baby pink icing.

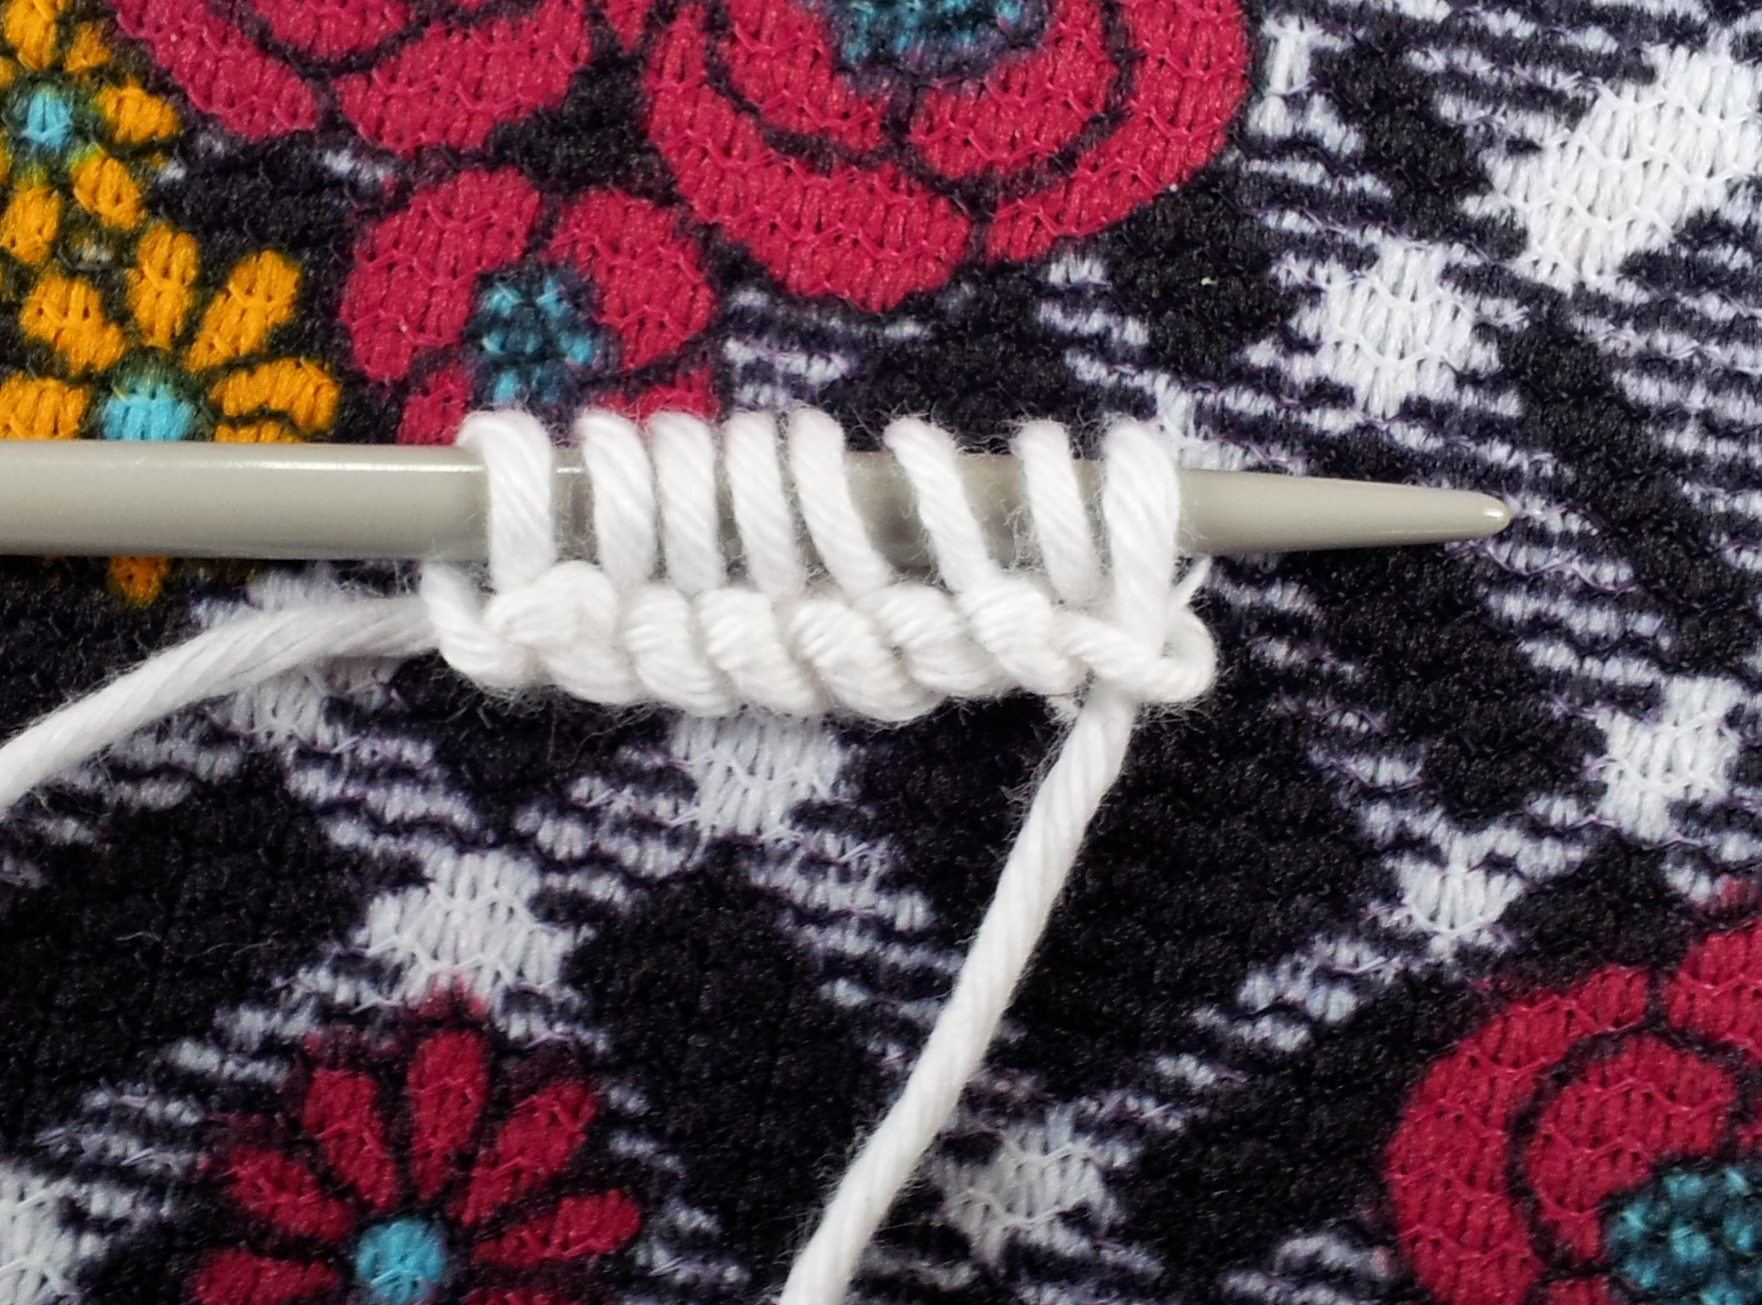
The Cupcake Case Base
Using white yarn, cast on 8 stitches. The case base is worked in stocking stitch – this is when you knit one row and purl the next.
Row 1 – Purl all stitches.
Row 2 – Knit all stitches increasing 1 stitch at the beginning and end of the row – you should have a total of 10 stitches.
Row 3 – Purl all stitches.
Row 4 – Knit all stitches increasing 1 stitch at the beginning and end of the row – you should have a total of 12 stitches.
Row 5 – Purl all stitches.
Row 6 – Knit all stitches increasing 1 stitch at the beginning and end of the row – you should have a total of 14 stitches.
Row 7 – Purl all stitches.
Row 8 – Knit all stitches.
Row 9 – Purl all stitches.
Row 10 – Knit all stitches decreasing 1 stitch at the beginning and end of the row – you should have a total of 12 stitches.
Row 11 – Purl all stitches.
Row 12 – Knit all stitches decreasing 1 stitch at the beginning and end of the row – you should have a total of 10 stitches.
Row 13 – Purl all stitches.
Row 14 – Knit all stitches decreasing 1 stitch at the beginning and end of the row – you should have a total of 8 stitches.
Row 15 – Purl all stitches.
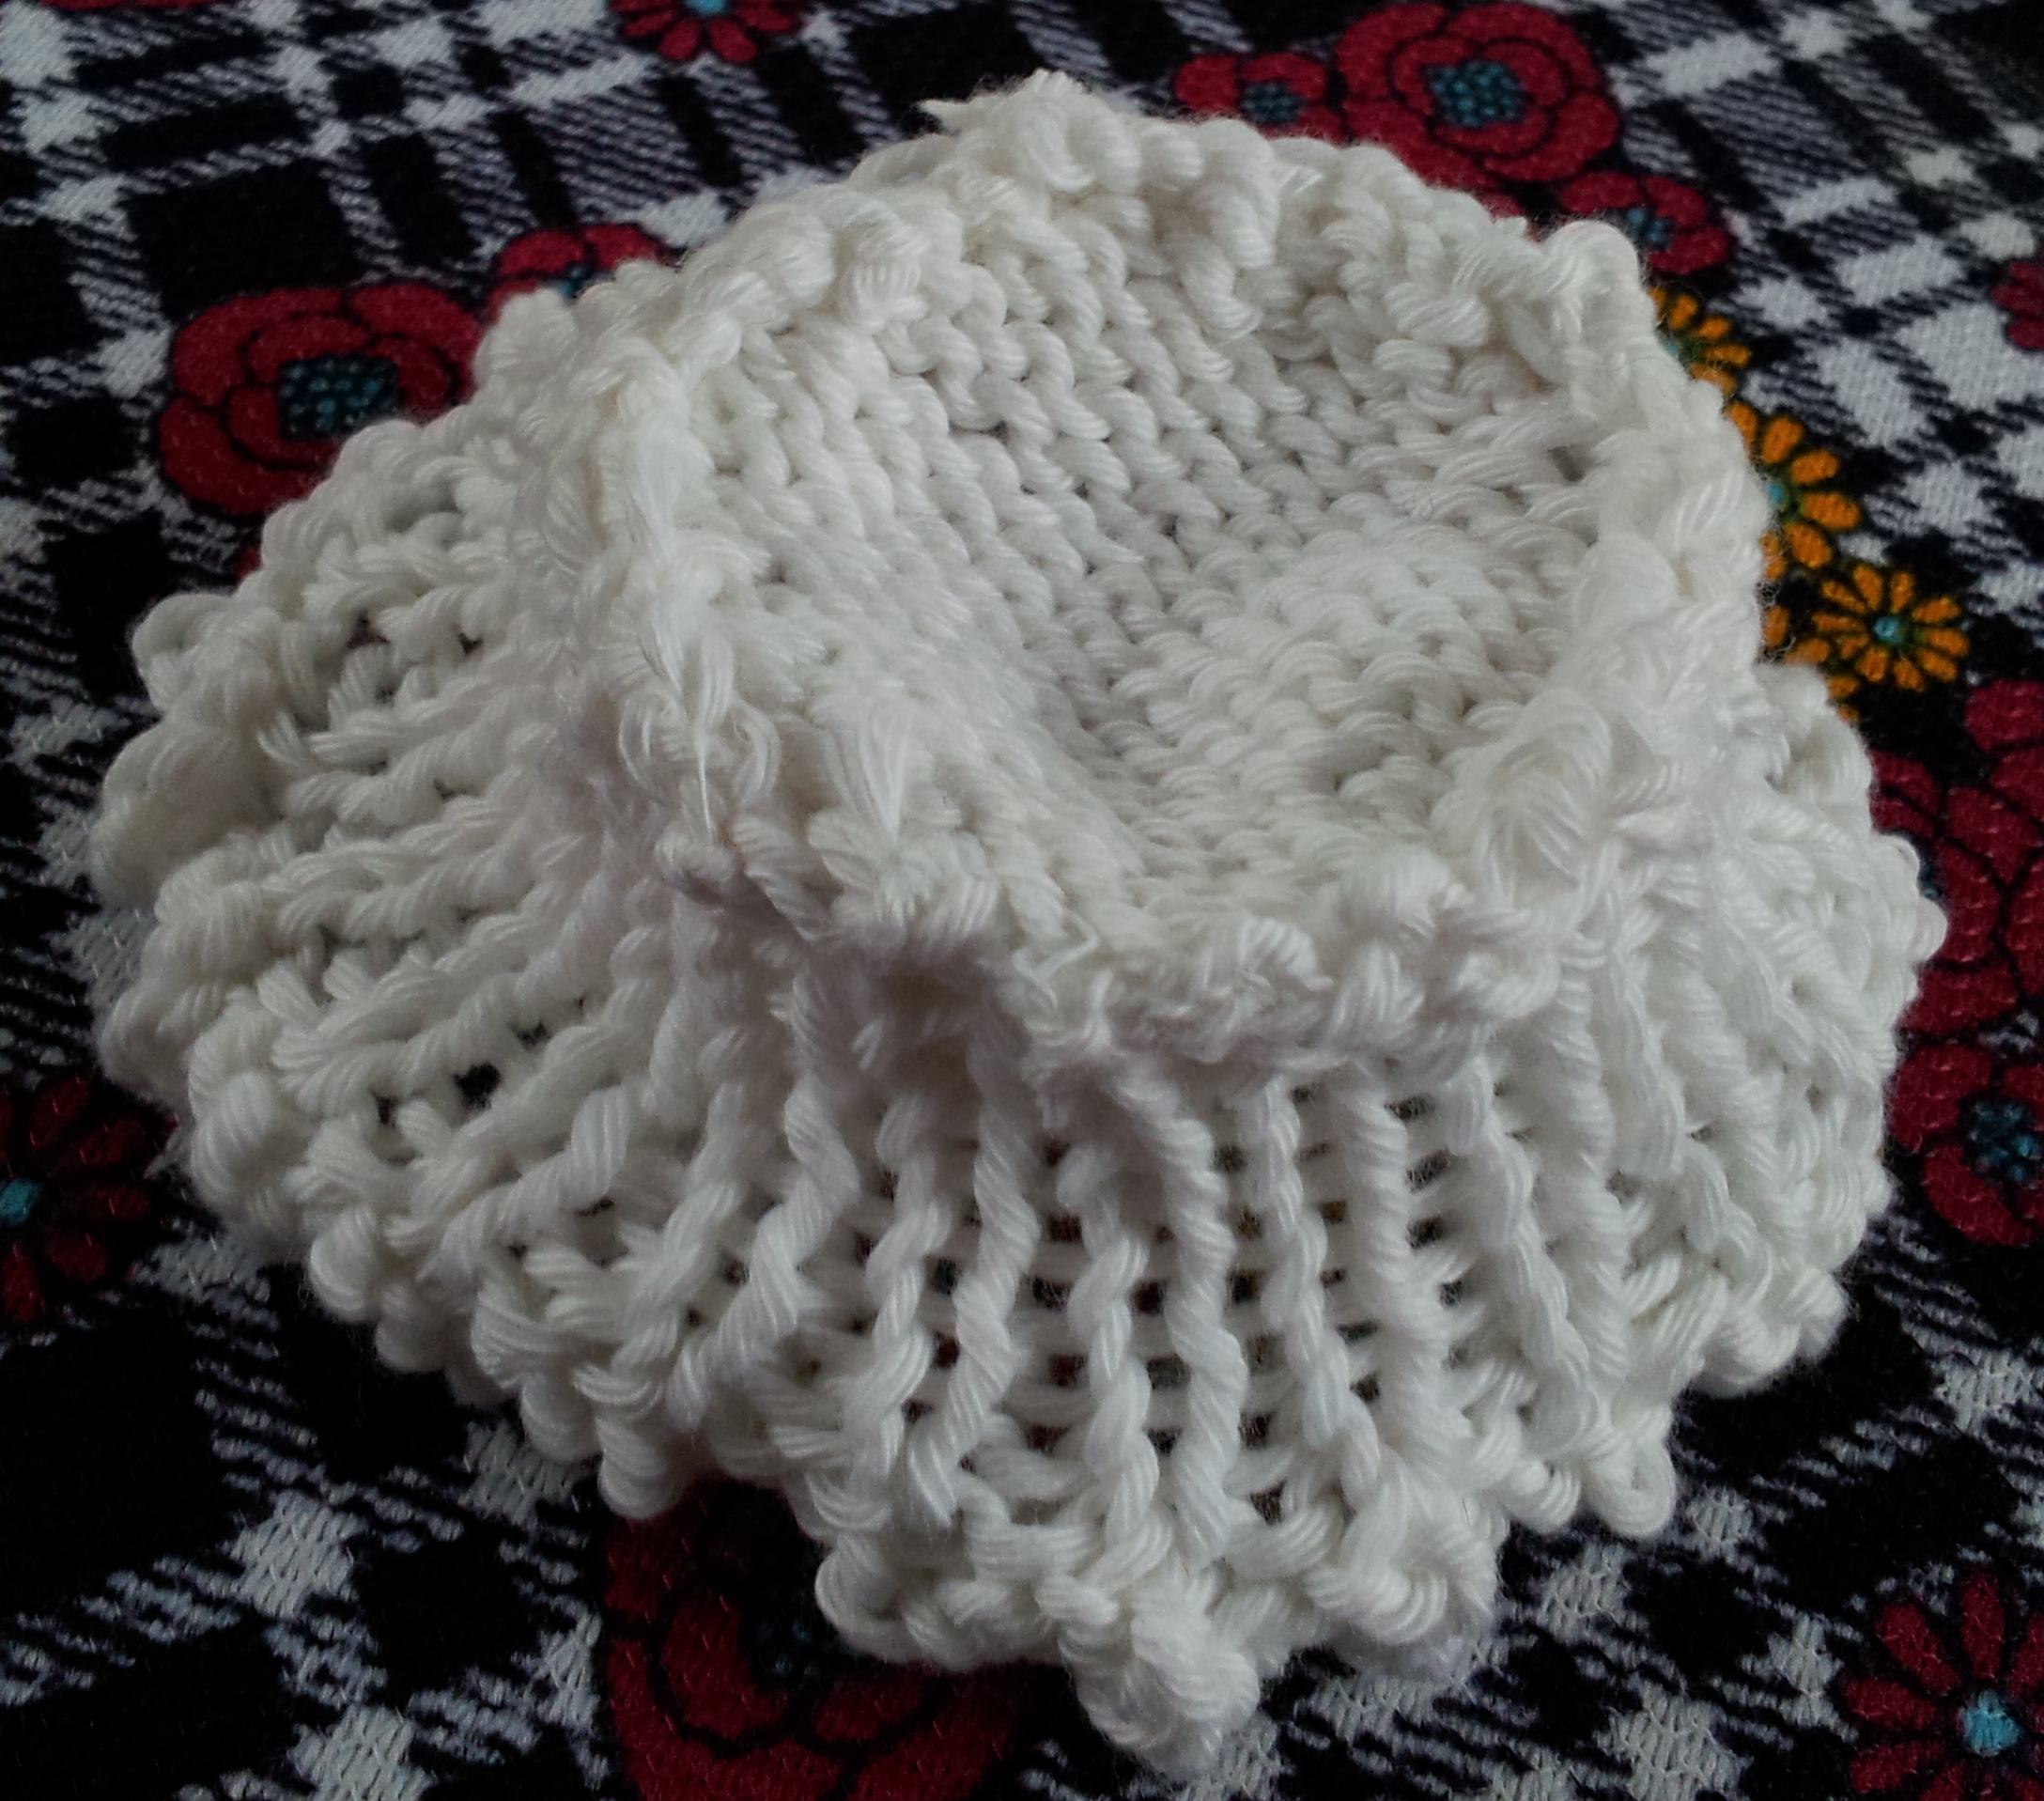
Your knitted cup cake case base should look something like this:

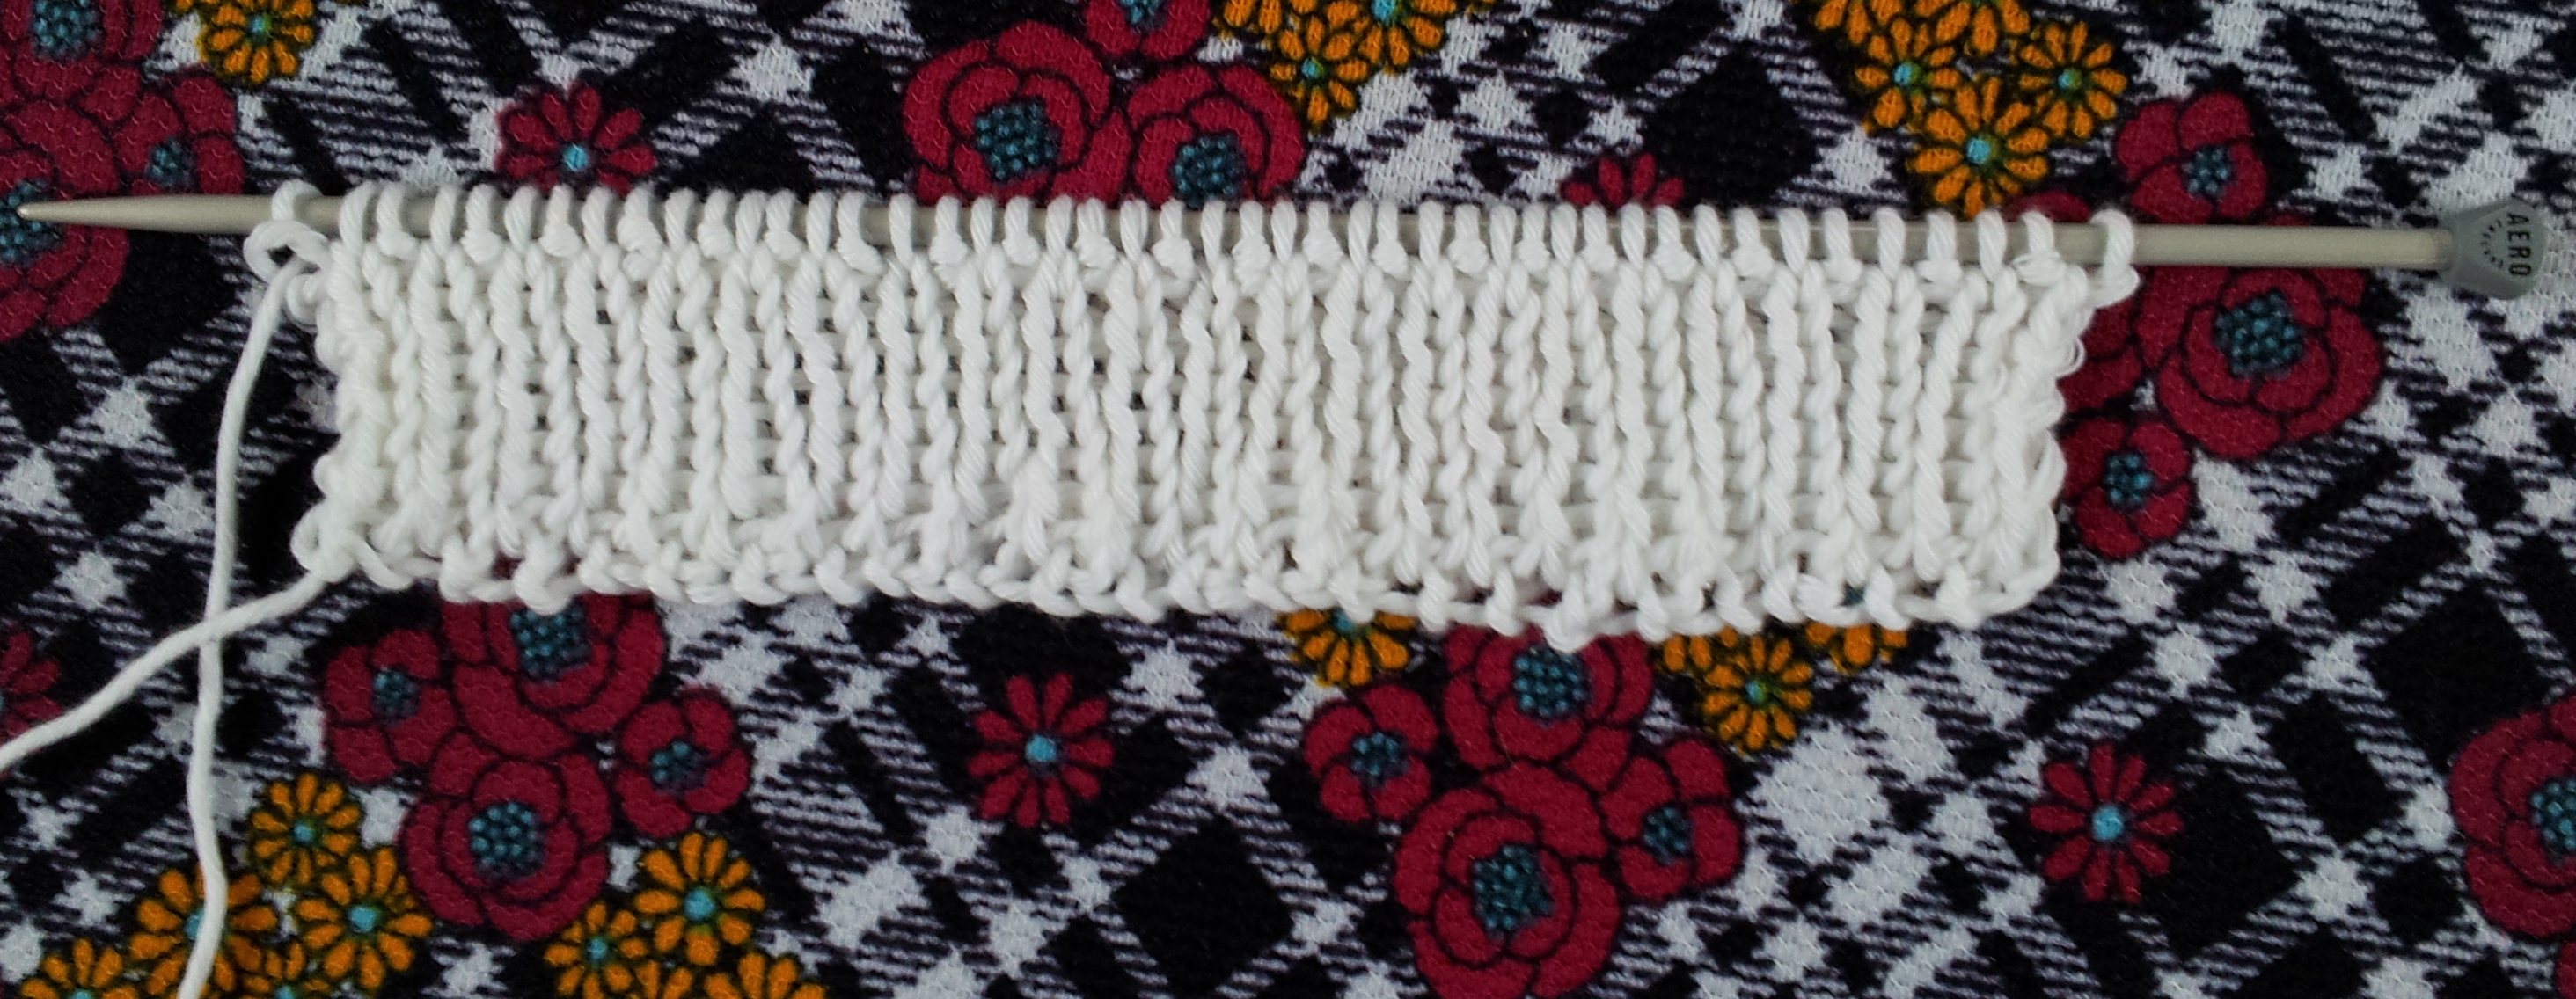
The Cupcake Case Side
Using white yarn, cast on 46 stitches.
Row 1: * Knit 1, Purl 1* repeat from * to * across the whole row.
Repeat the above 8 more times to give you 9 rows of a ribbing.
The fluted edge of the cupcake is created by casting off with a Picot stitch. I found this stitch on the new-stitch-a-day website. It goes something like this:
a) At the beginning of your row, cast on 2 stitches. I have marked my 2 new ‘cast on’ stitches with 2 pins in the photo below.
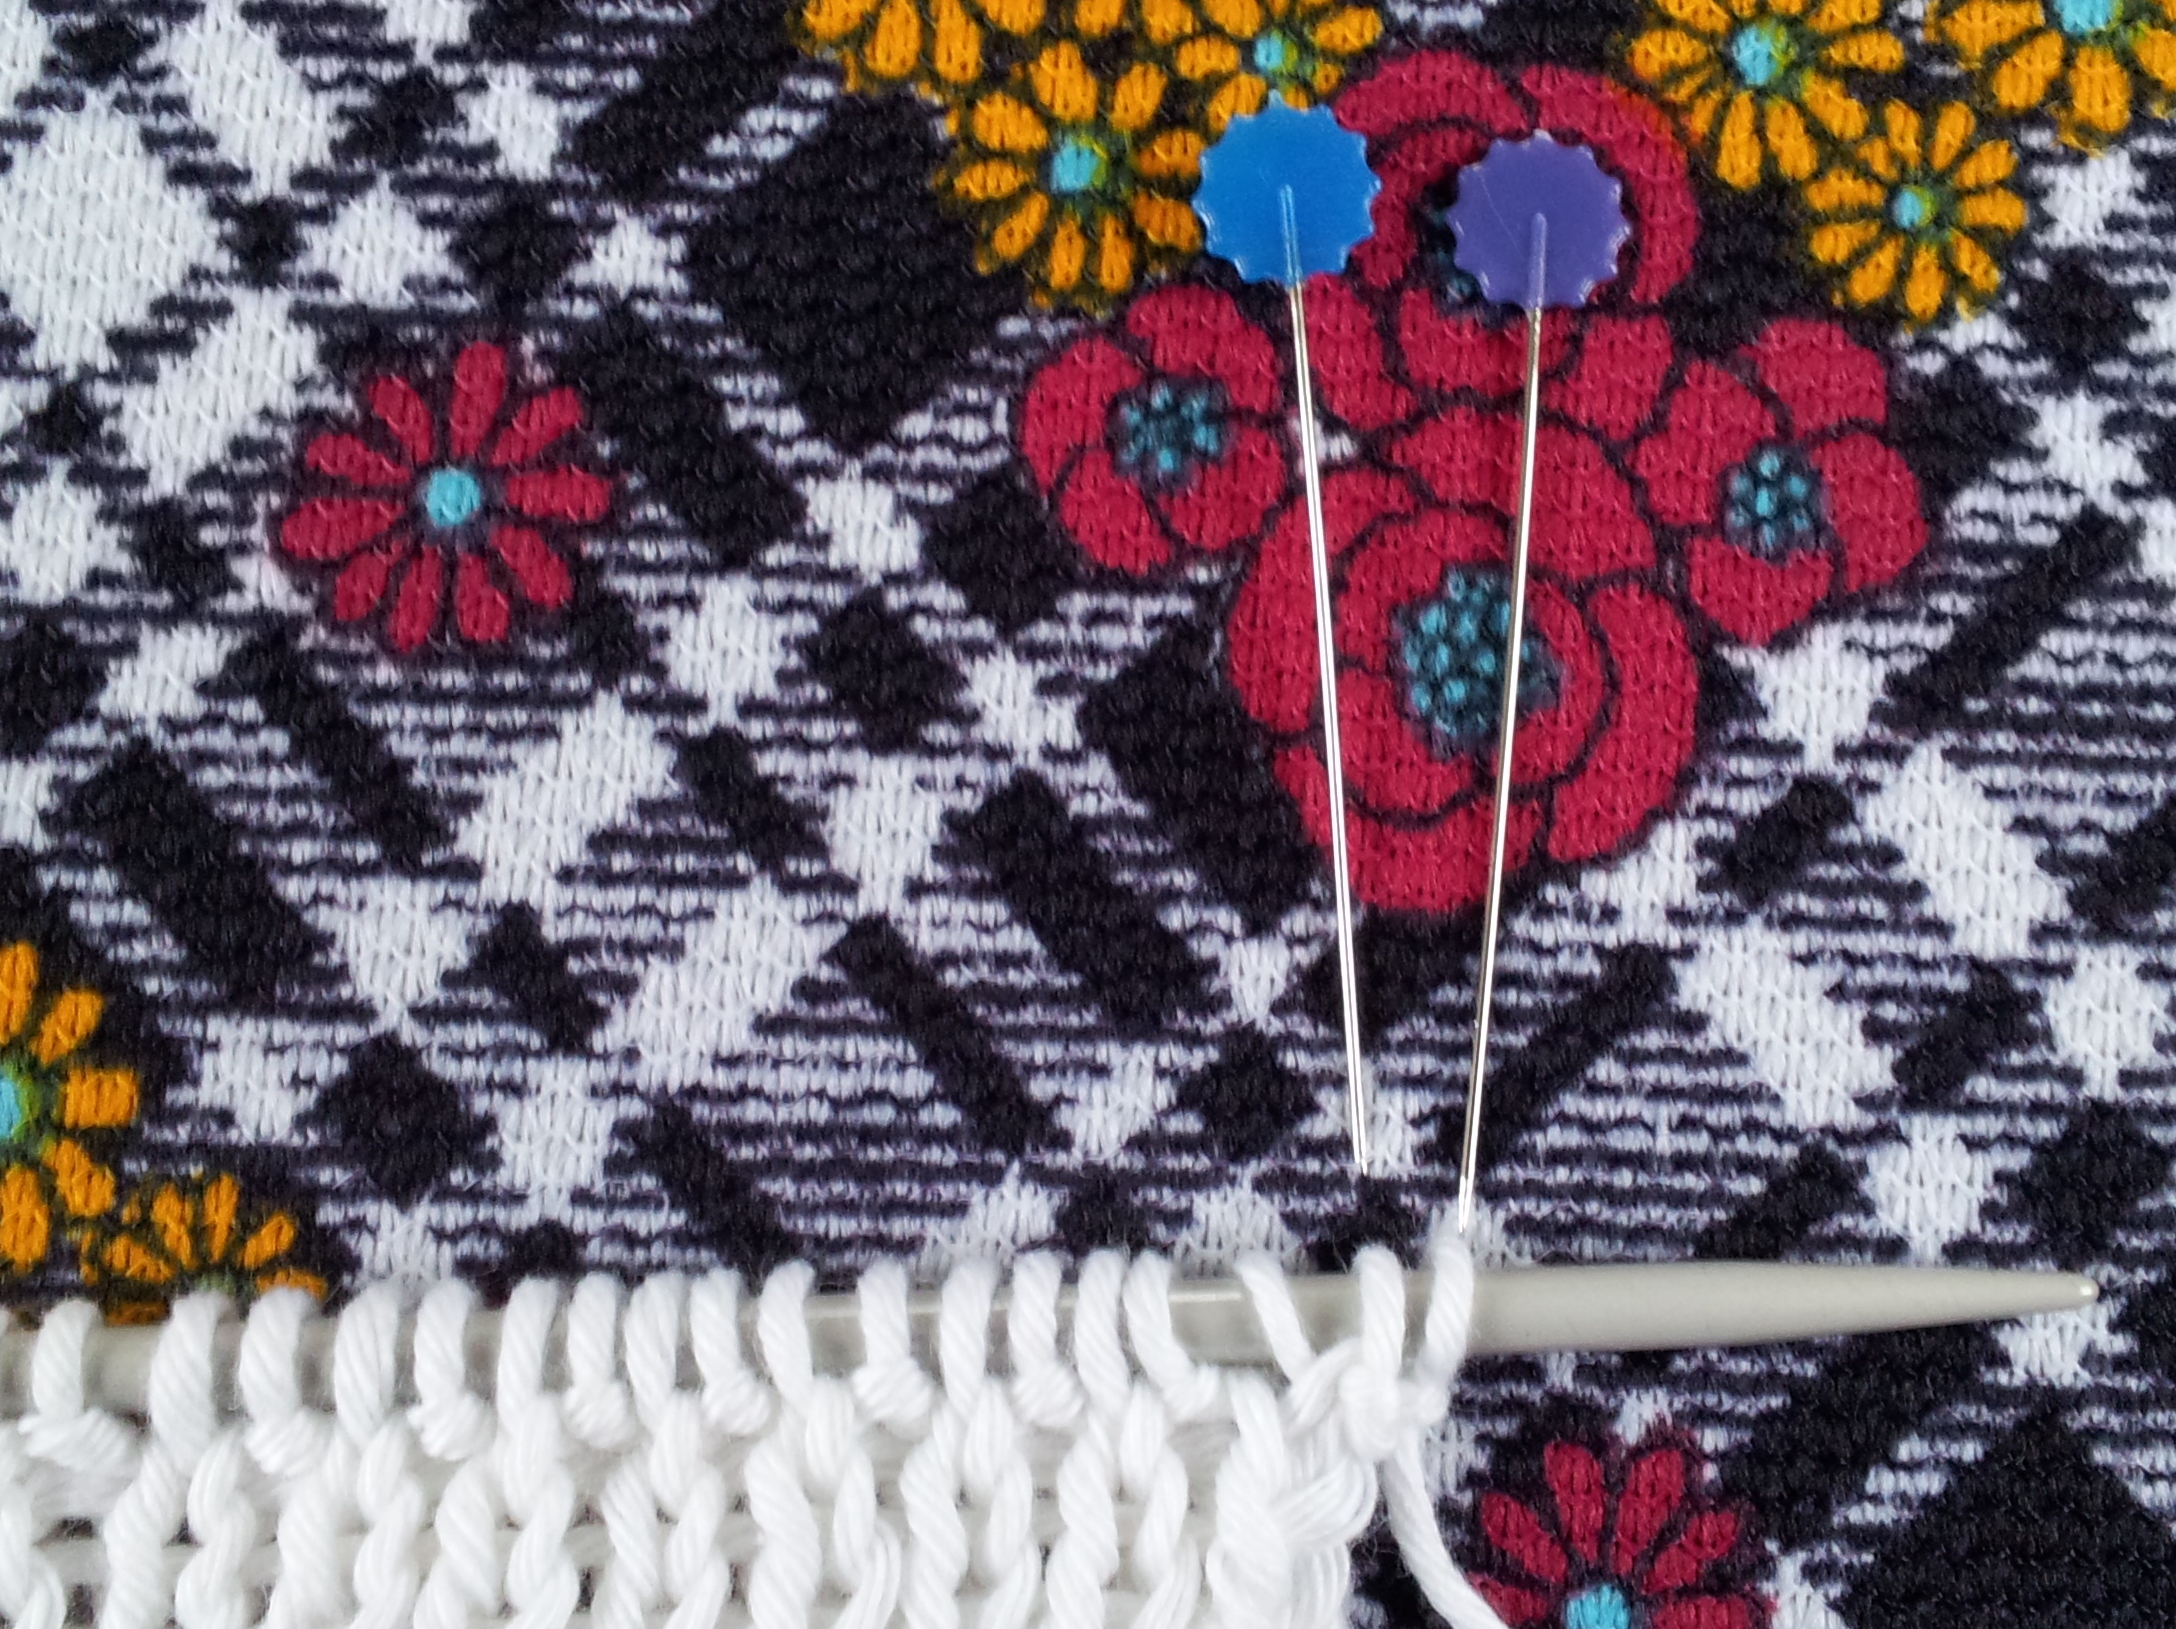
b) Knit both of your 2 cast on stitches – they should end up on your right hand needle.
c) Pass the first stitch you knitted over the second one and let it fall into the gap between your needles (ie, cast 1 stitch off). You should have 1 stitch left on your right hand needle.

d) Knit 1 stitch from your left hand needle so that you have 2 on your right.

e) Pass the first stitch over your freshly knitted second stitch and let it fall into the gap between your needles again – 1 stitch remains on the left hand needle.

f) Repeat steps d and e two more times ie, knit one, then pass your first stitch over the second stitch.
g) Slip the stitch that’s on your right needle back onto your left needle – your first Picot stitch pattern is finished.
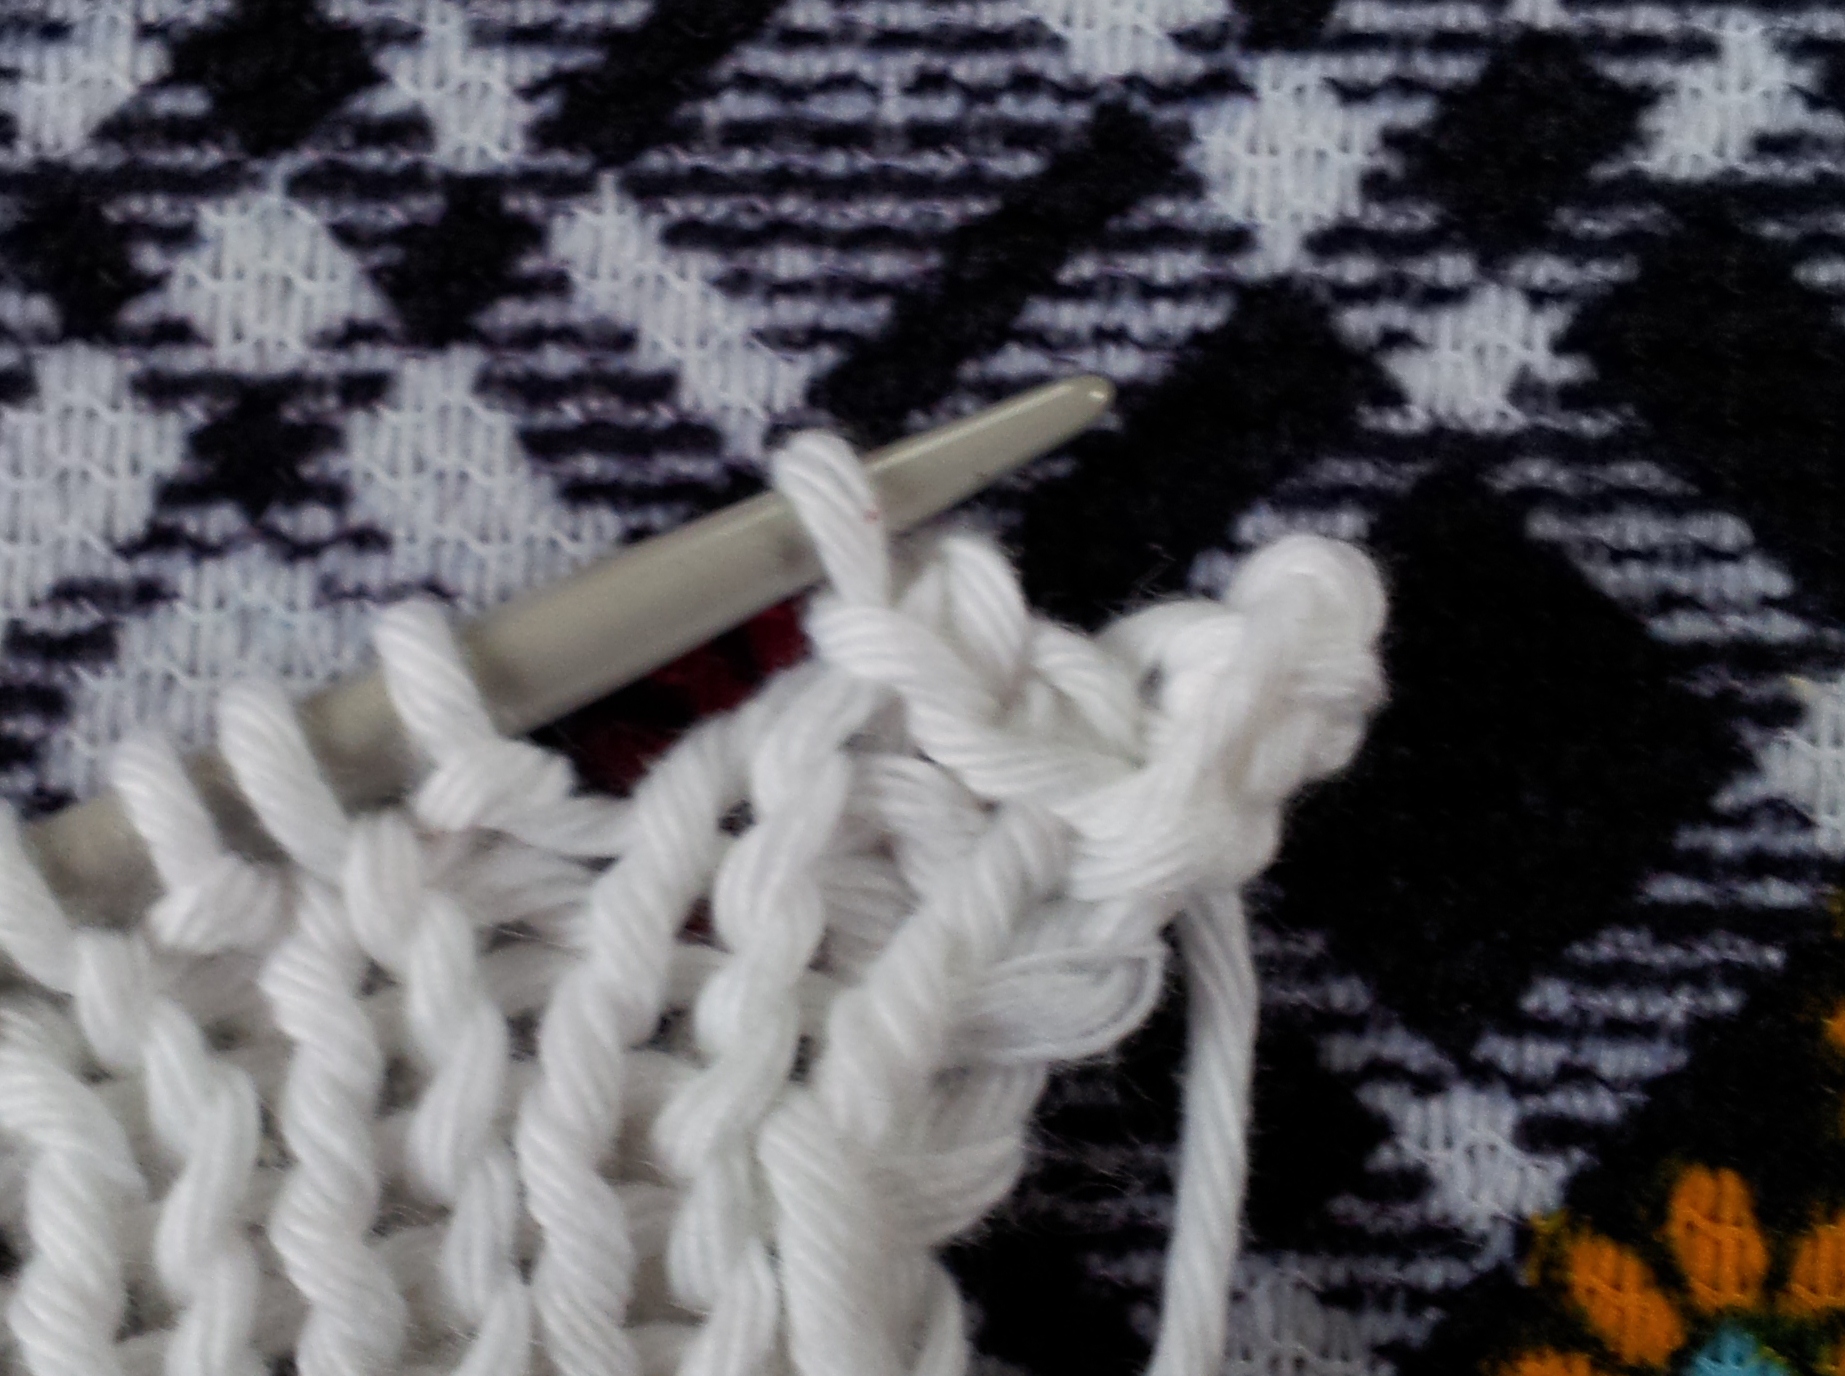
Repeat steps a – g until you have worked all stitches and created a beautiful frilly Picot edge. Cut your yarn and pass the end through the centre of the remaining stitch to fasten off the row.

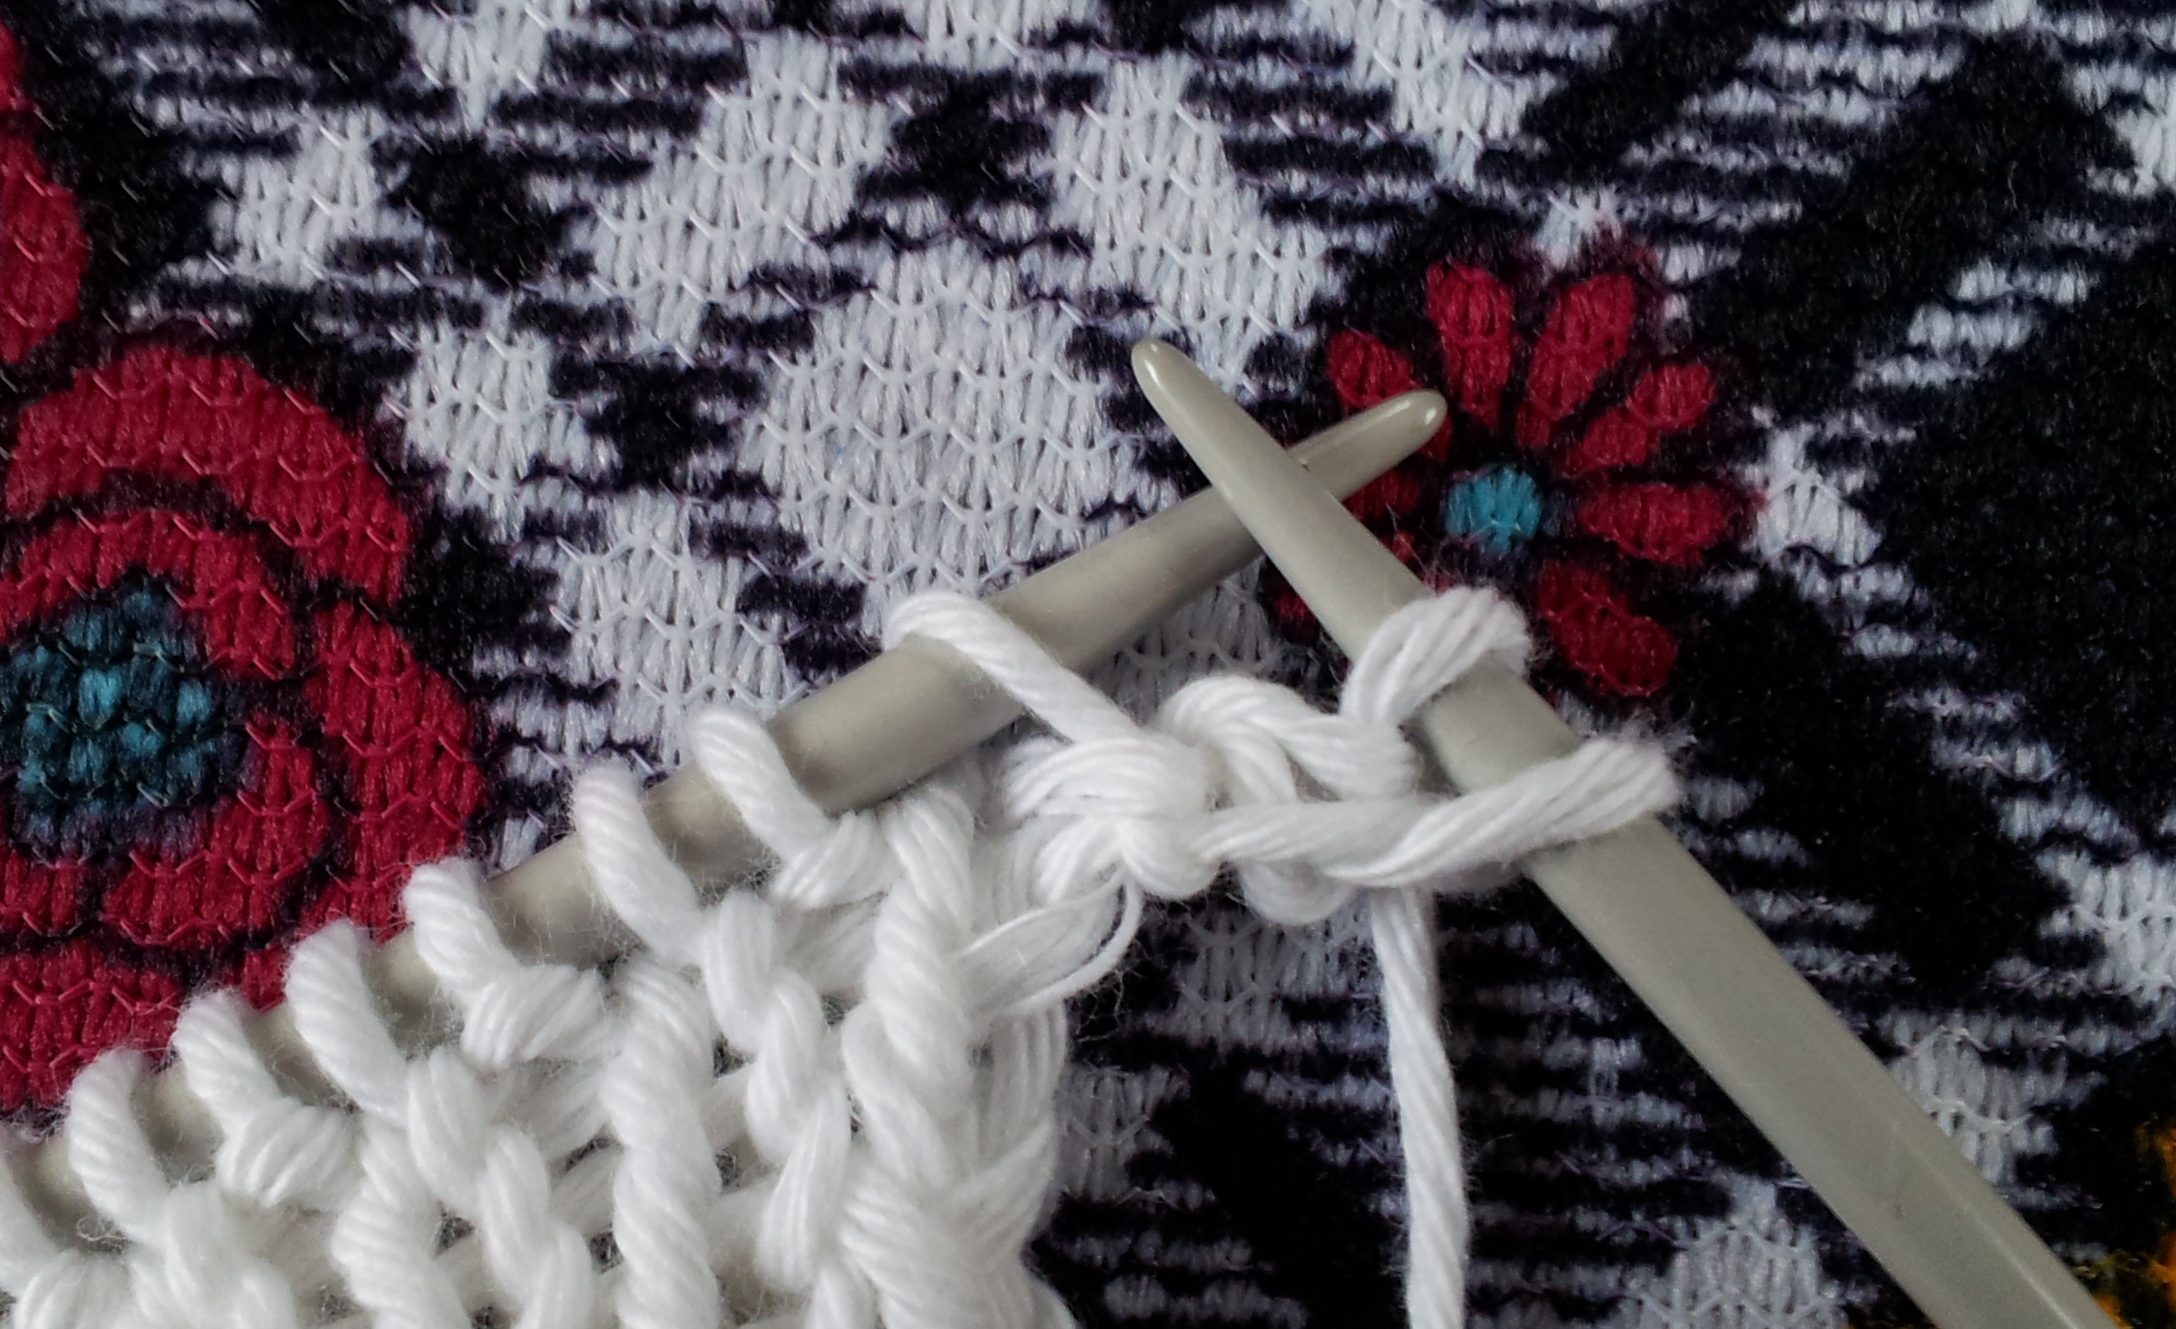
Join your cupcake case pieces together by sewing the flat ‘cast – on’ edge of the side around the case base. It’s best to do this by turning your pieces so you join them wrong sides together – see photo below of the cup cake case turned inside out and upside down.
Cup Case Top
Cast on 36 stitches in a light brown colour (for the cooked cake!)
Row 1: Knit all stitches.
Row 2: Purl all stitches.
Row 3: Knit all stitches.
Row 4: Purl all stitches.
Row 5: Knit all stitches.
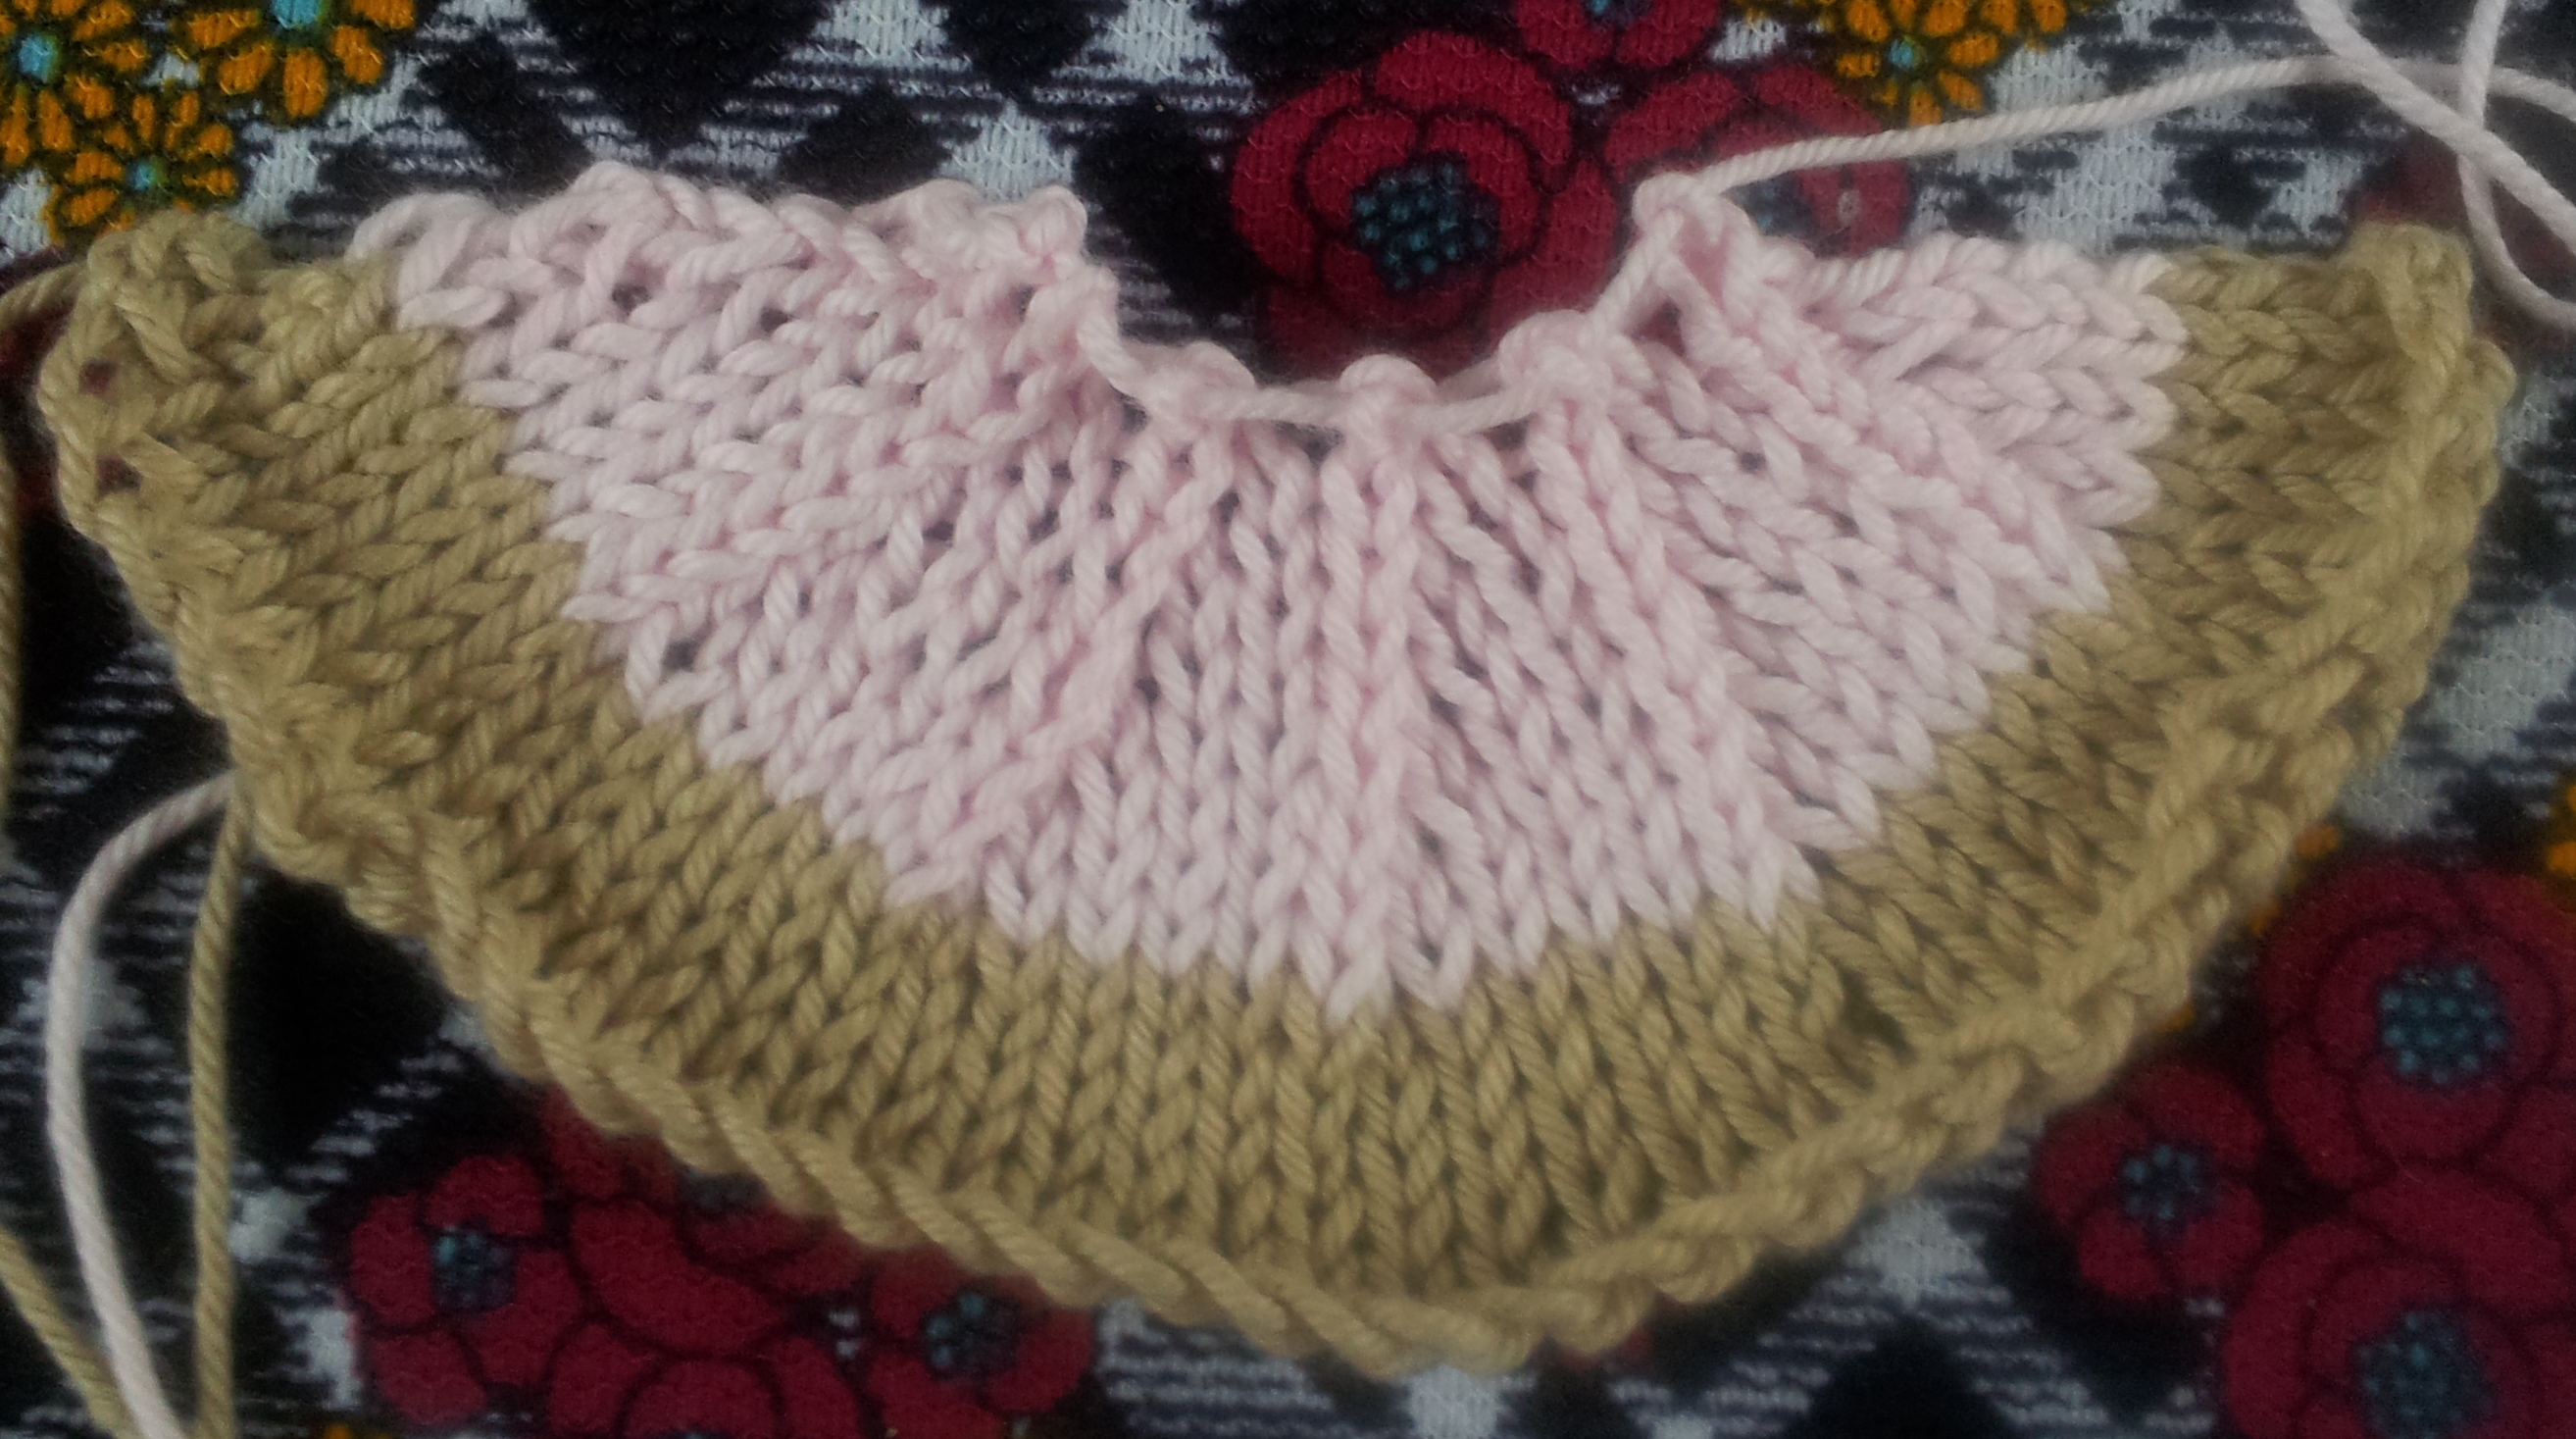
Row 6: Change your yarn to pale pink (ie, icing colour) and purl all stitches in the row. Your cake top should look something like this:

Row 7: *Knit 4 stitches, Knit 2 together* repeat * to * 6 times until you reach the end of the row. Your should have 30 stitches left.
Row 8: Purl all stitches.
Row 9: *Knit 3 stitches, Knit 2 together* repeat * to * 6 times until you reach the end of the row. You should have 24 stitches left.
Row 10: Purl all stitches.
Row 11: *Knit 2 stitches, Knit 2 together* repeat * to * 6 times until you reach the end of the row. You should have 18 stitches left.
Row 12: Purl all stitches.
Row 13: *Knit 1 stitch, Knit 2 together* repeat * to *until you reach the end of the row. You should have 12 stitches left.
Row 14: *Knit 2 together* repeat * to * 6 times. You should have 6 stitches left.
Cut the yarn and thread it though remaining stitches.
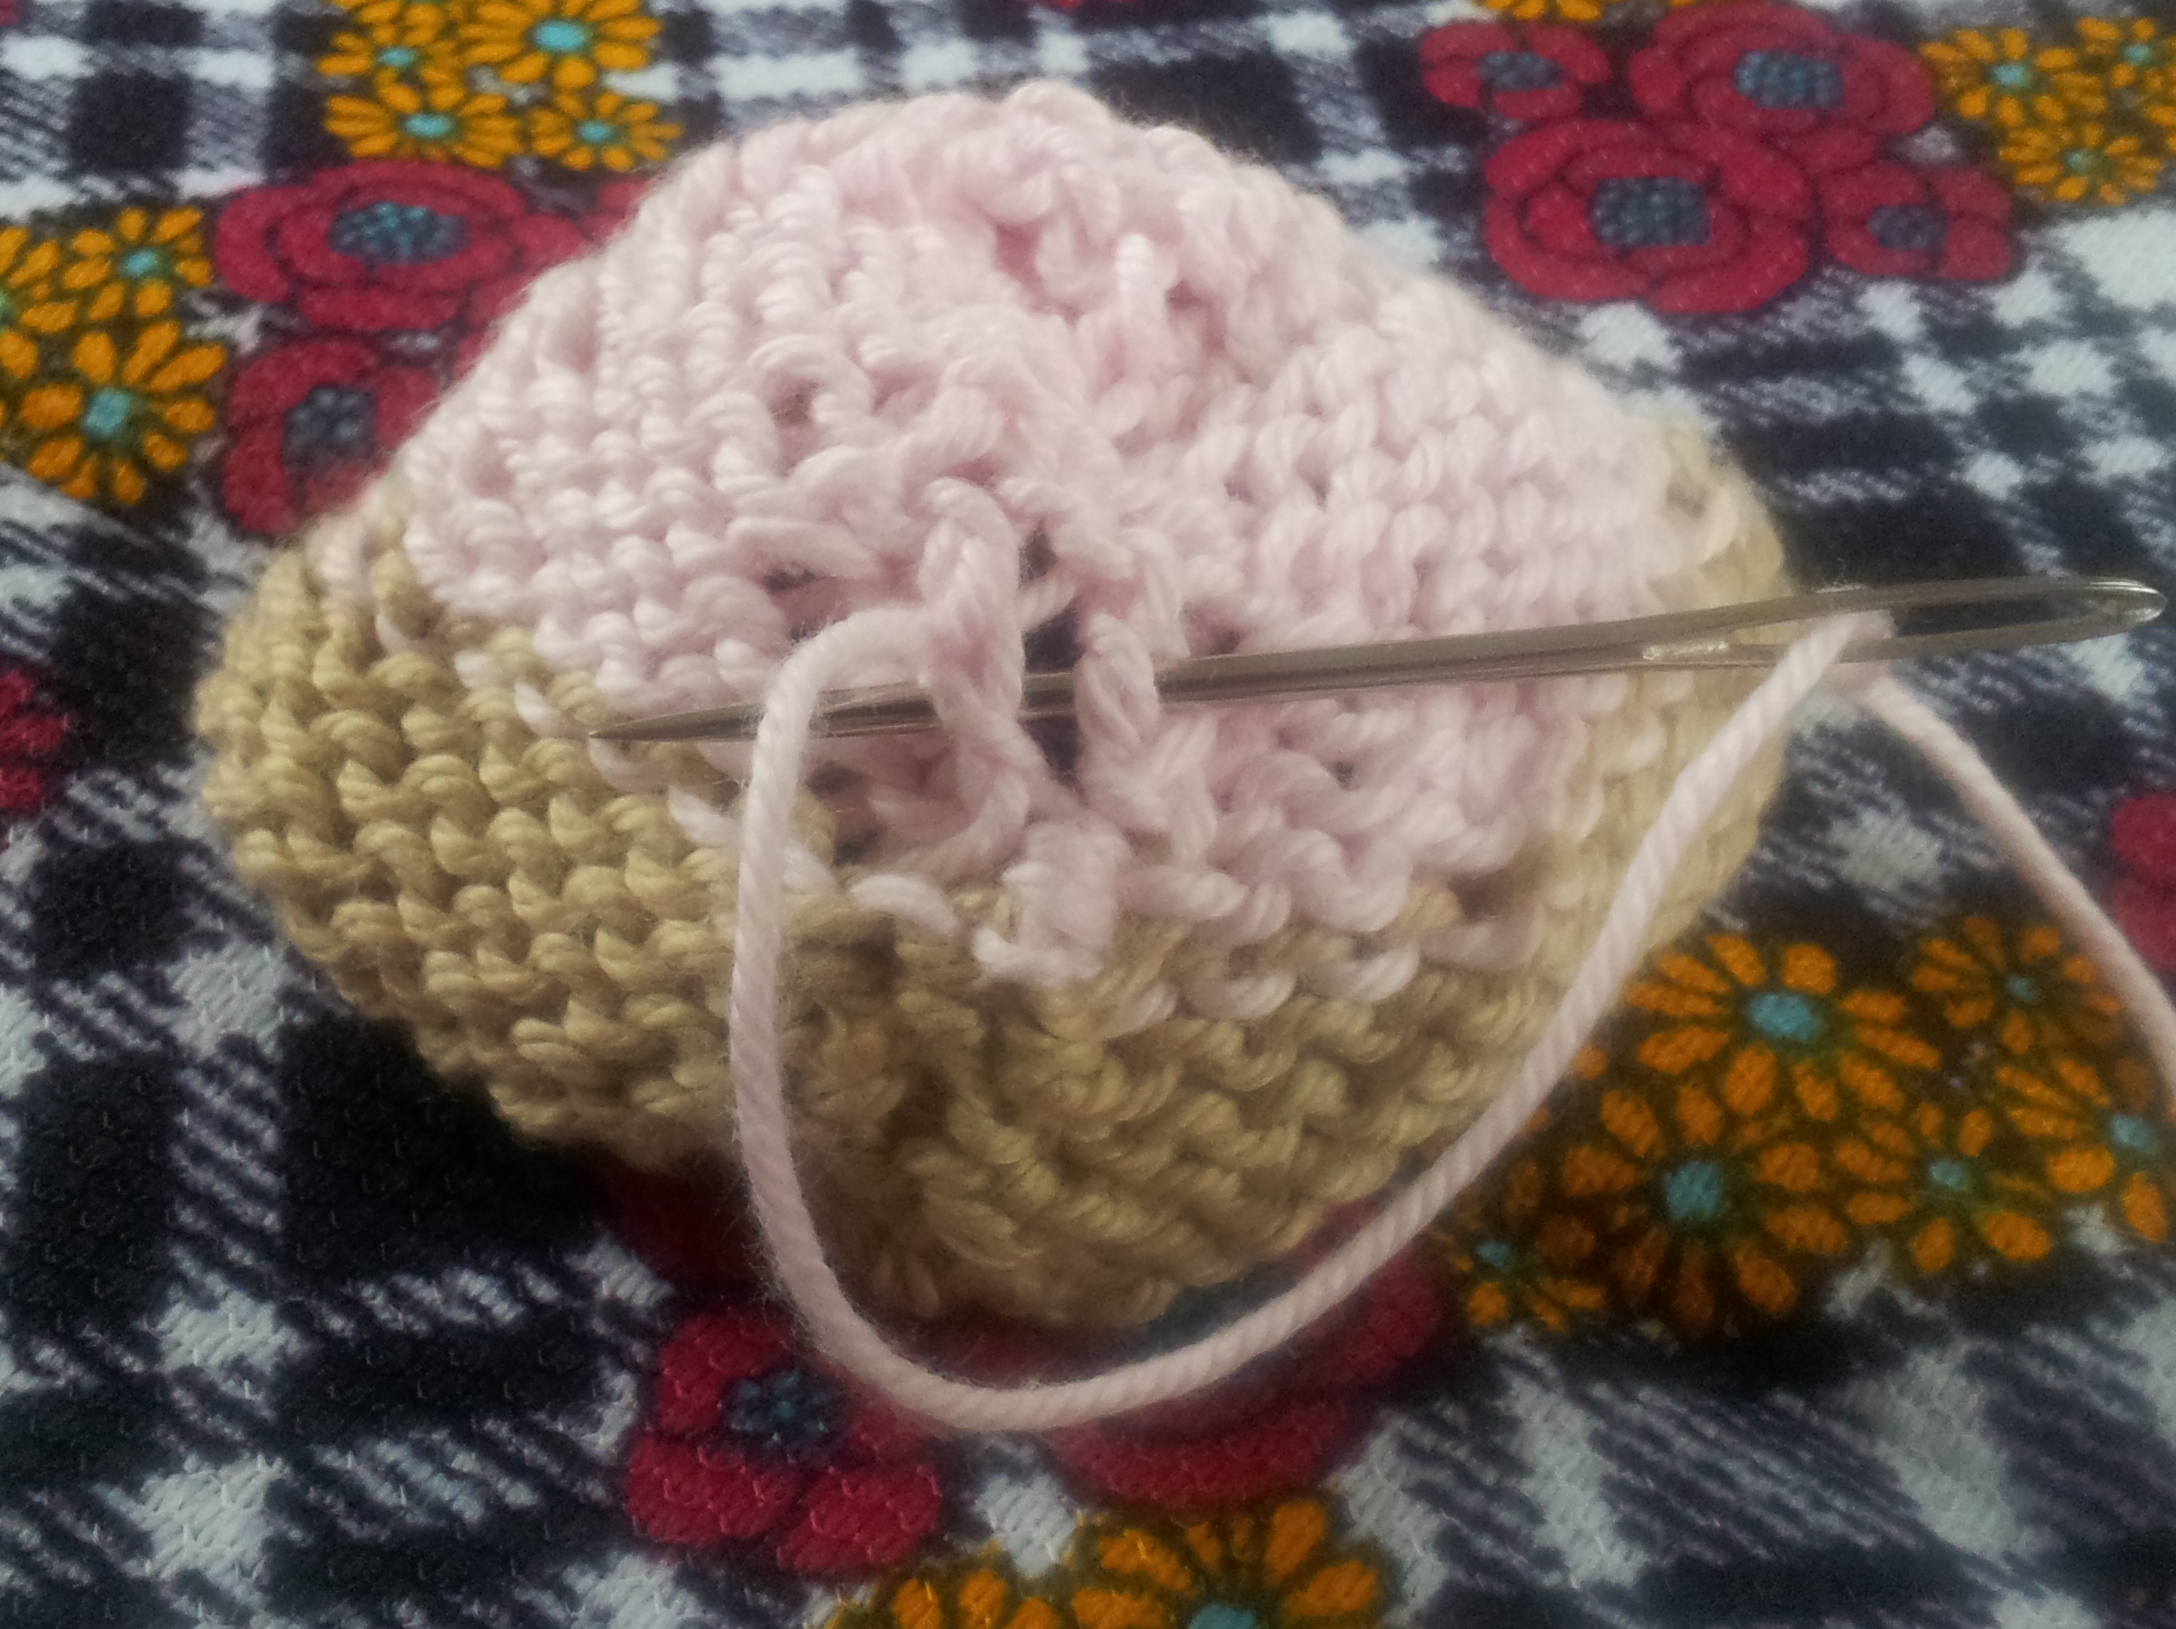
Pull the thread to gather your stitches together and then sew up the side seams (its best if you do this on the wrong side) to form a dome. Here’s mine from the wrong side.
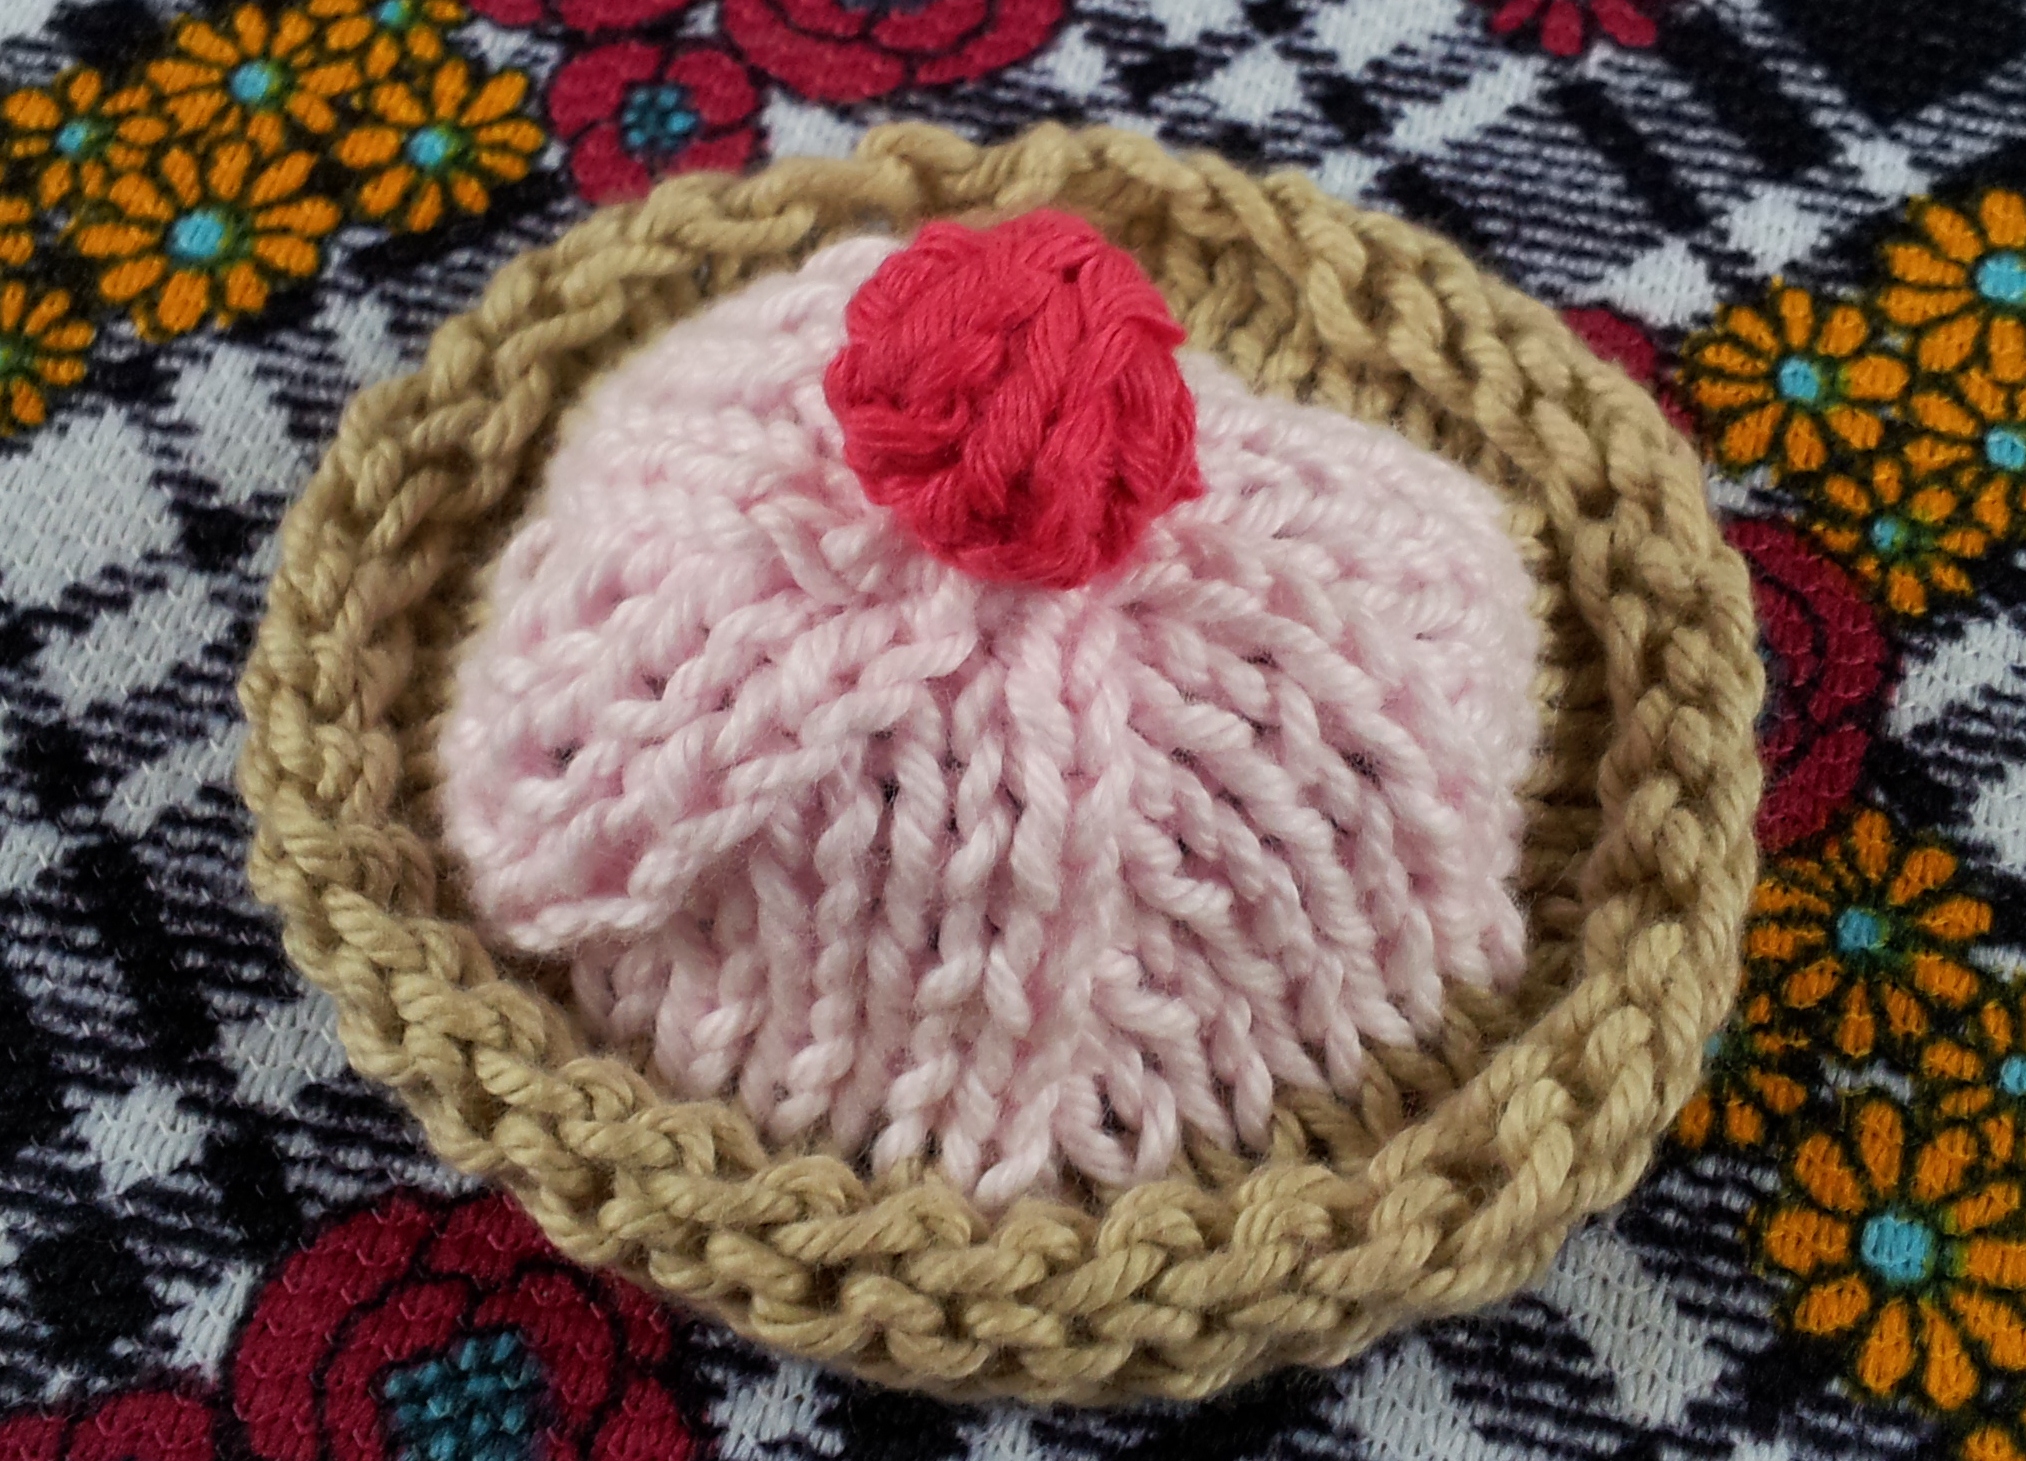
The top of your cupcake is finished. It already looks really cute and you could even get away with using it as a tart (once you have added your cherry!)
Knitted Cherry
Cast on 4 stitches in red yarn.

Work 6 rows in stocking stitch – that’s knit one row, purl the next.
Cast off.
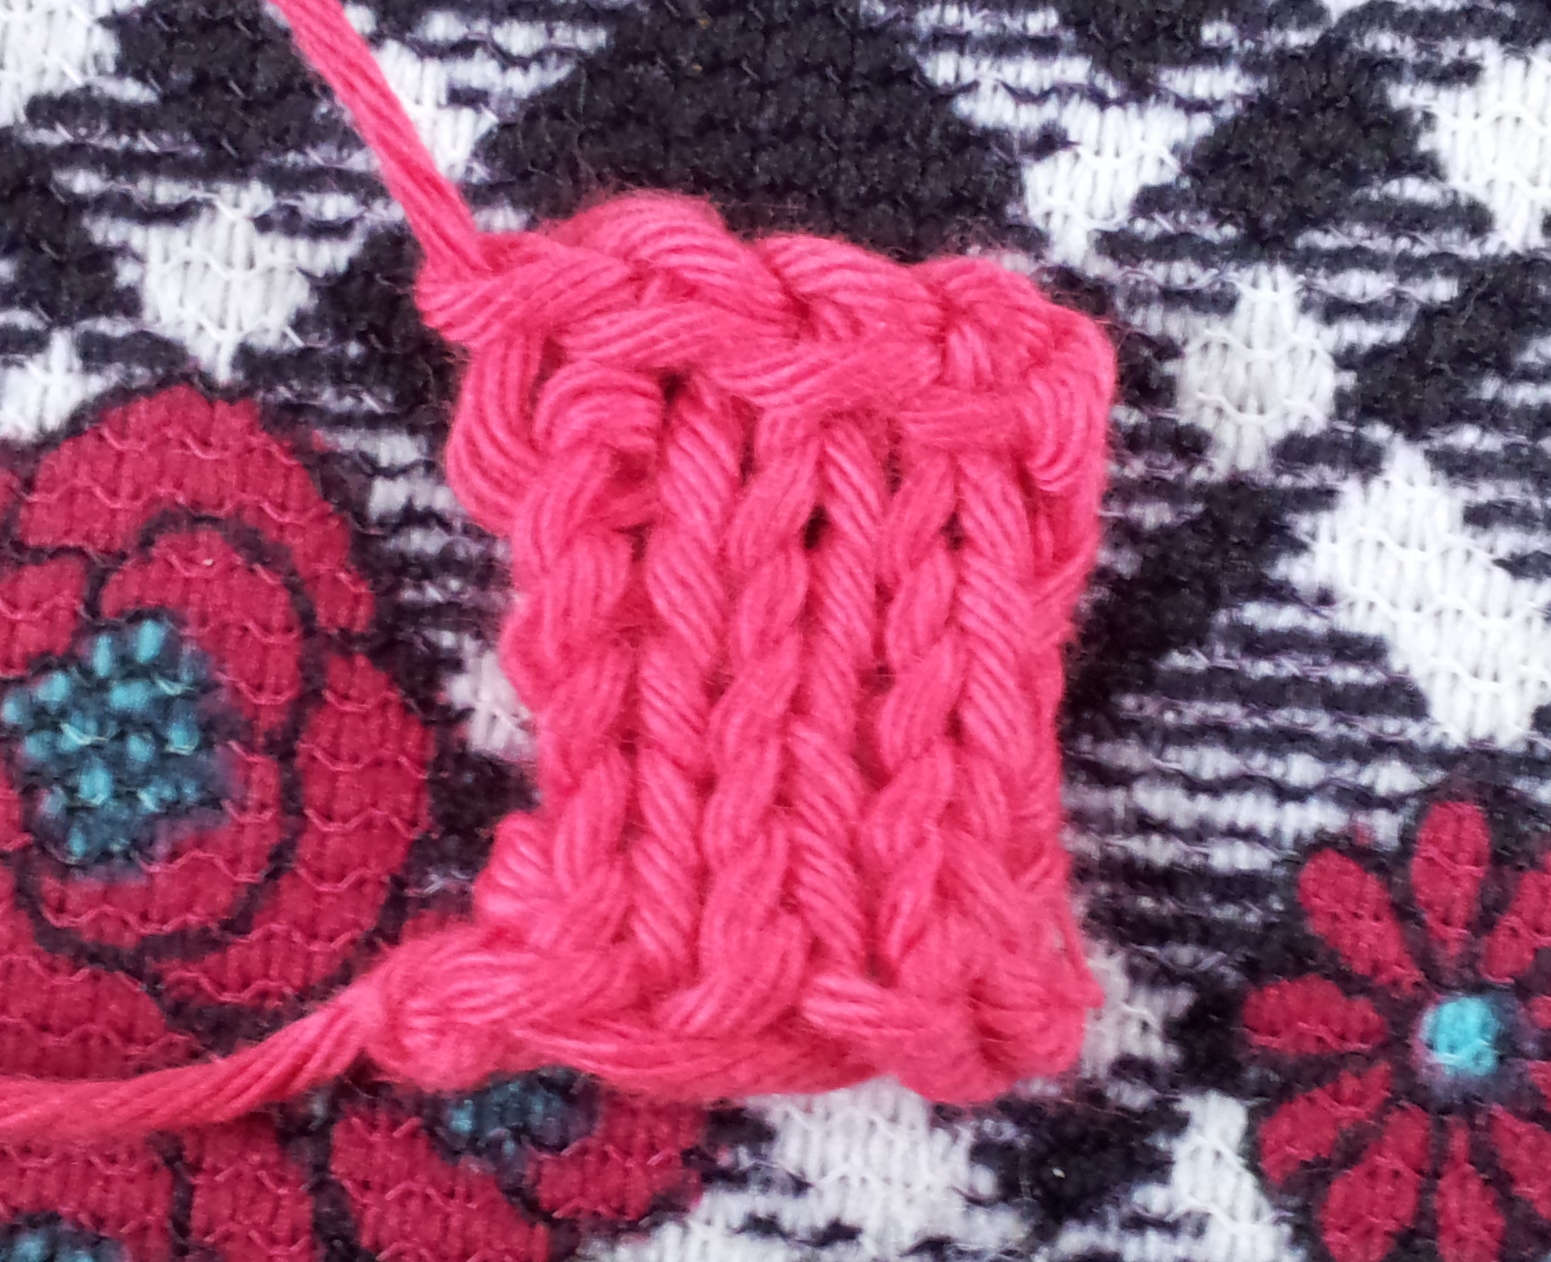
Using one of your yarn tails, make a running stitch around the edges of your cherry rectangle and draw together to form a ball. Secure in place with a few stitches.
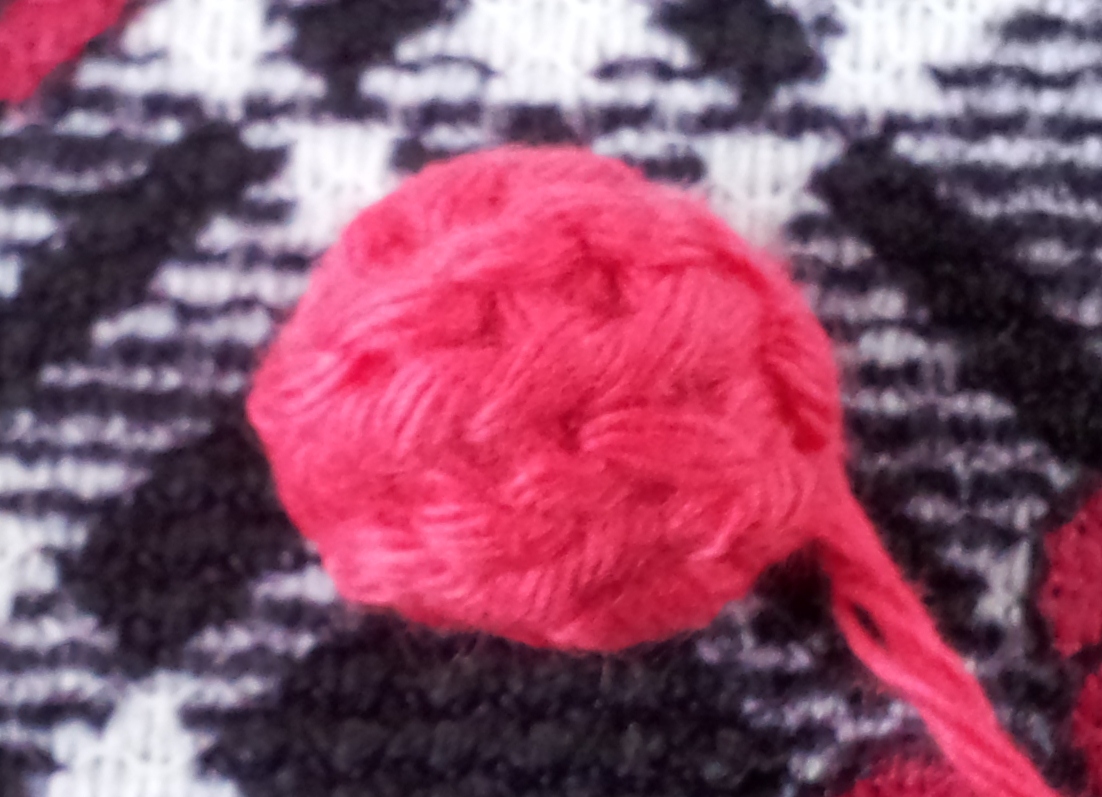
Stitch the cherry onto the middle of your cupcake top (see photo above).
Constructing your knitted cupcake!
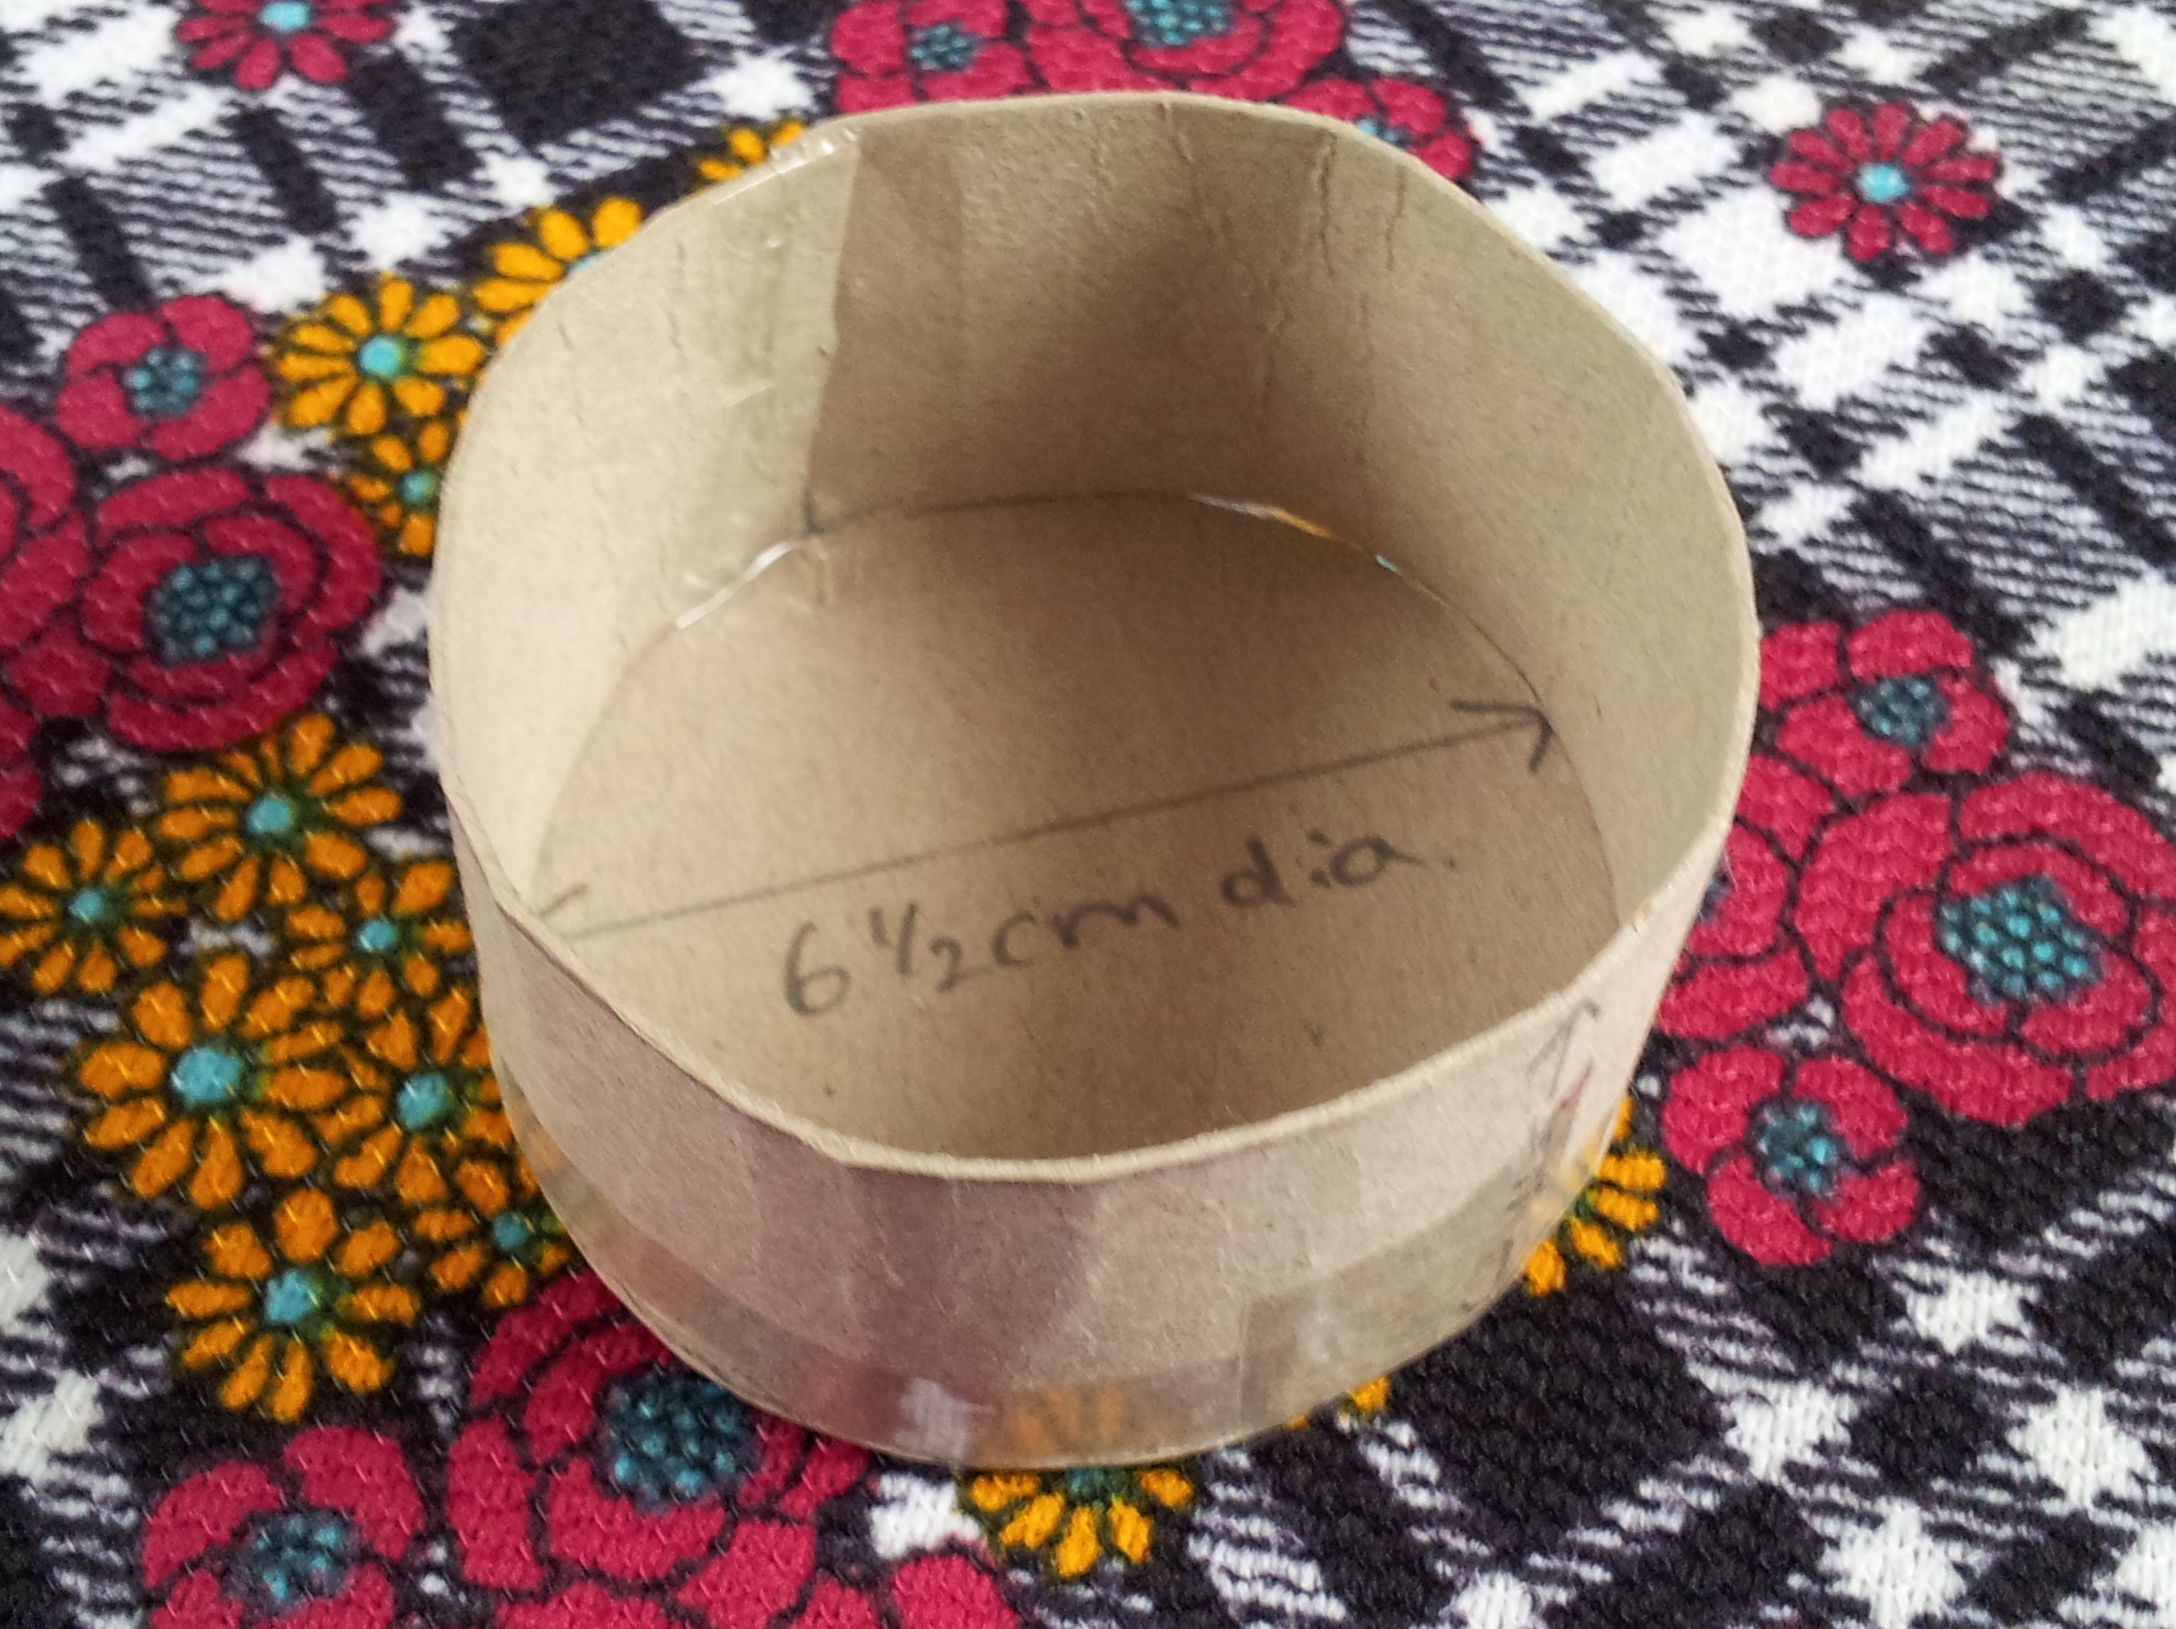
Cut a card circle the size of your cupcake base (approx 6.5cm diameter)and a strip of card 3cm wide.
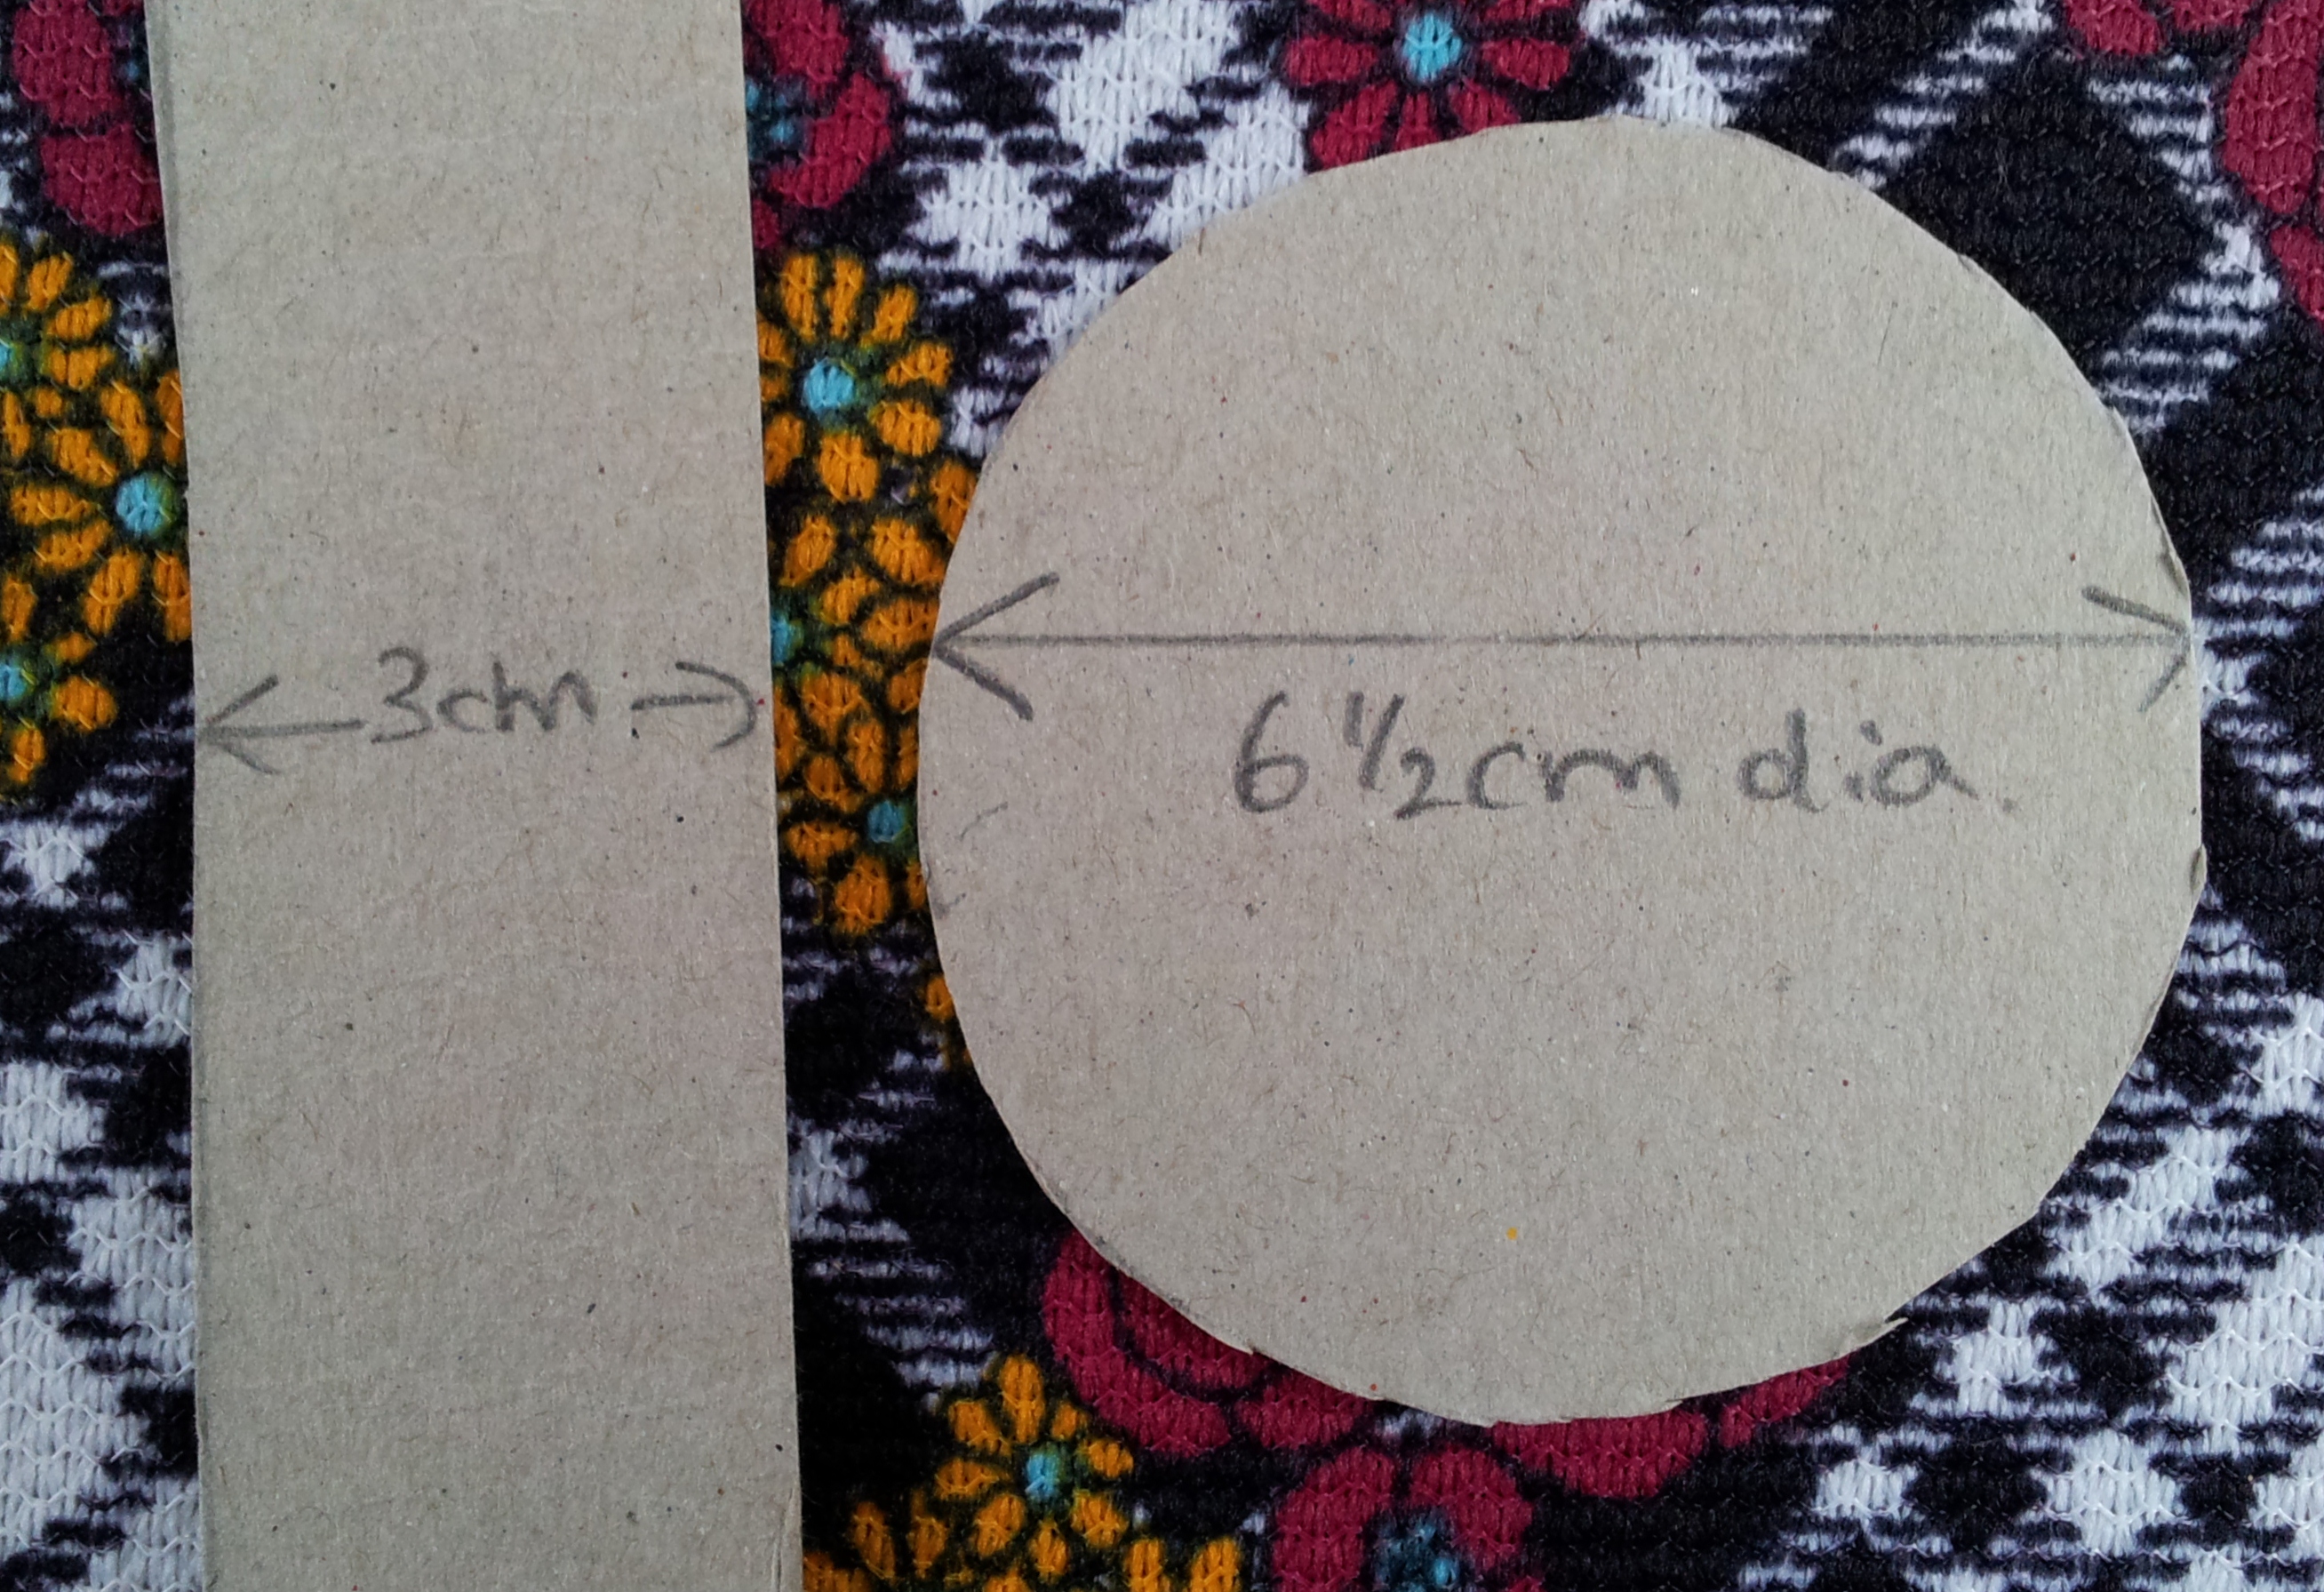
Use sticky tape to make a circular cupcake liner by sticking the rectangular strip around the circles’ edge.
Put some toy filling inside the case – if you want to use your cupcake for a pin cushion make sure you stuff if firmly.

Place the cardboard liner inside the cupcake case. Put your cupcake top over the stuffing and tuck it inside the cupcake case. Pin in place.
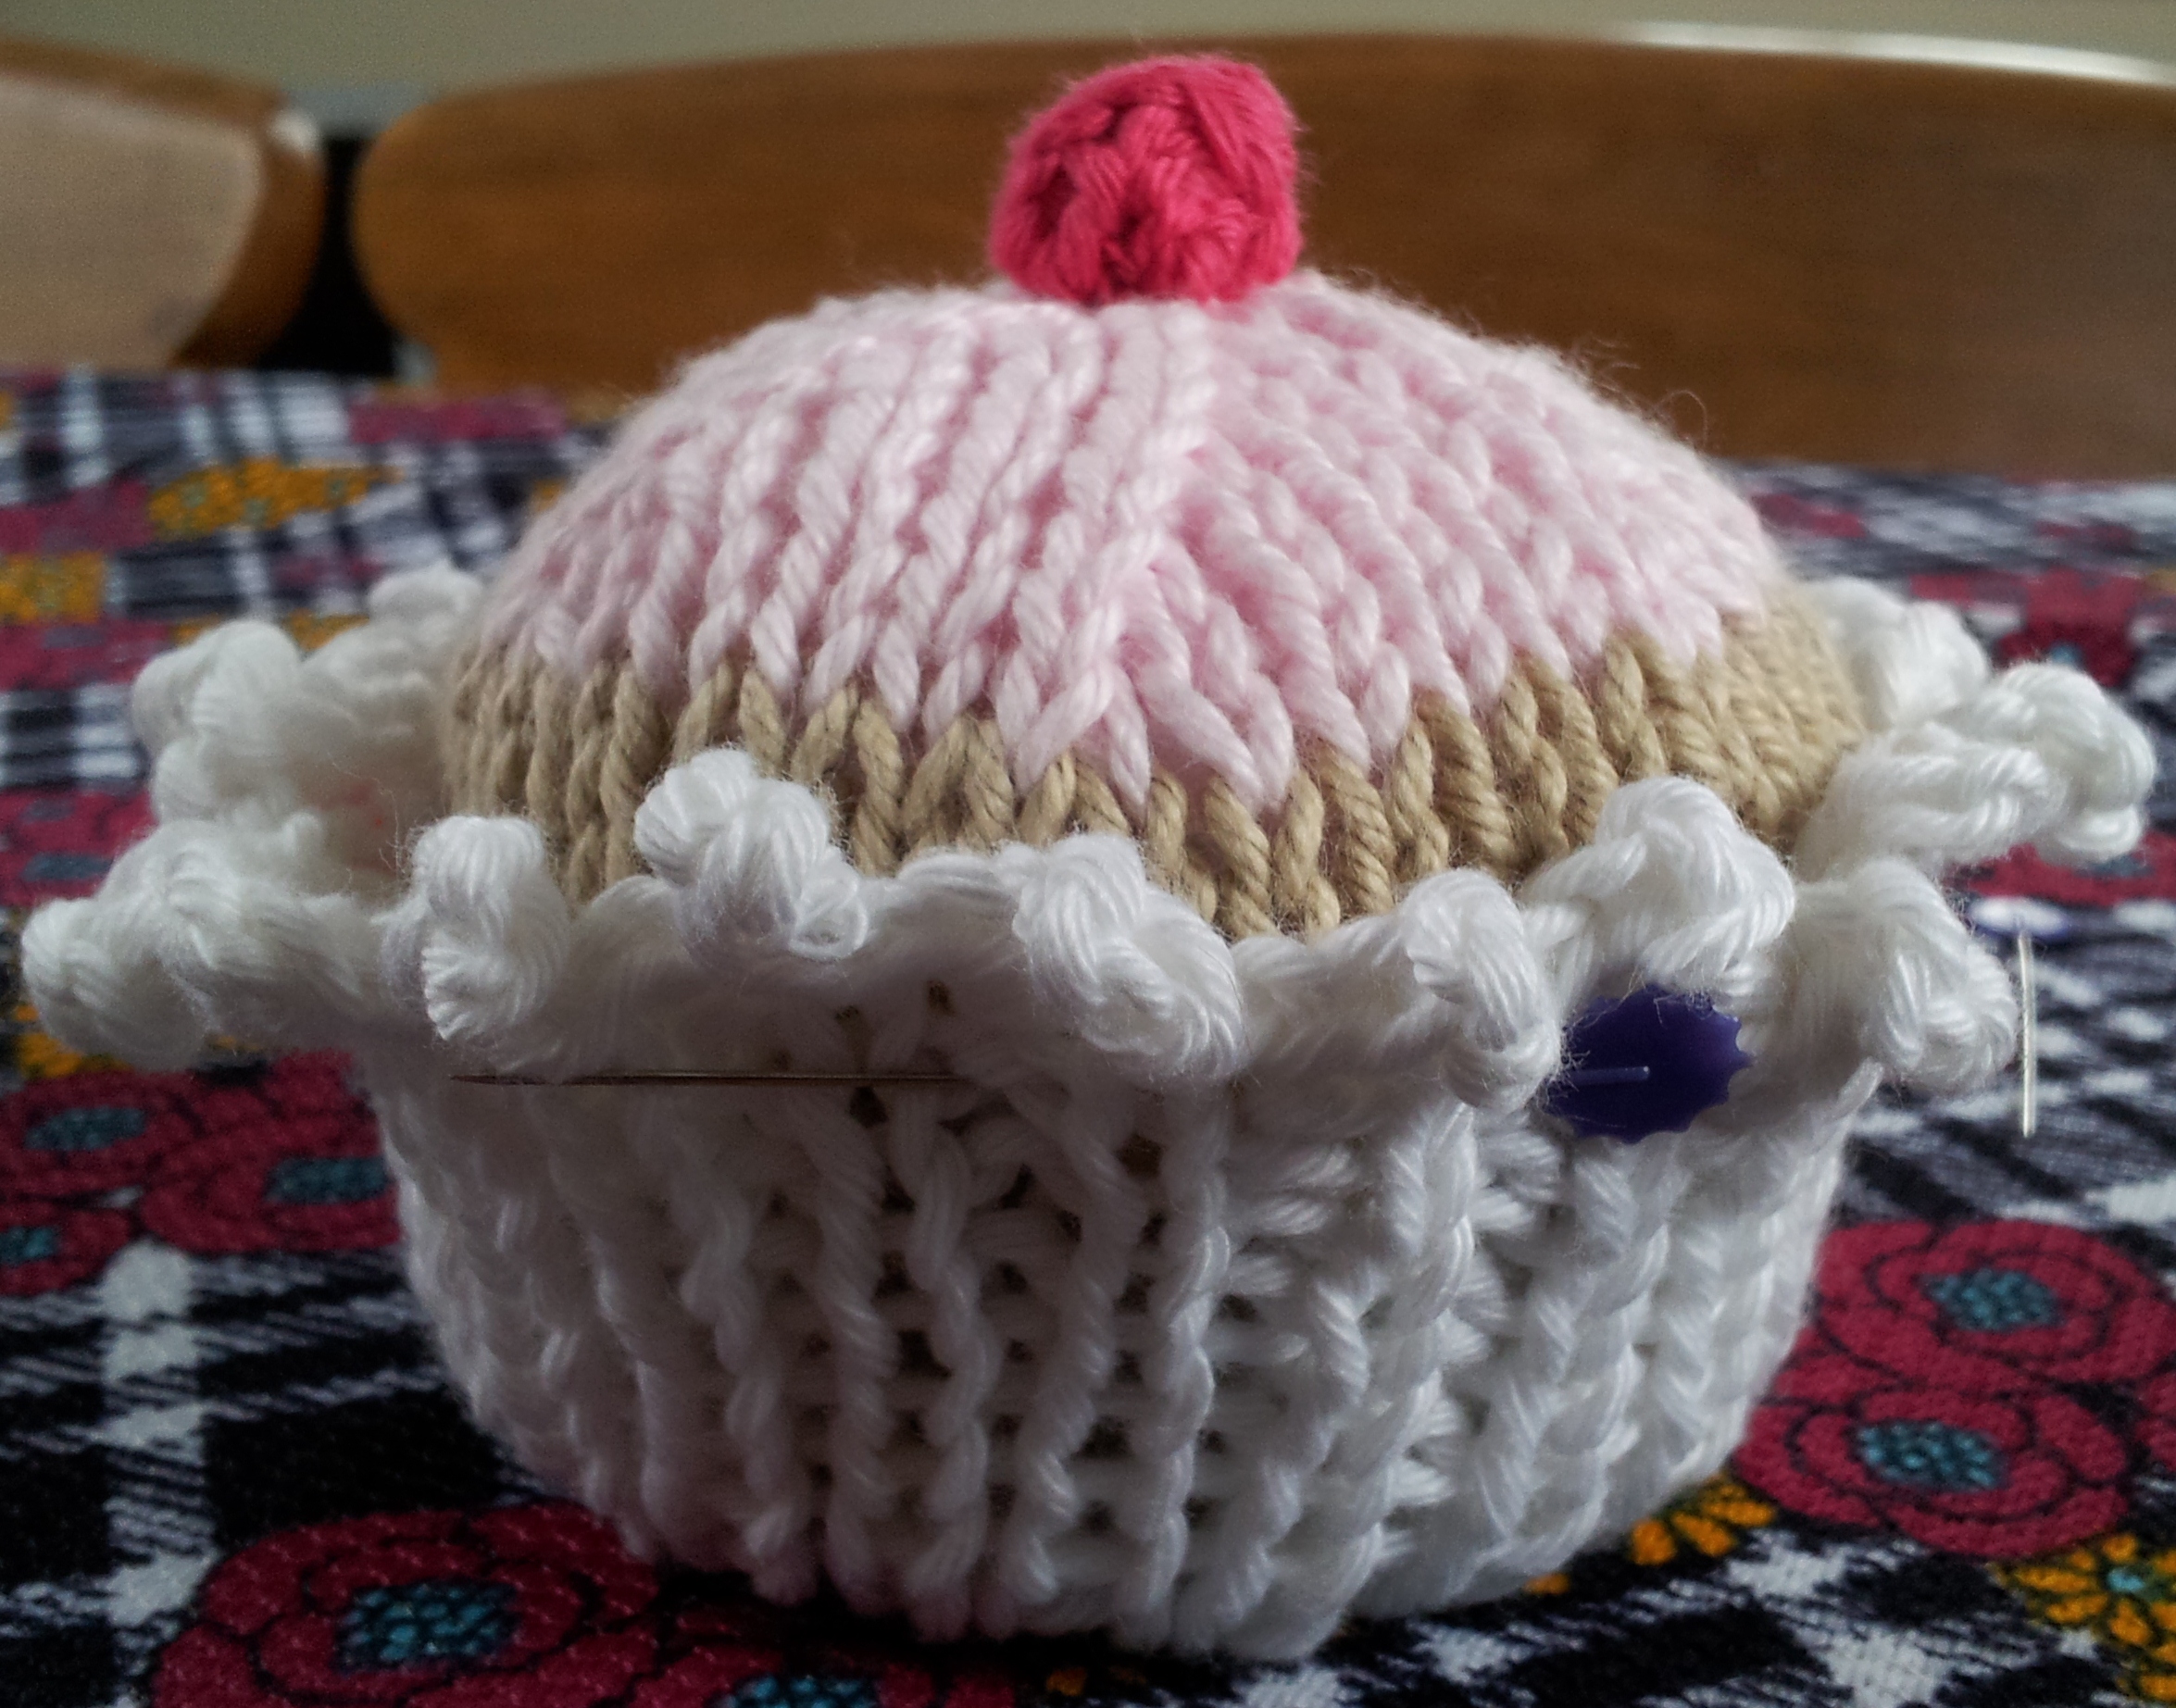
Secure the top to the case using some small white running stitches just below your picot edge. Voila! One gorgeous knitted cupcake.

What will your use your cupcake for? Mine is going to be my new pincushion! The pattern can easily be adapted to give different looks – ie, work the icing in garter stitch (knit all rows), cast off the case side ‘normally’ for a flat case edge, or pop a knitted or crochet flower on top to decorate! What ever you make – have fun! It would be great to hear what you do with yours.


Going to sell mine in aid of Macmillan cancer charity…. such fun to make thank you
You’re welcome. X