
 Bunny Bunting is a great sewing project for beginners.You can use different hand stitches to decorate your bunny, or learn how to control a sewing machine as you follow the bunny contours.
Are you ready to get Bunny Bunting busy? Firstly, make yourself a Bunny Bunting template – the internet is a great place to look for bunny shapes. The bigger the ears the better!
Pop your template onto some fabric and draw around the edge.

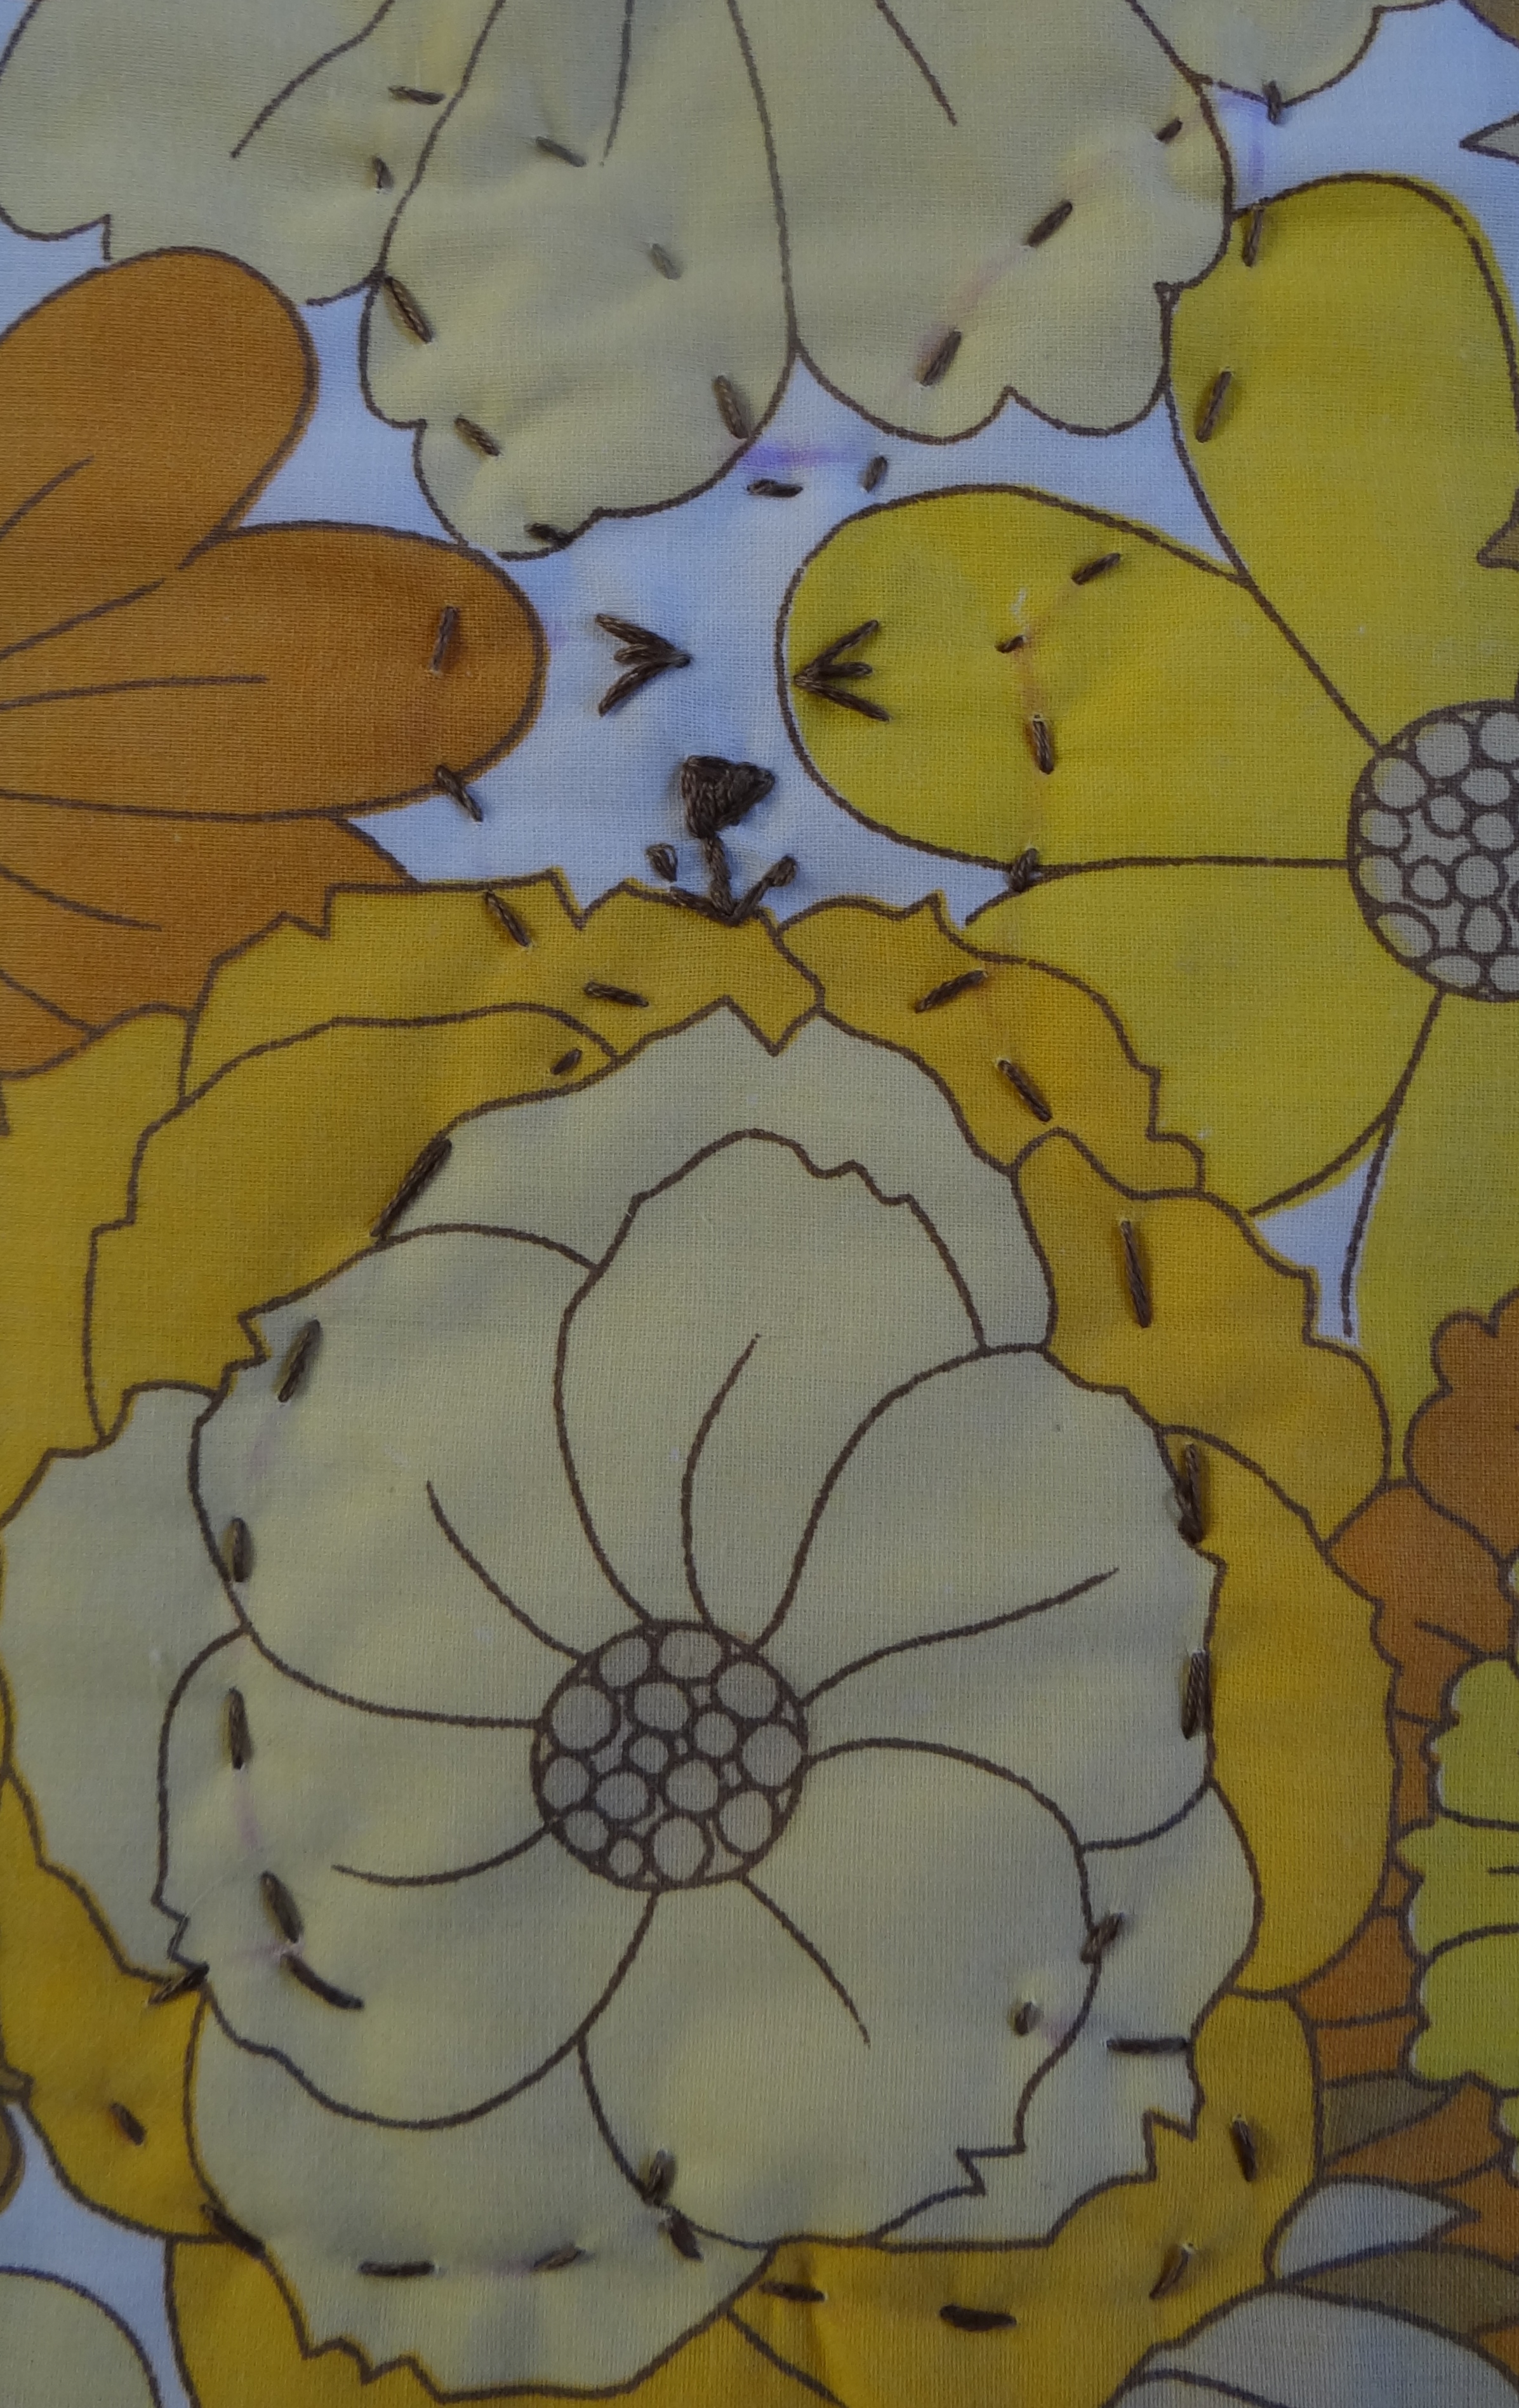
Remove the template and sketch out your bunnies face.

Use embroidery thread or thin yarn to stitch in your bunnies features.

Lay your top fabric onto a backing fabric – this will hide any messy stitches! If you would like your bunny to have a bit of bounce place some wadding between your fabric layers. This is a great way to use up quilting off-cuts!
The backing fabric is right side down, wadding in the middle and top fabric right side up.

Pin your two or three layers together and sew around the bunny outline in a running stitch with yarn or thread.
Cut out your bunny shape with scissors – pinking shears give a really cute fur effect and help stop the fabric from fraying.

Now make a pom-pom for your bunnies tail.
I find the quickest way of doing this is by winding some yarn around your index and middle fingers.
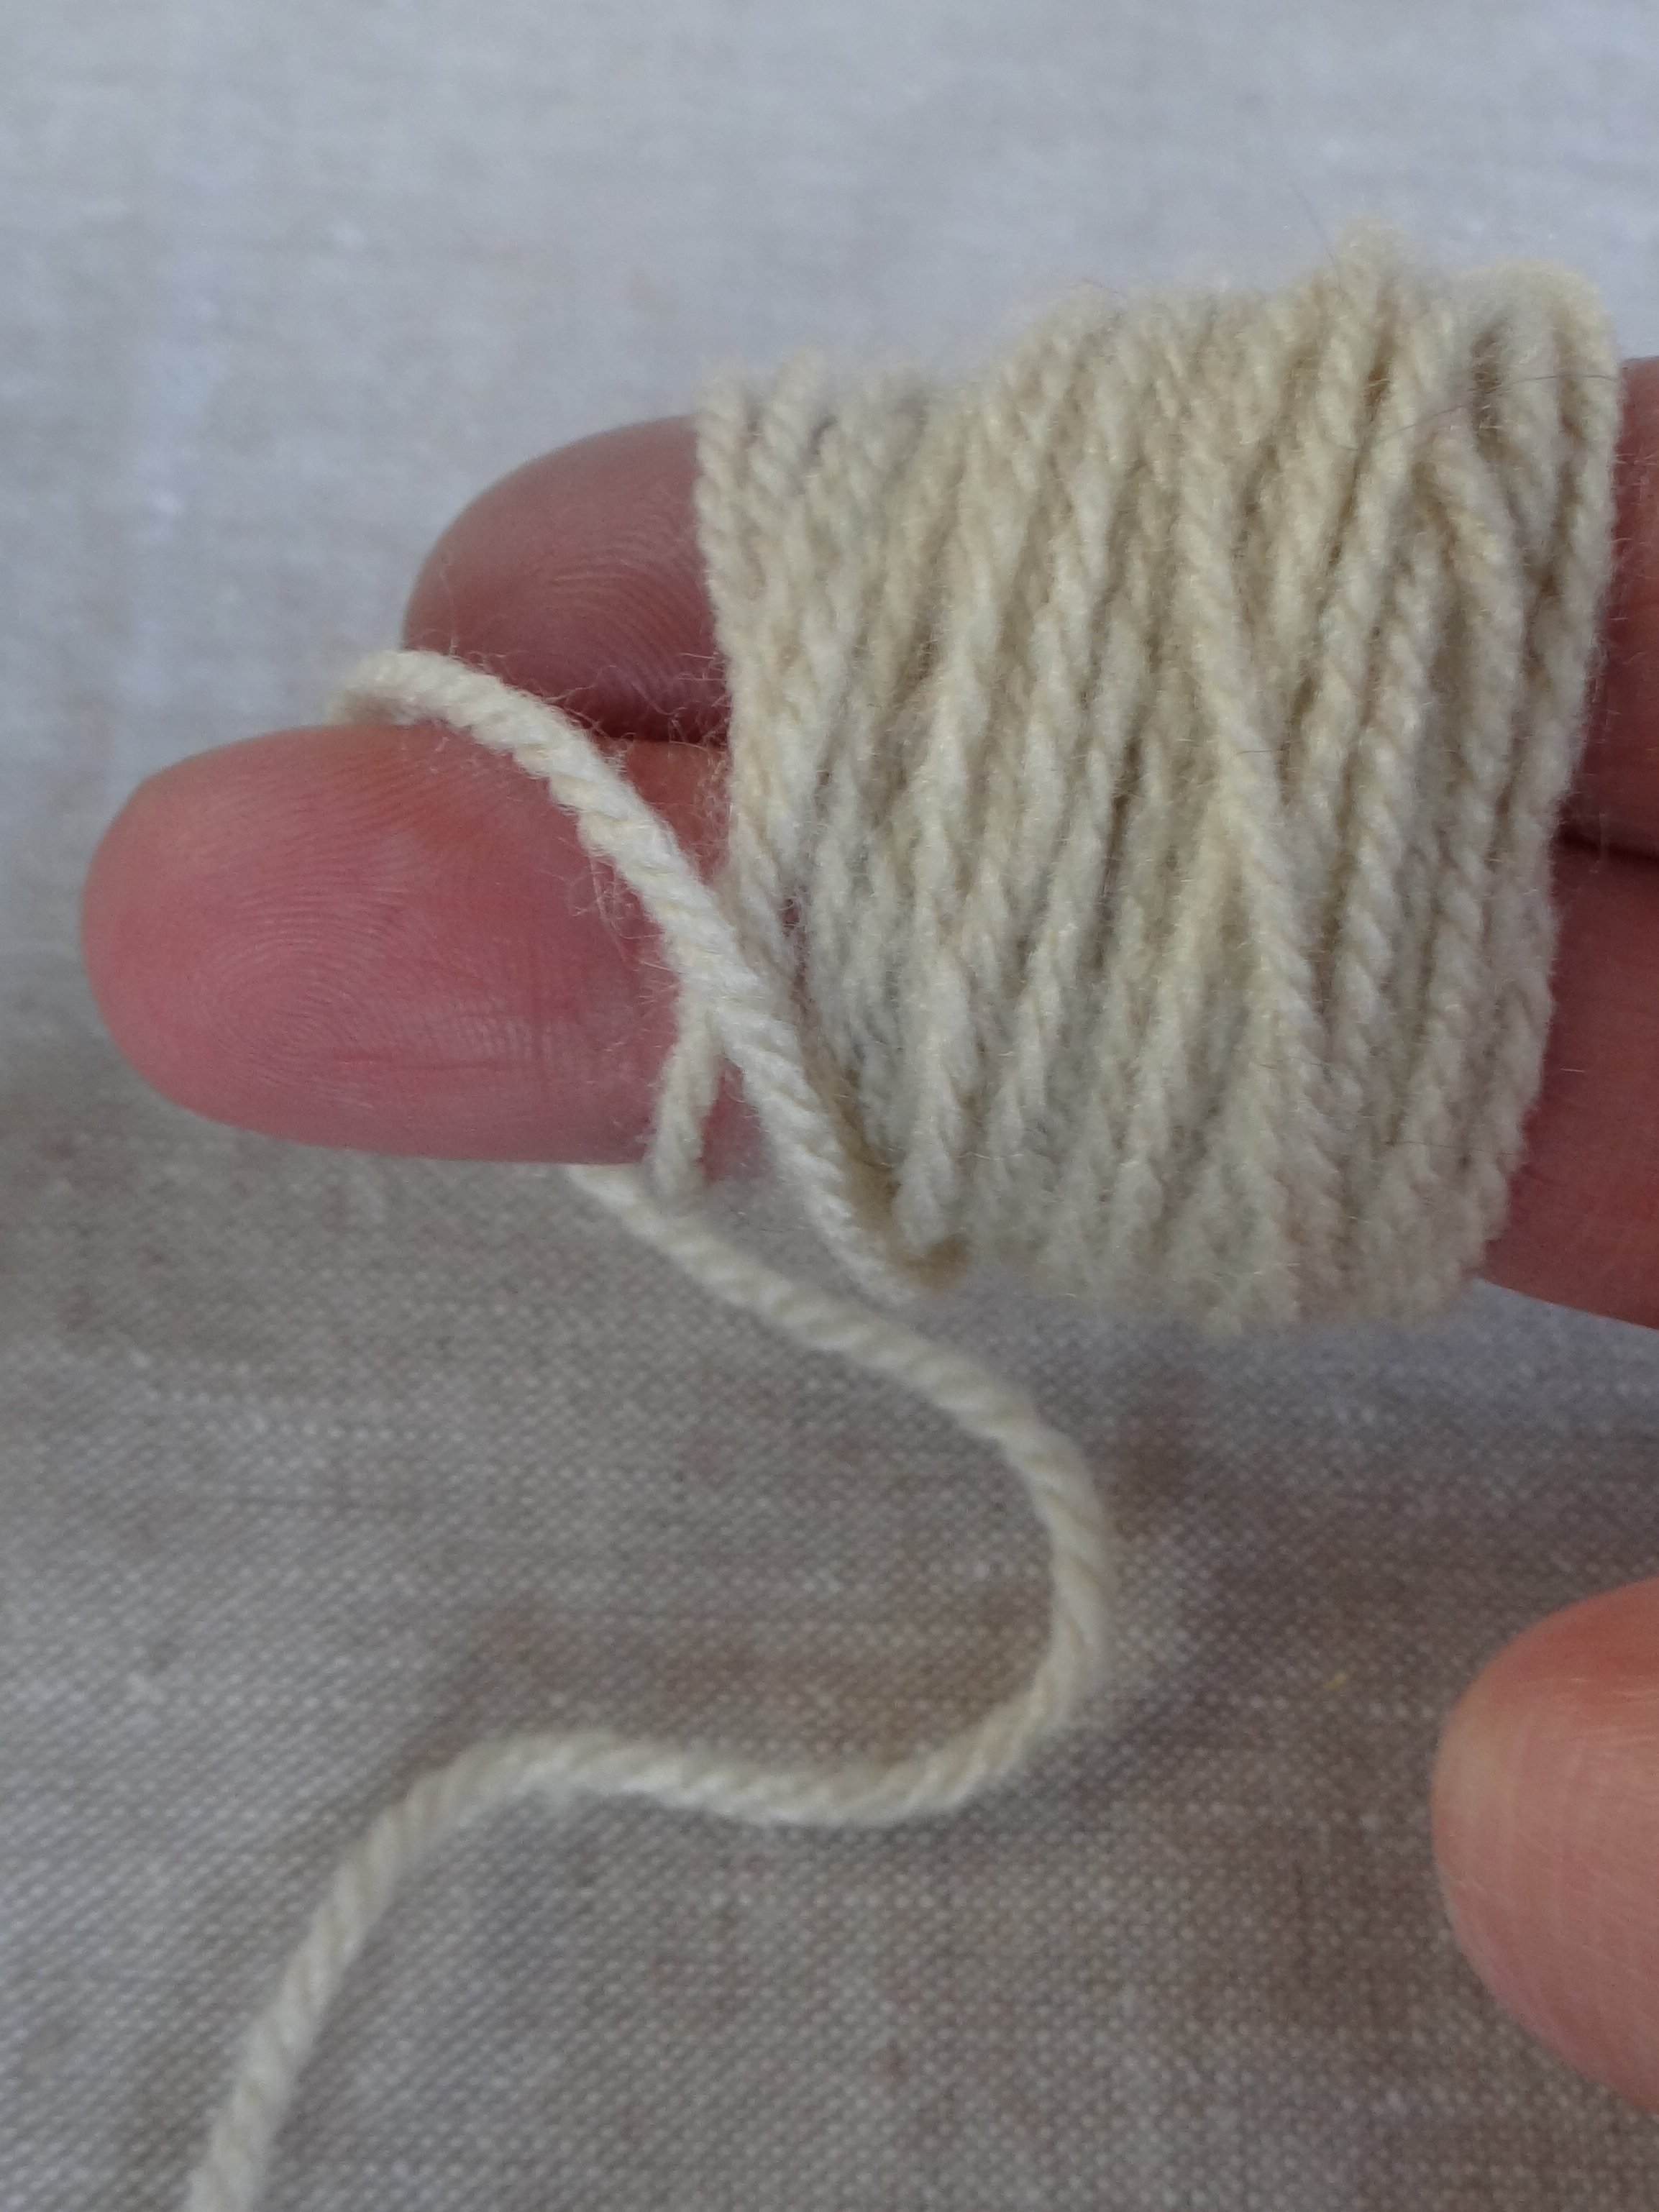
Next slide the wound yarn off your fingers and cut a piece to go around the middle.
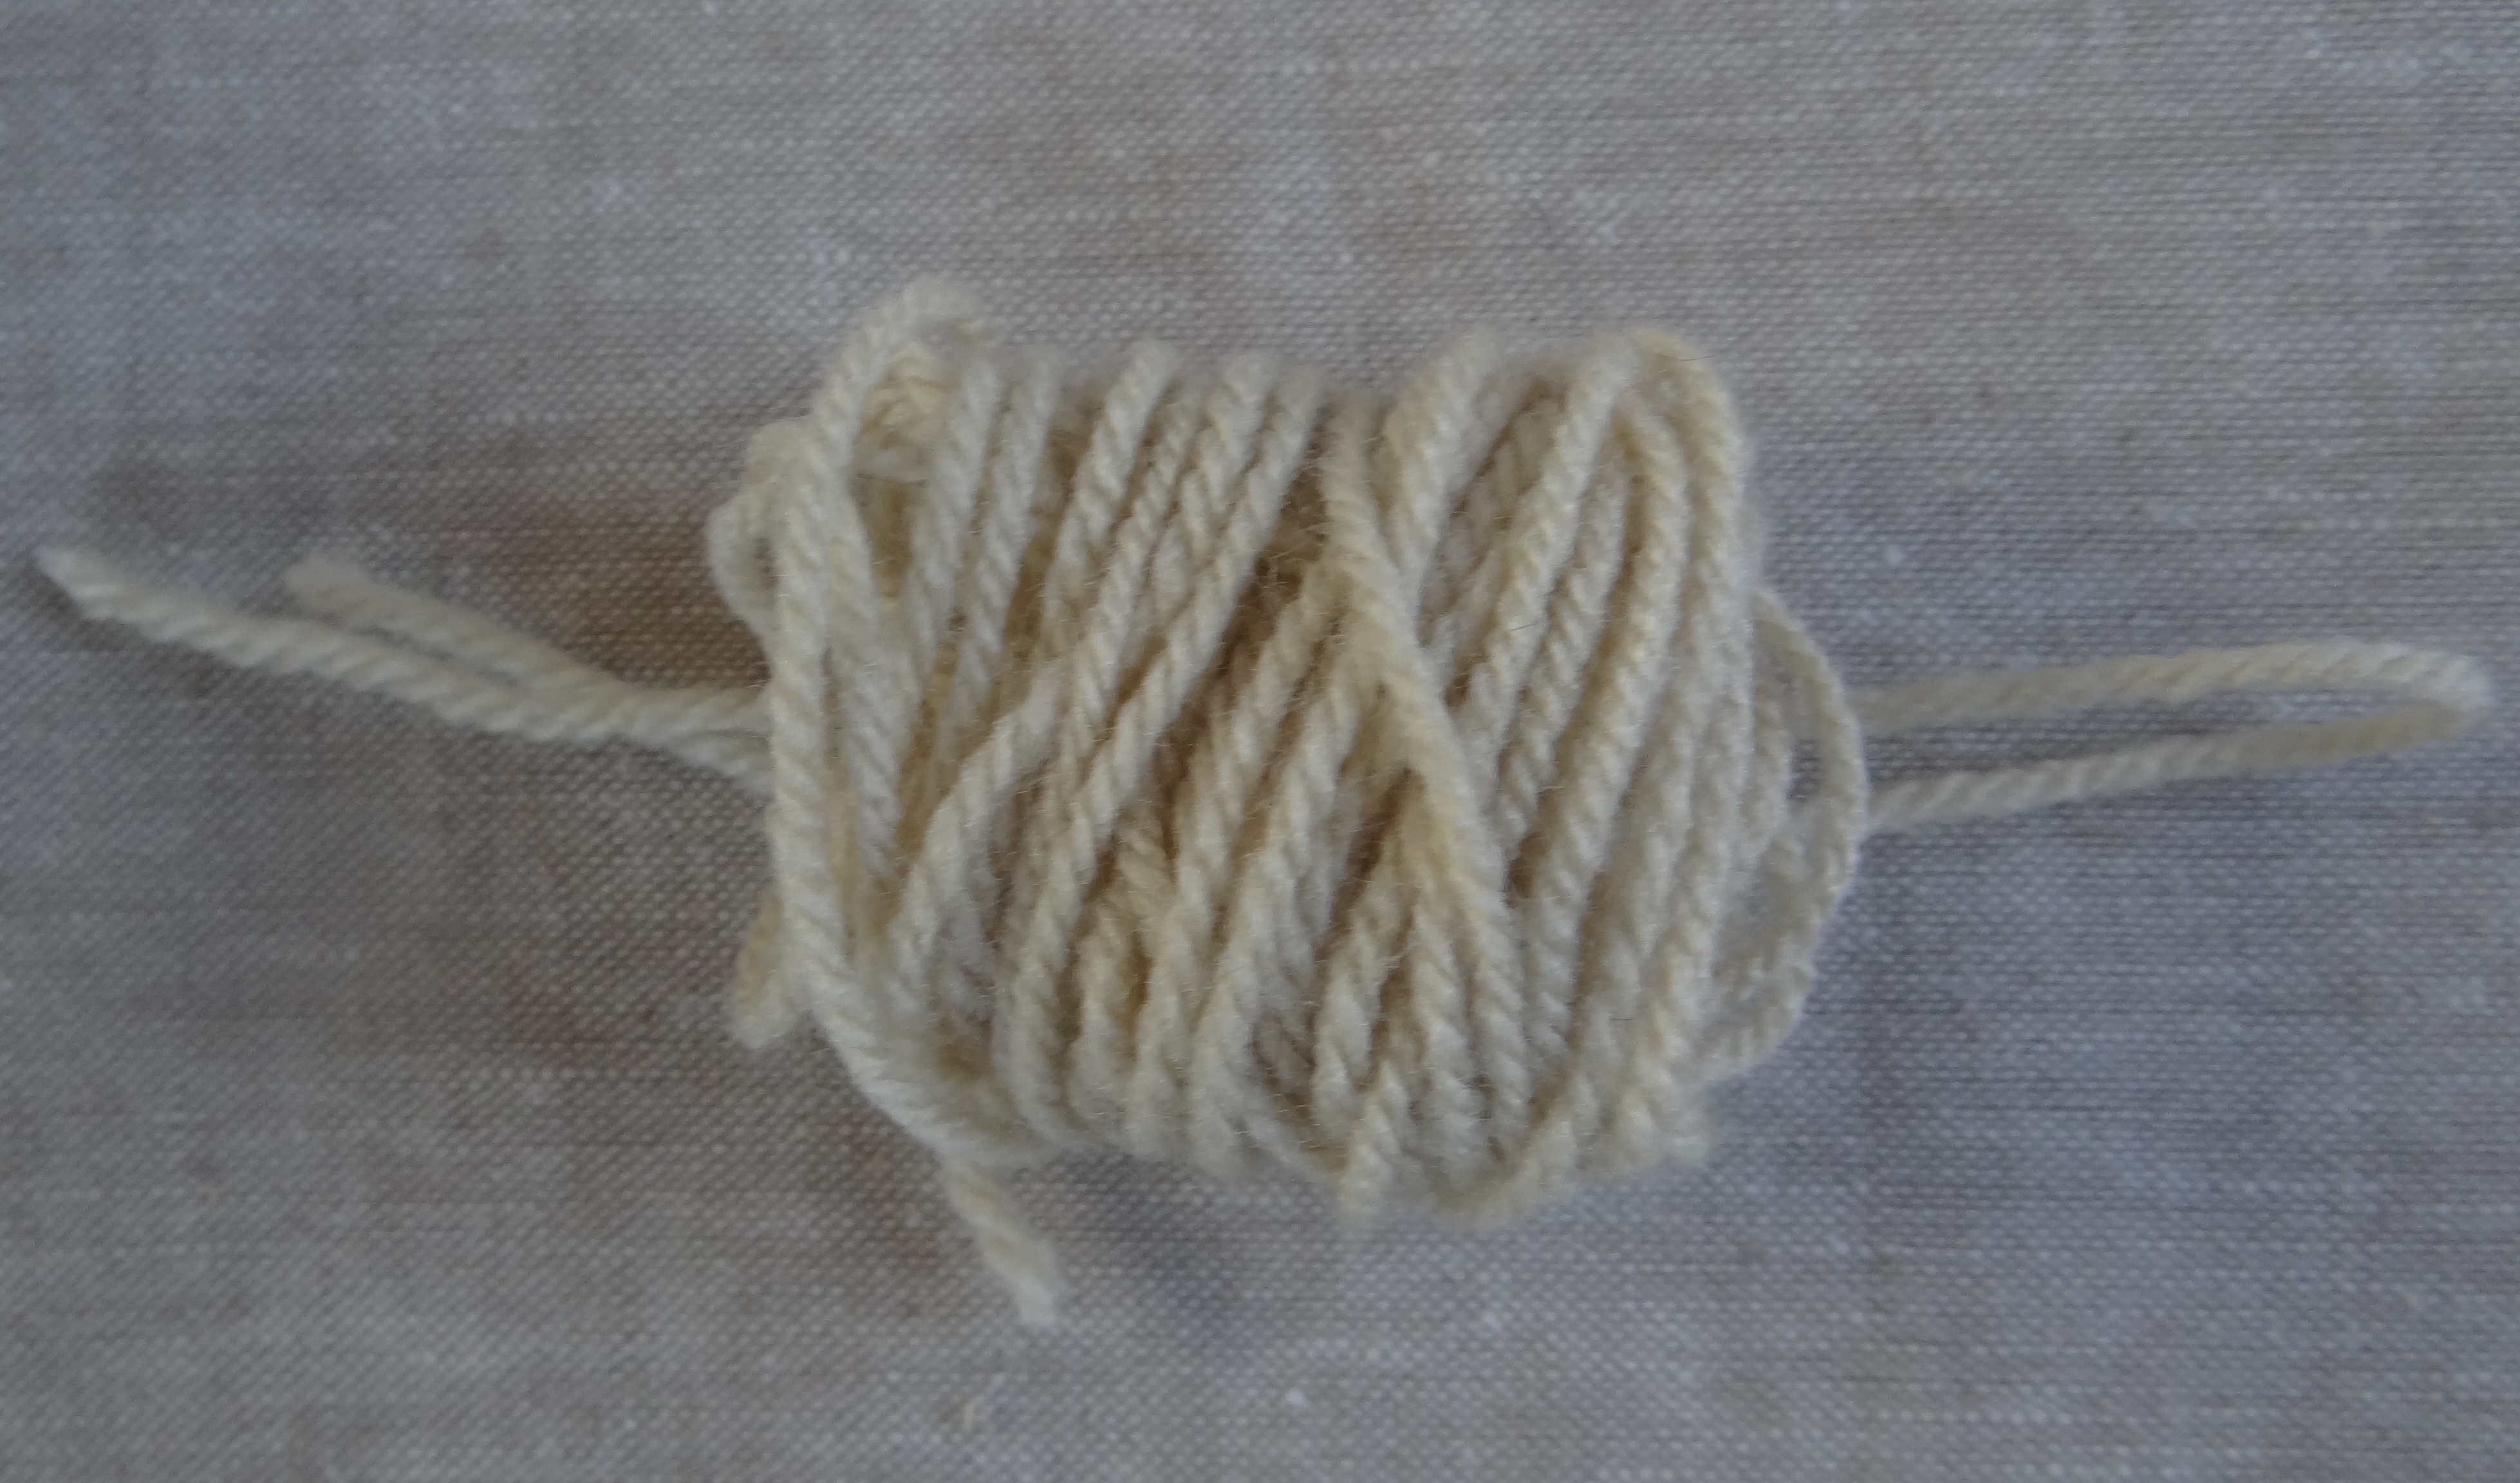
Tie the yarn in a knot. I just love the scrunched / bunched look you get!
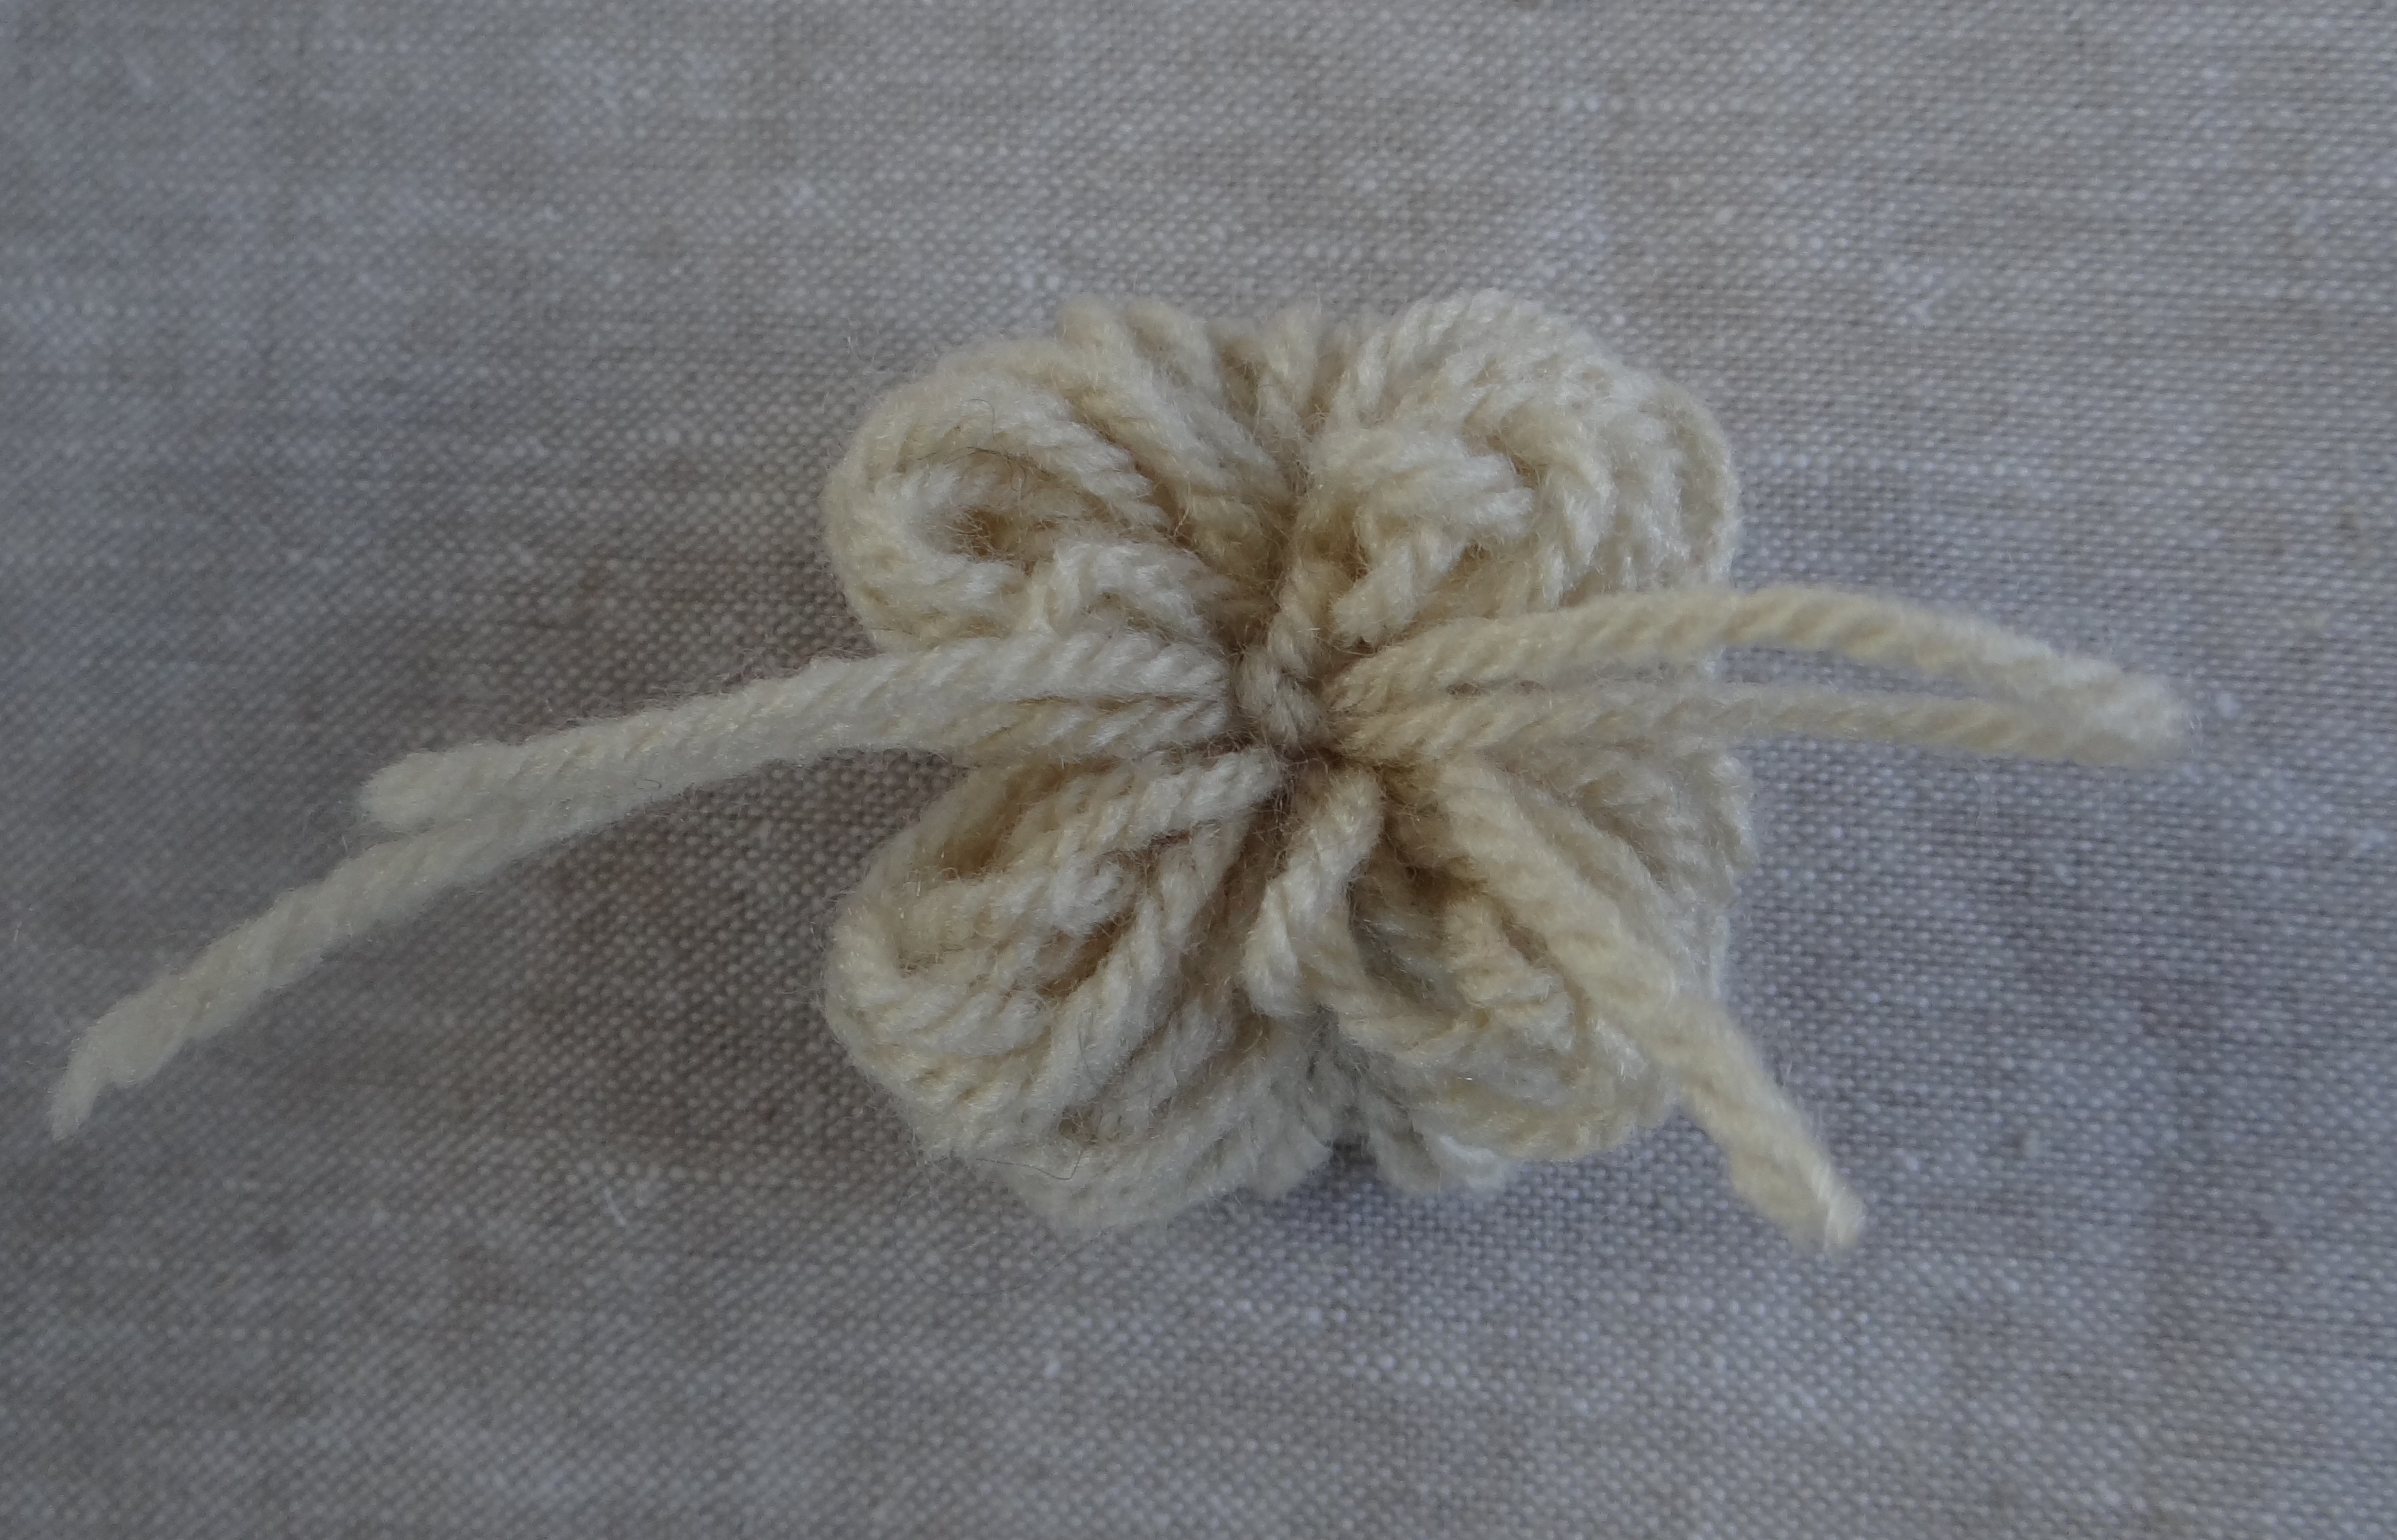
Lastly cut each of your side loops to see your pom-pom appear!
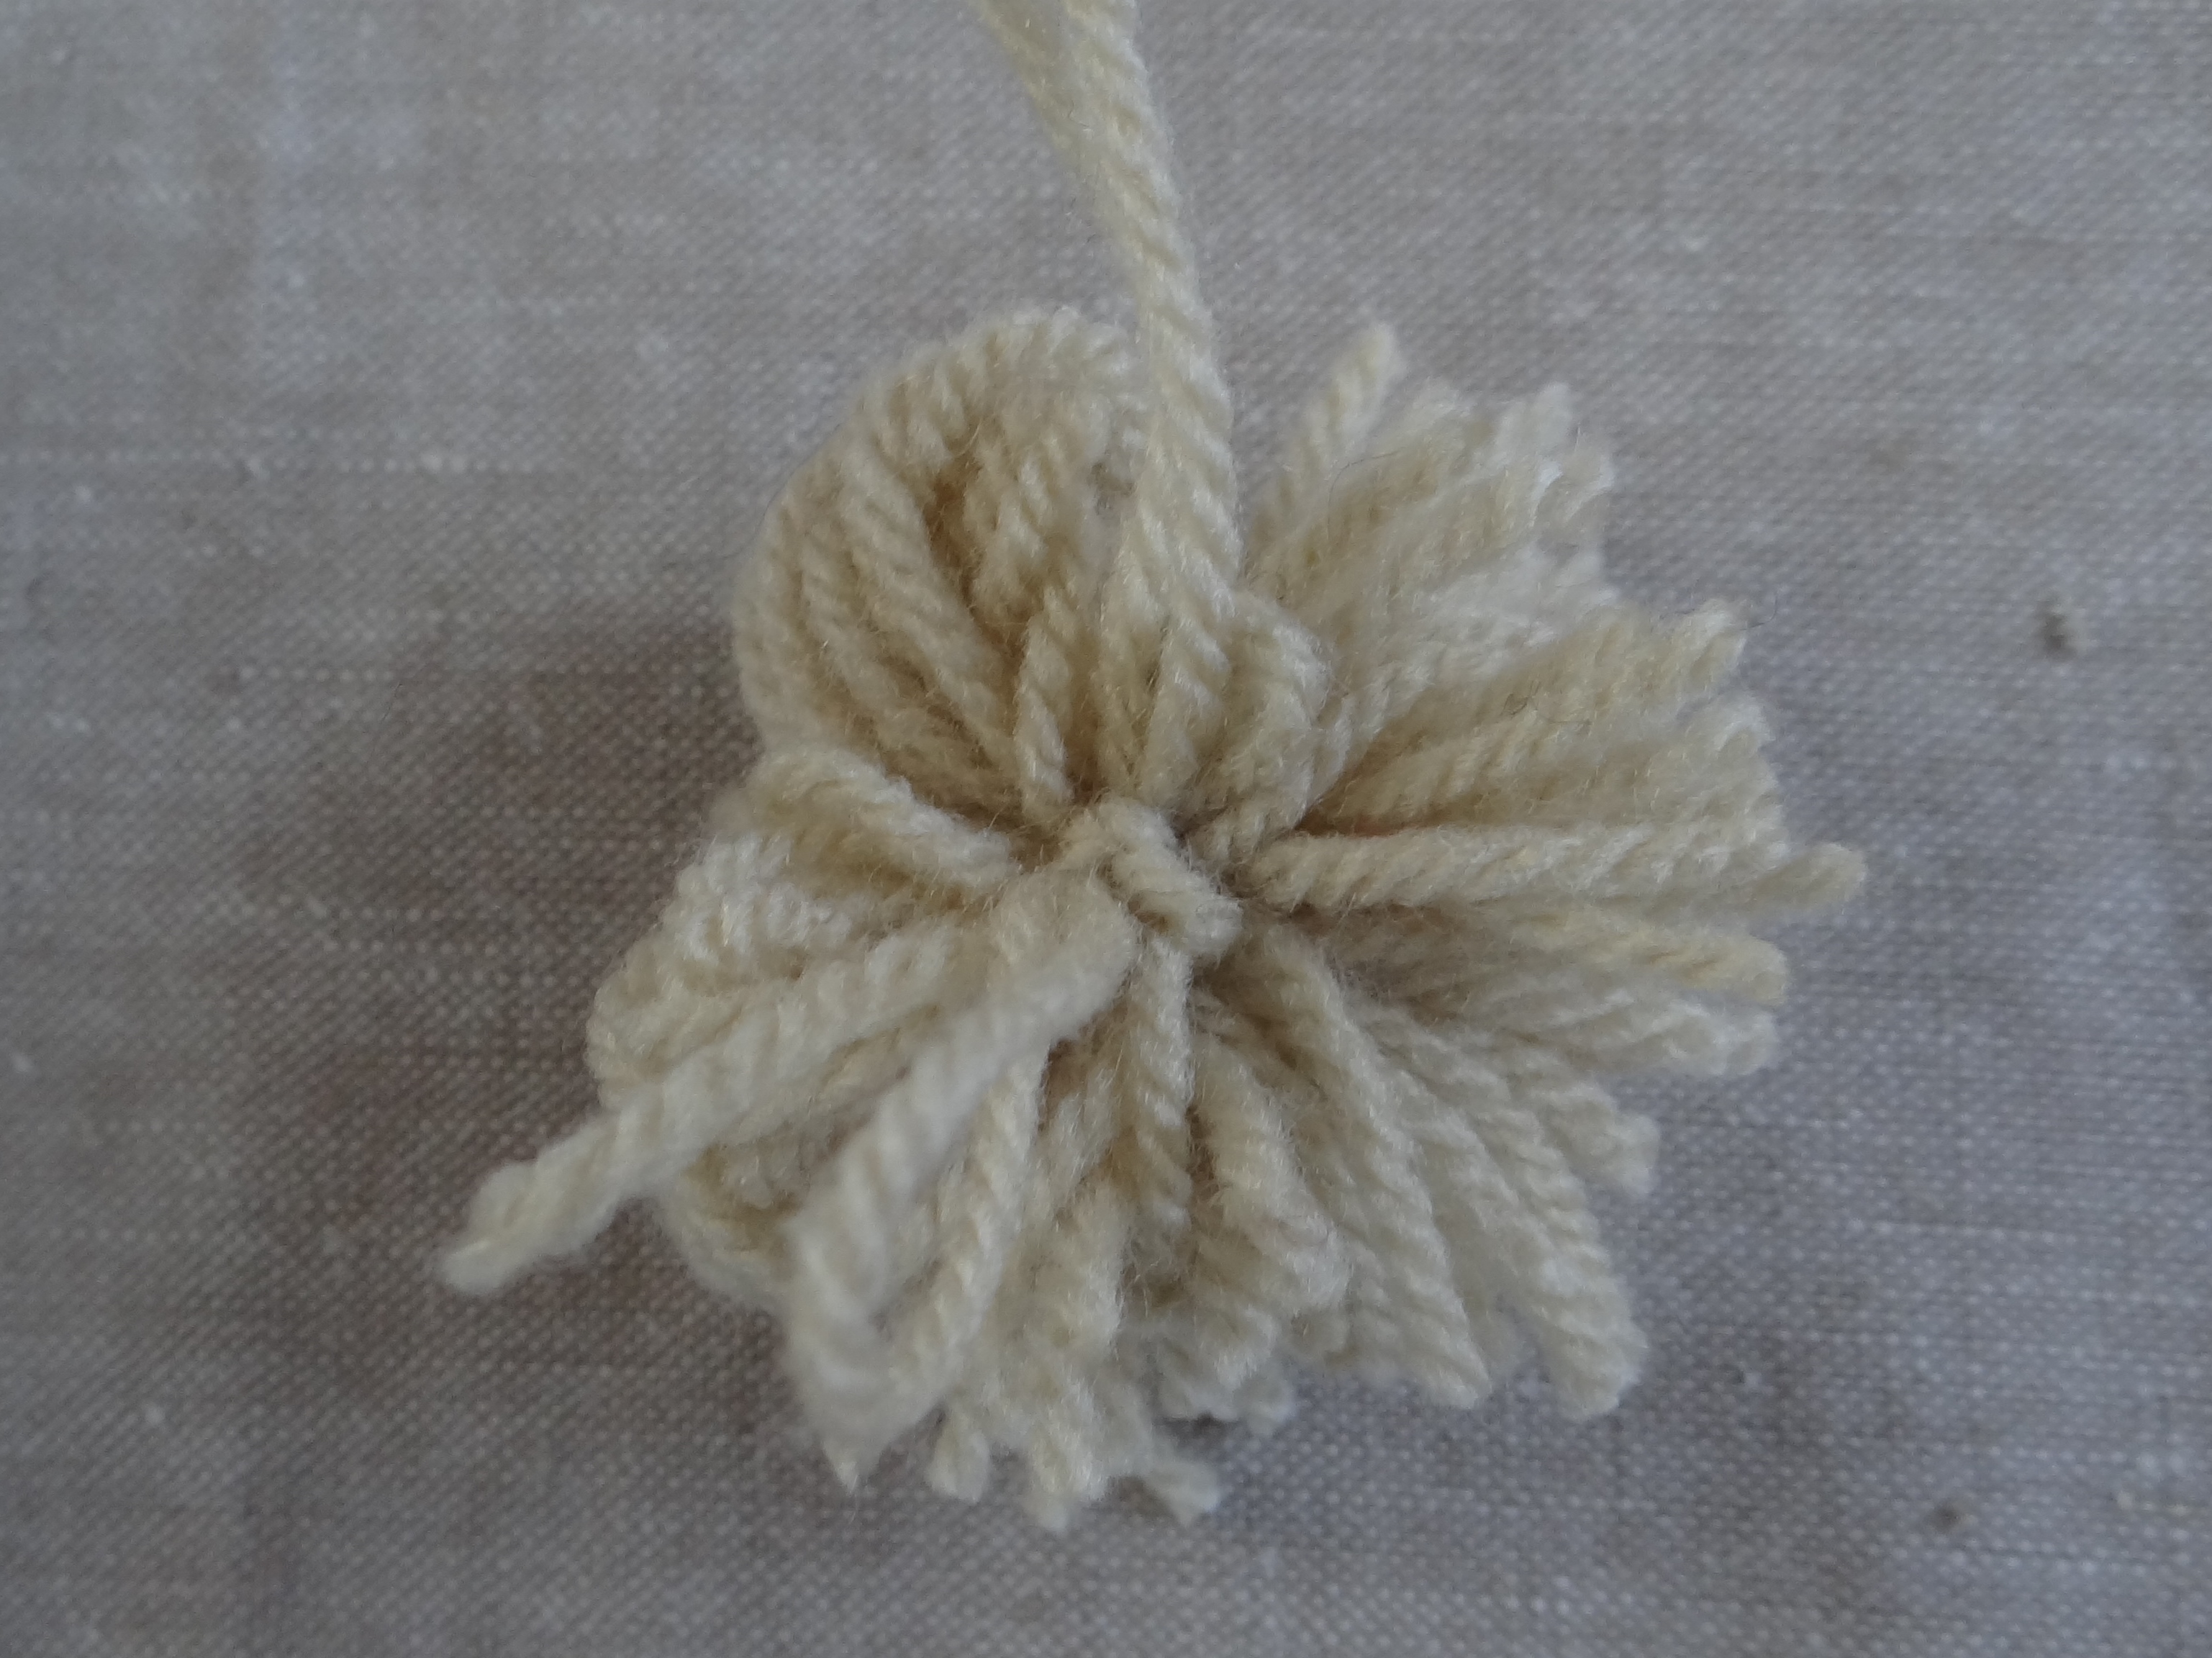
Once your pom-pom is made, sew it onto your bunnies back for a fluffy tail.

I love this pattern as its great for children and adults alike. You can add florist’s flower stamen for whiskers, buttons or beads for eyes.

Use a back-stitch or blanket stitch to vary the edging…
….and sew as much detail as you want onto your Bunny body.
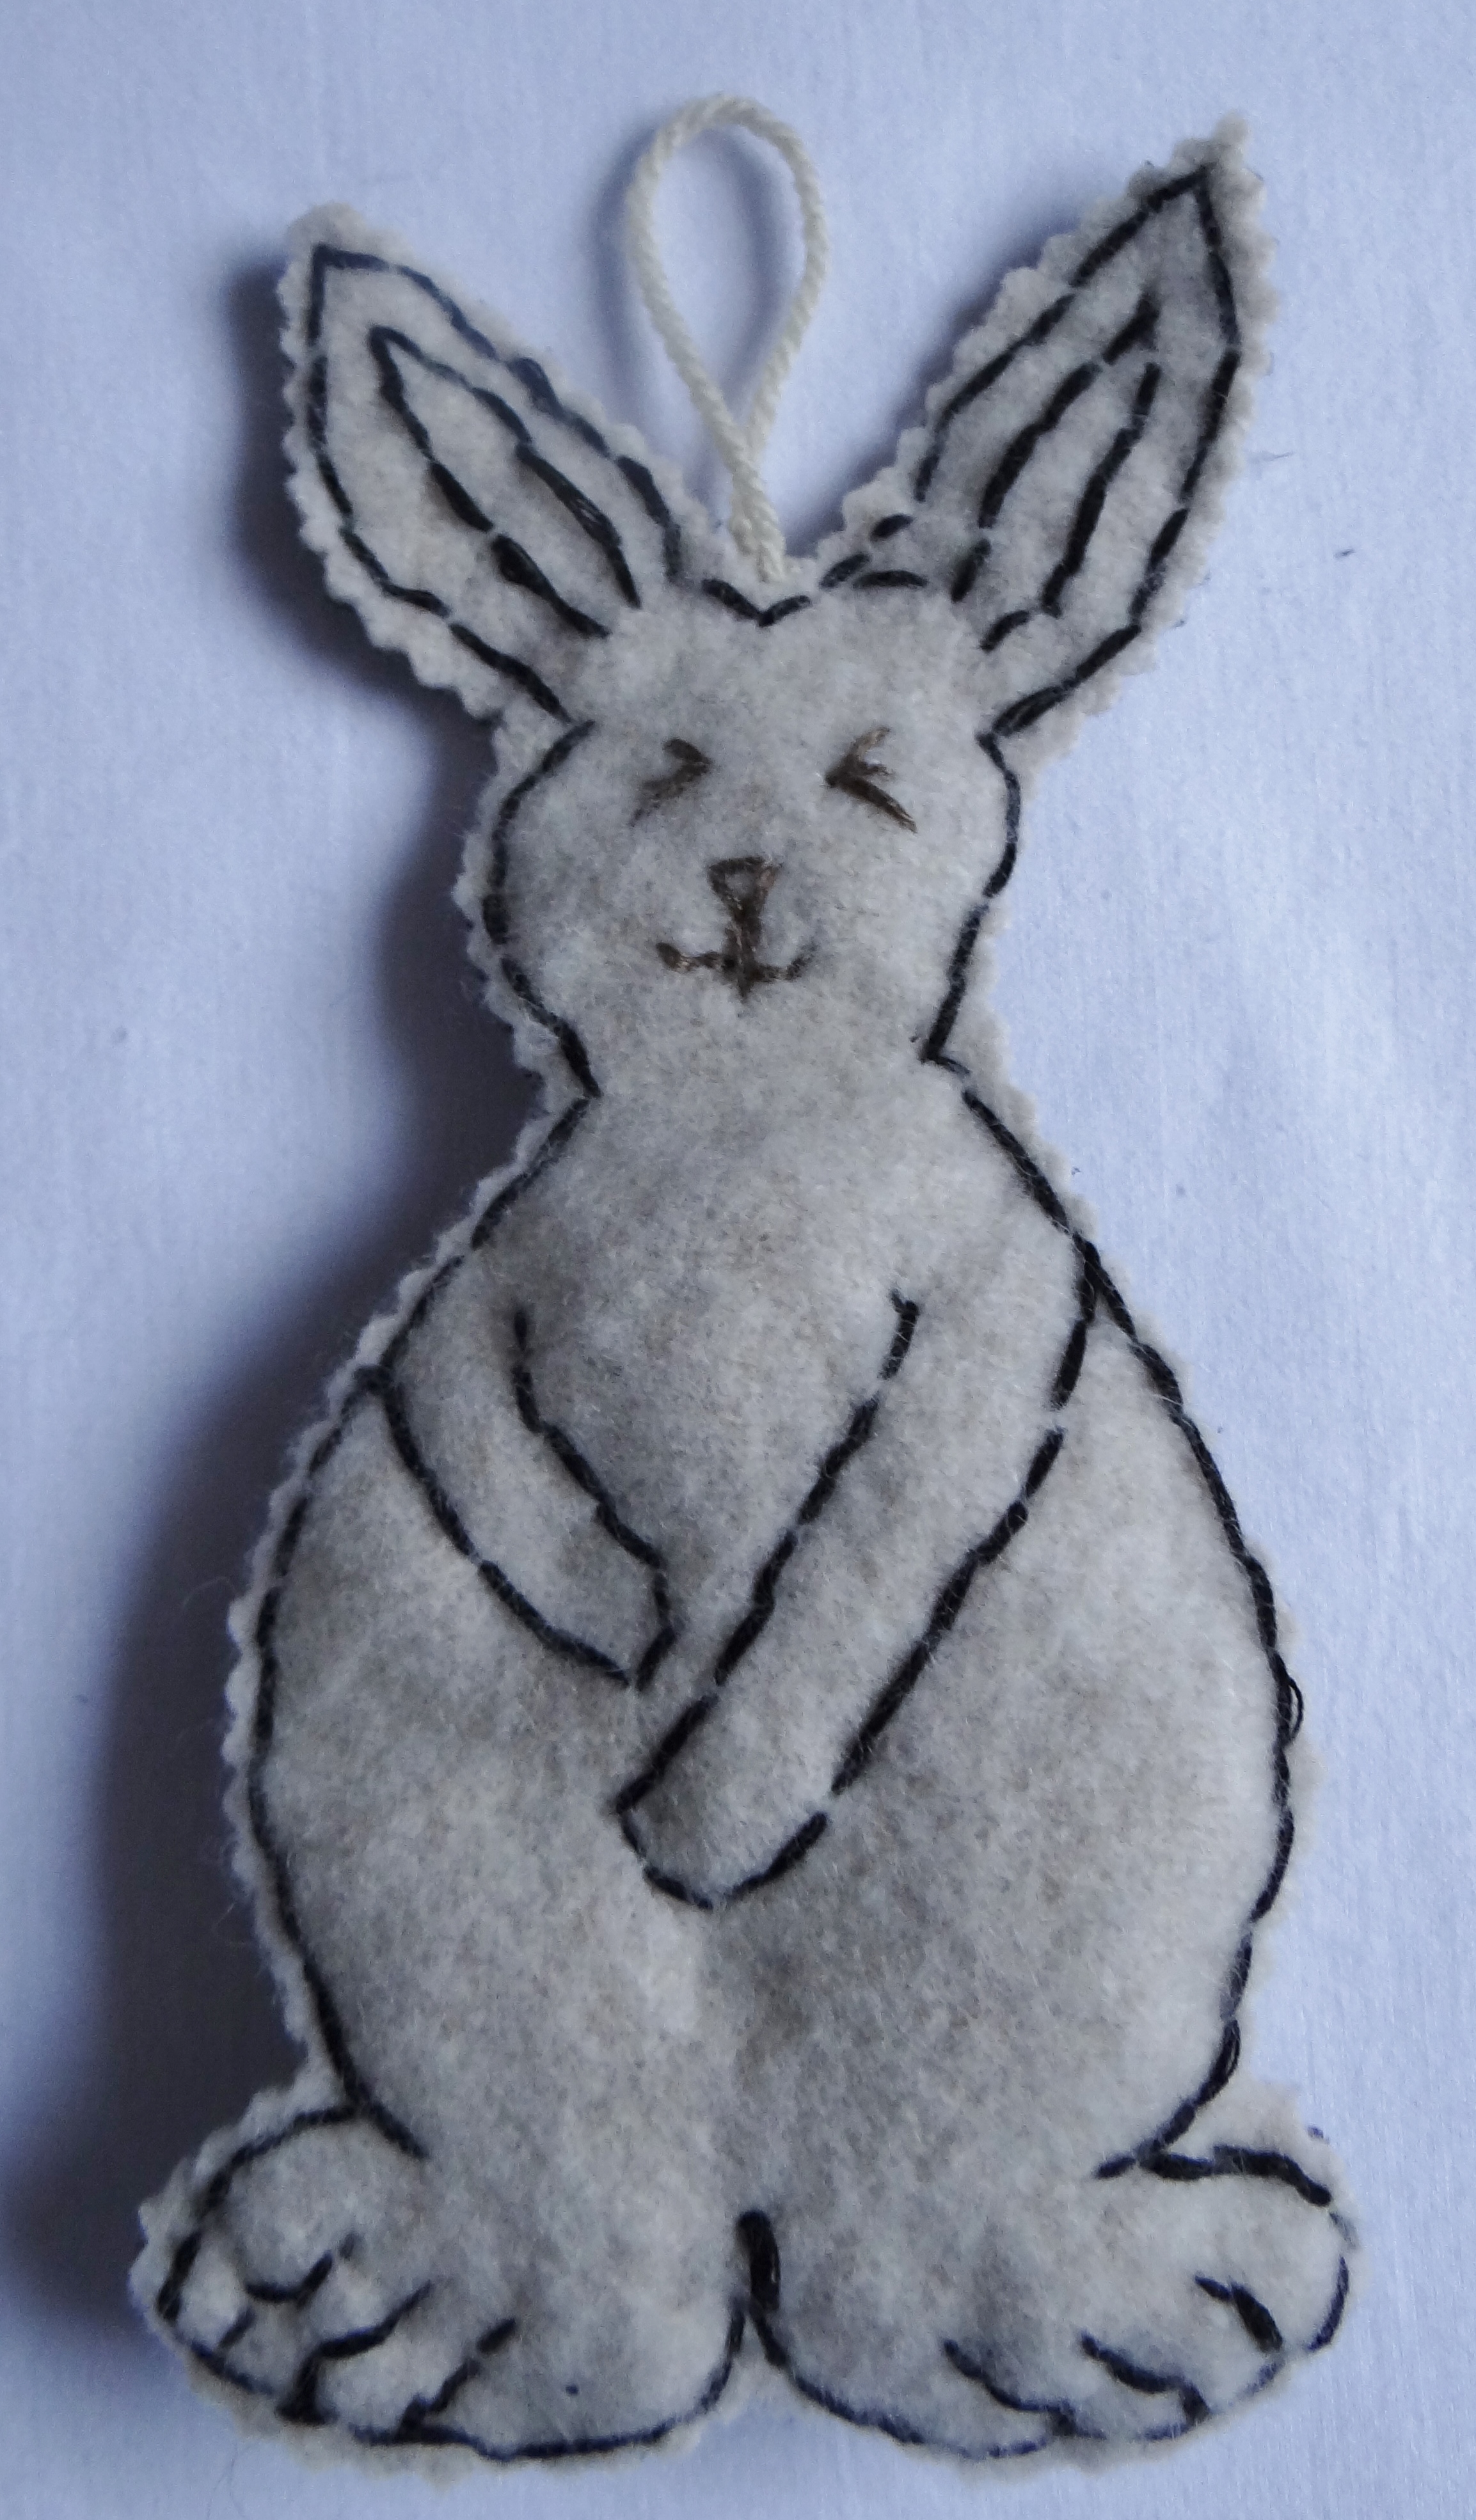
You could either make lots of bunnies to hang together for some Spring / Easter bunny bunting or add a loop to each for an Easter Tree decoration.


So cute! I want to try it.
I ran my first craft workshop last night! Bunnies went done great, also took some heart, bird and dog templates with me as alternatives which were really popular. Loved it! X
Adorable!!
These are sooooo cute and what a brilliant idea. I think I’d definitely going to have a shot at this. Thanks so much, you have such brilliant ideas.
So glad you like them. Thank you for your lovely feedback. X
aw they are so cute, thanks for sharing how you make them, is certainly something Id like to create 🙂
You’re welcome. They are so easy to do so great for a ‘sewing party’!
Great idea, unfortunately Ive never had a sewing party, be good excuse to have one though 🙂
Ahhhh!—–dorable! 🙂
Thank you. X