
 Have you ever made yourself a pair of hand knitted socks? Over the last year or so socks have been on my ‘must-make-list’ and during the summer I finally managed to knit the first sock of a pair!
My sock was mainly knitted on a small circular needle and what I have loved most about the whole experience is how my growing tunnel of stripy delight could be tucked in my pocket or handbag and whipped out at various locations.
I first came across the pattern via Lucy’s Attic 24 blog, as she had recently knitted herself a pair. The pattern itself is from another blogger – Winwick Mum who has published a hard copy of her pattern in her book “Super Socks” which contains some fabulous photos to make the whole process much easier to follow.
If you are thinking about knitting yourself a pair here are a few pics of my ‘sock-knit-in-action’ that might just help.
My sock was knitted with variegated sock yarn (Regia)- hence the self-striping effect. The first part to make was the sock’s cuff in a rib stitch (some patterns start the other way round with the toe first). Stitch markers come in very handy as they help you to easily find your starting point. Once the cuff is created it’s all about the knit stitch to create a tube of knitting that will hug your lower leg.


The heel flap comes next – that’s the part of the sock that sits against your heel. To give it strength this part of the sock involves a knit and slip technique on every second row. I found this part of the pattern hard to understand at first as the pattern abbreviation for slip 1 is Sl1 which I originally read as ‘slip 11’ opps! The heel flap was knitted on a pair of double-pointed straight needles.

The next step of your foot warming creation is ‘Turning the heel’ which is how you create the U-shaped piece of fabric that sits under your heel. If you have a look at your heel you should be able to see the part of your foot I’m talking about. 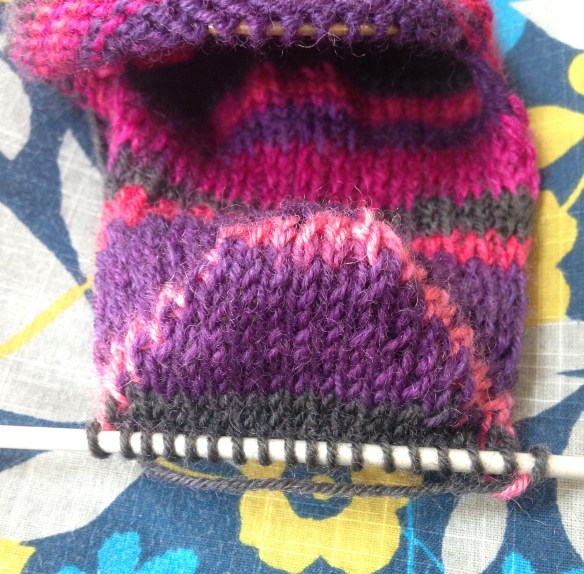
The gusset is the next section of the sock to knit (I never knew a sock had some many parts until I made one!) which fills the space between the heel flap and the foot part of the sock. I think this is my most favourite part of the sock as it looks like a pretty triangle from the side. By the time you have finished the gusset all your stitches will be back on your circular needles again so it’s easier to keep track of where they all are.

Here comes that foot!

 Almost there!
After a bit of decreasing to shape the toes there is one last pattern formation – it’s called the Kitchener stitch. Don’t be put off if its sounds a bit intimidating – there is lots of information out there on the internet to help. All you are really doing is using a darning needle to weave through your final stitches to create a piece of seamless fabric. This is my first attempt – good enough for me and my toes!
So here it is – my first ever finished sock. Just one more to go!


Pingback: Time to Create and Motivate | thestitchsharer
Much neater than my first pair! You don’t have to do Kitchener if you don’t like it, I made a pair recently using the sort of spiral decrease you do for a beret. Worked out really nicely if I say so myself.
That sounds a great way too. Xxxx
great to see your success. this is how I was taught in school but now knit them toe up which I find much easier and quicker. happy knitting
Lovely to hear how you knit yours too, thanks for sharing. X
Hooray! That’s a fabulous sock and you’ve taken some great in-progress pictures. I’m looking forward to seeing the photos of you wearing your pair! xx
Thank you so much. It was your fabulous pattern and book that made it all work out! Thank you. 🙂
nice job! I would never guess it was your first one. 🙂 I love my tiny circular needle fro socks, just whizzzzz around. 🙂 But as I hate the kirchener, I always do toe up socks. I should get over that fear…
Thank you, the Kitchener stitch was ok in the end, just wrote some steps out on a piece of paper first to remind me of what I was doing.