
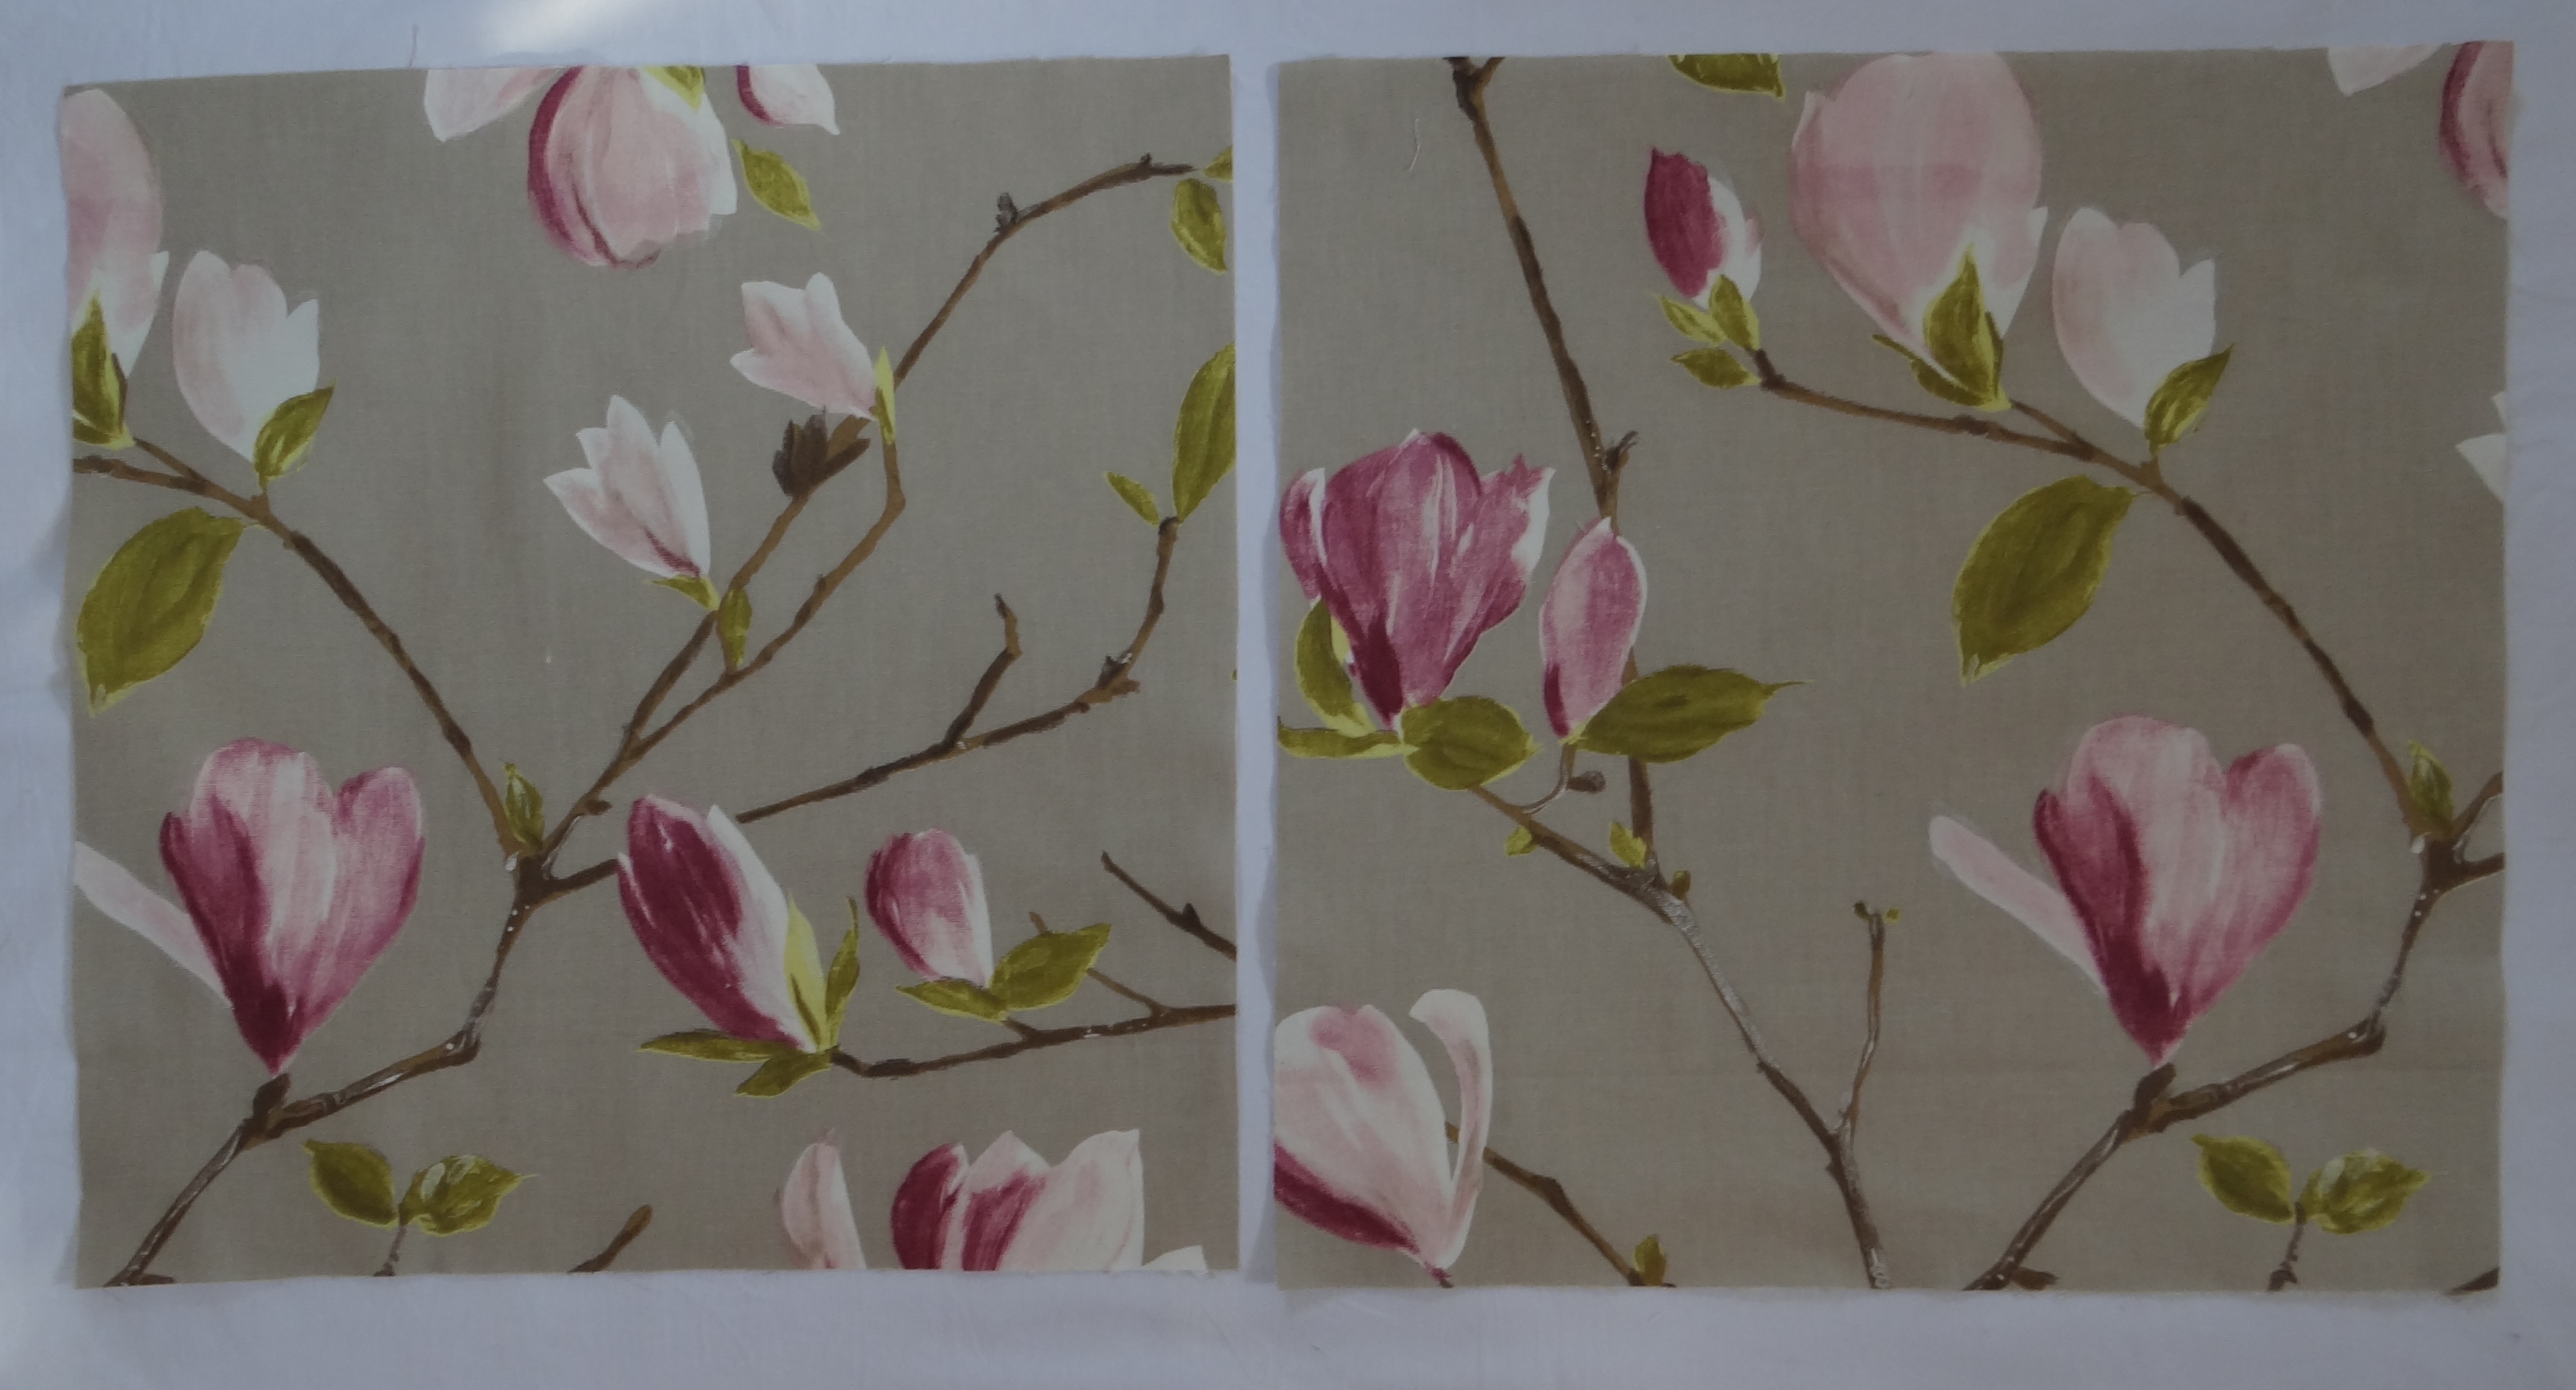
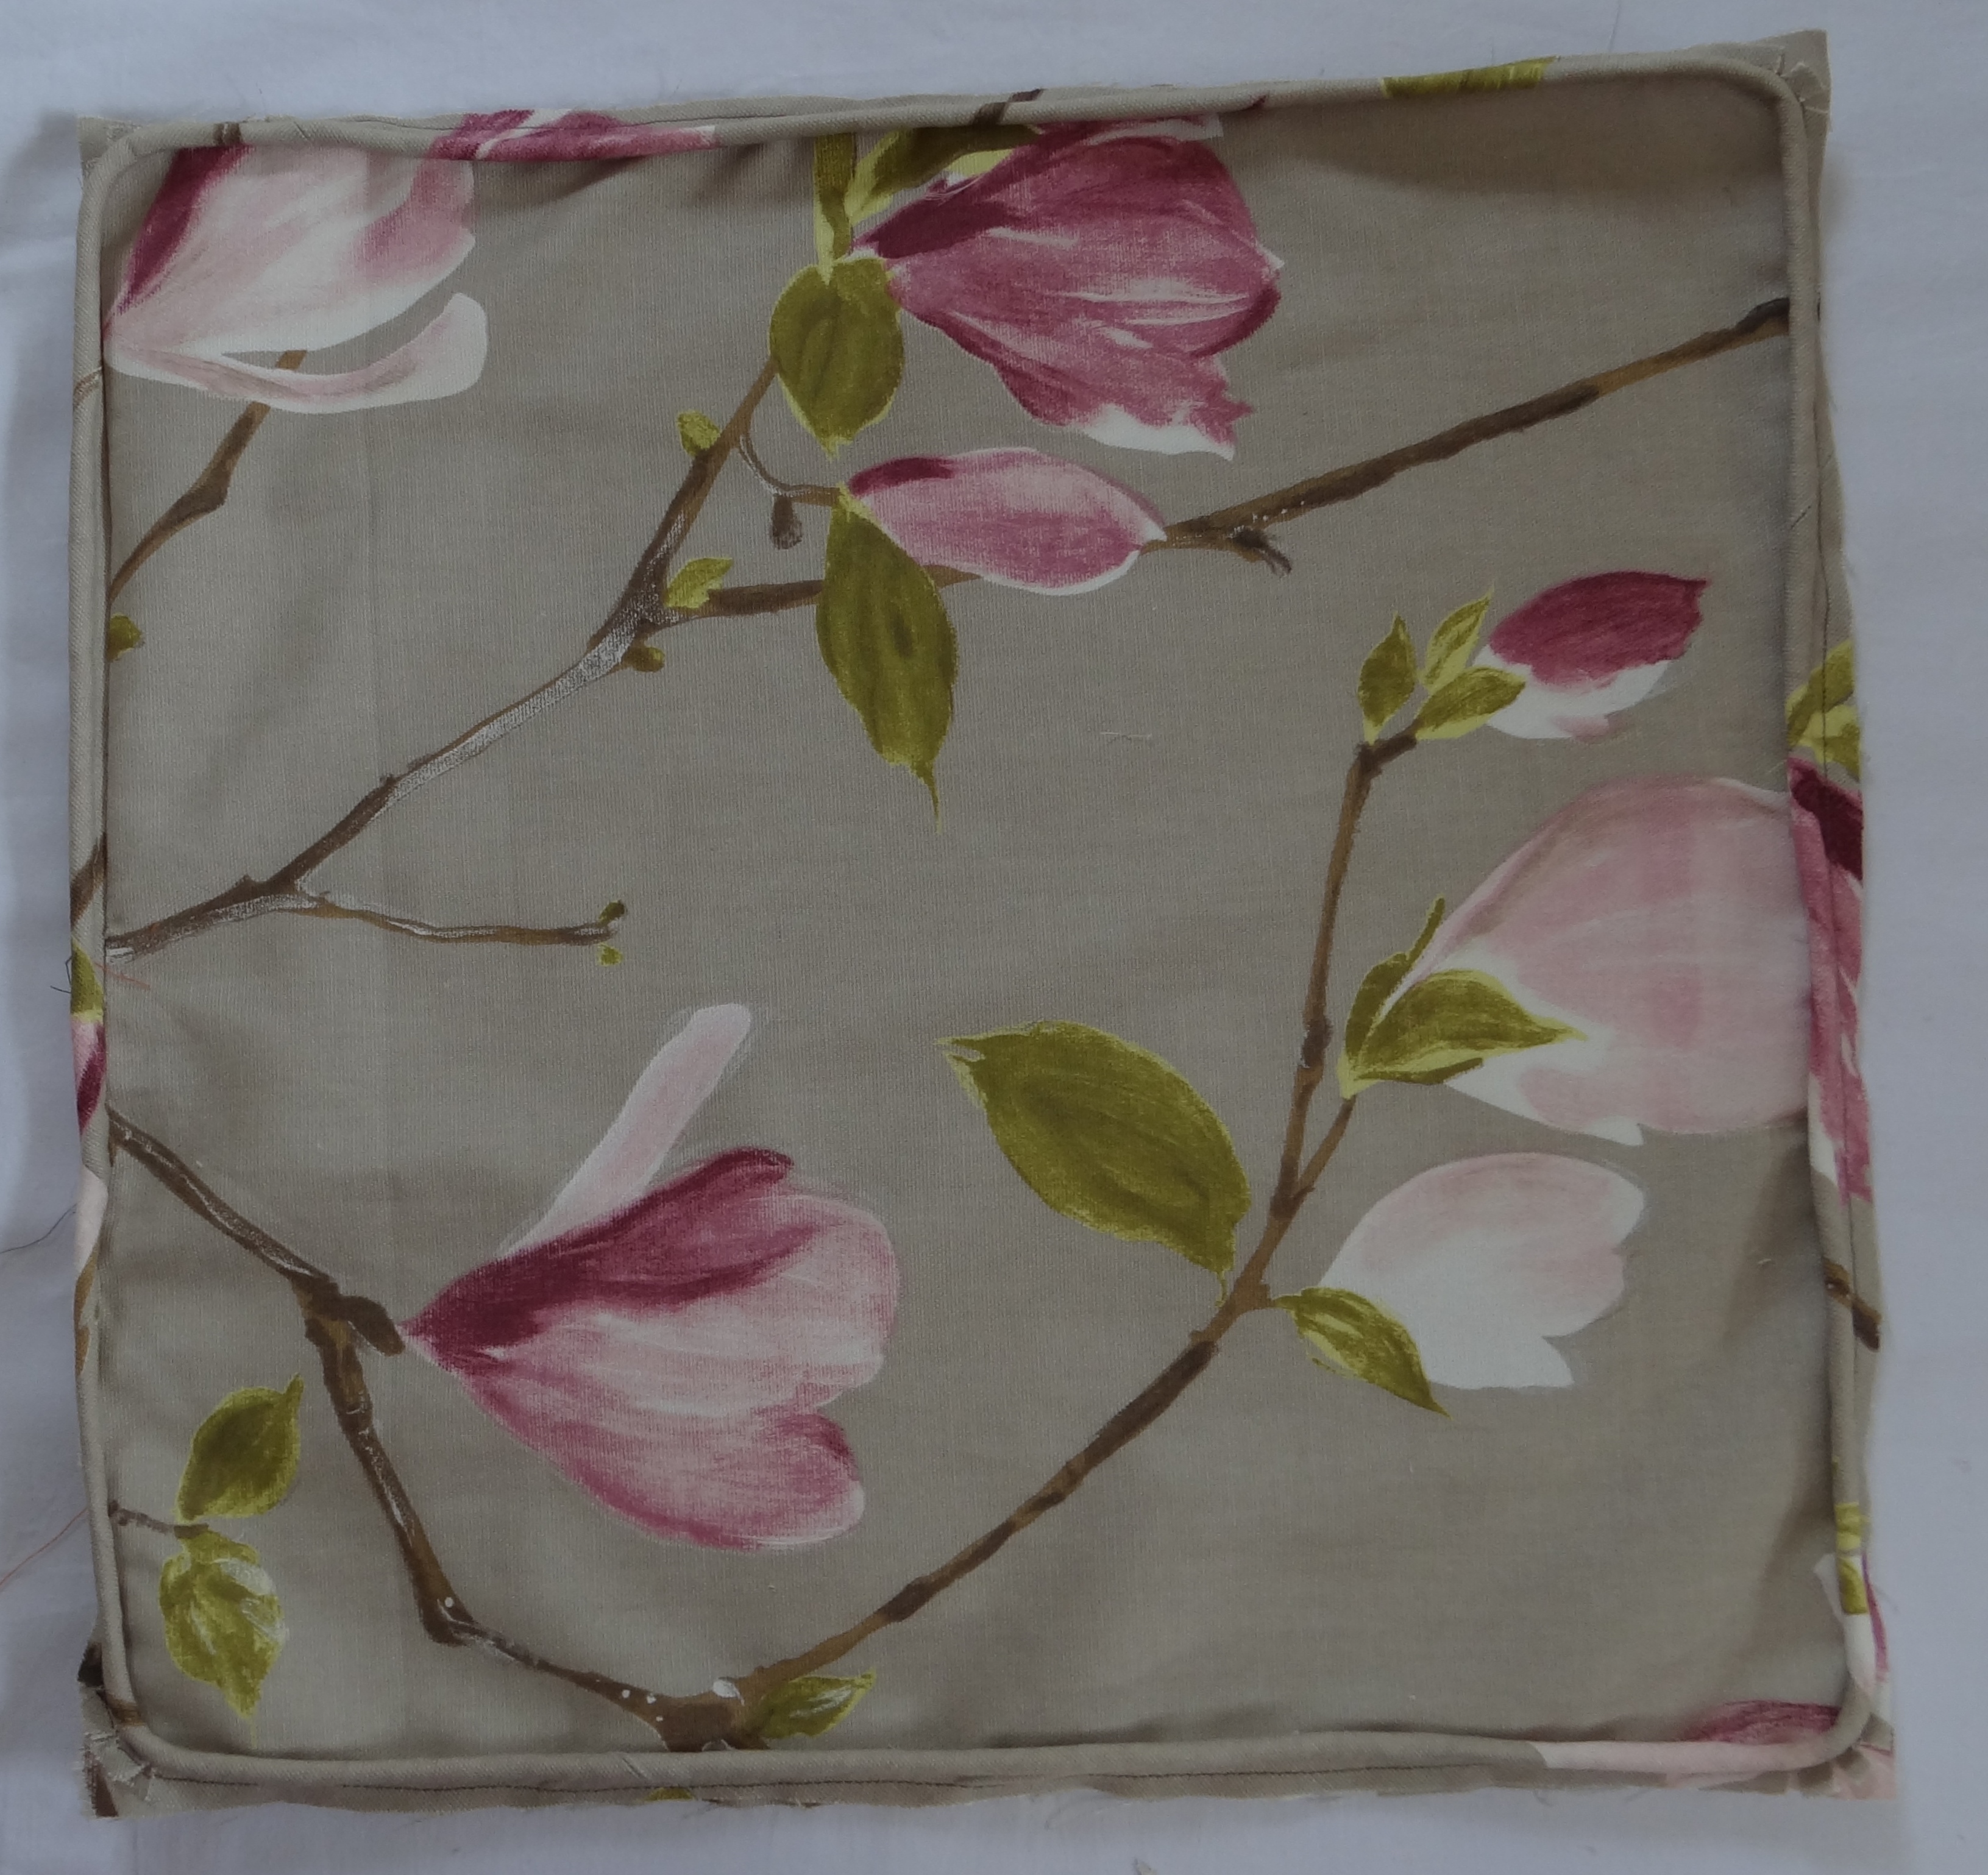
 1. First decide what size you would like the finished cushion cover to be then add on a seam allowance to work out the size of the cushion panel pieces. Cut out two cushion panels of this size from the fabric. I normally make my cushions slightly smaller than the size of the cushion pad so the finished cushion is all lovely and puffy.
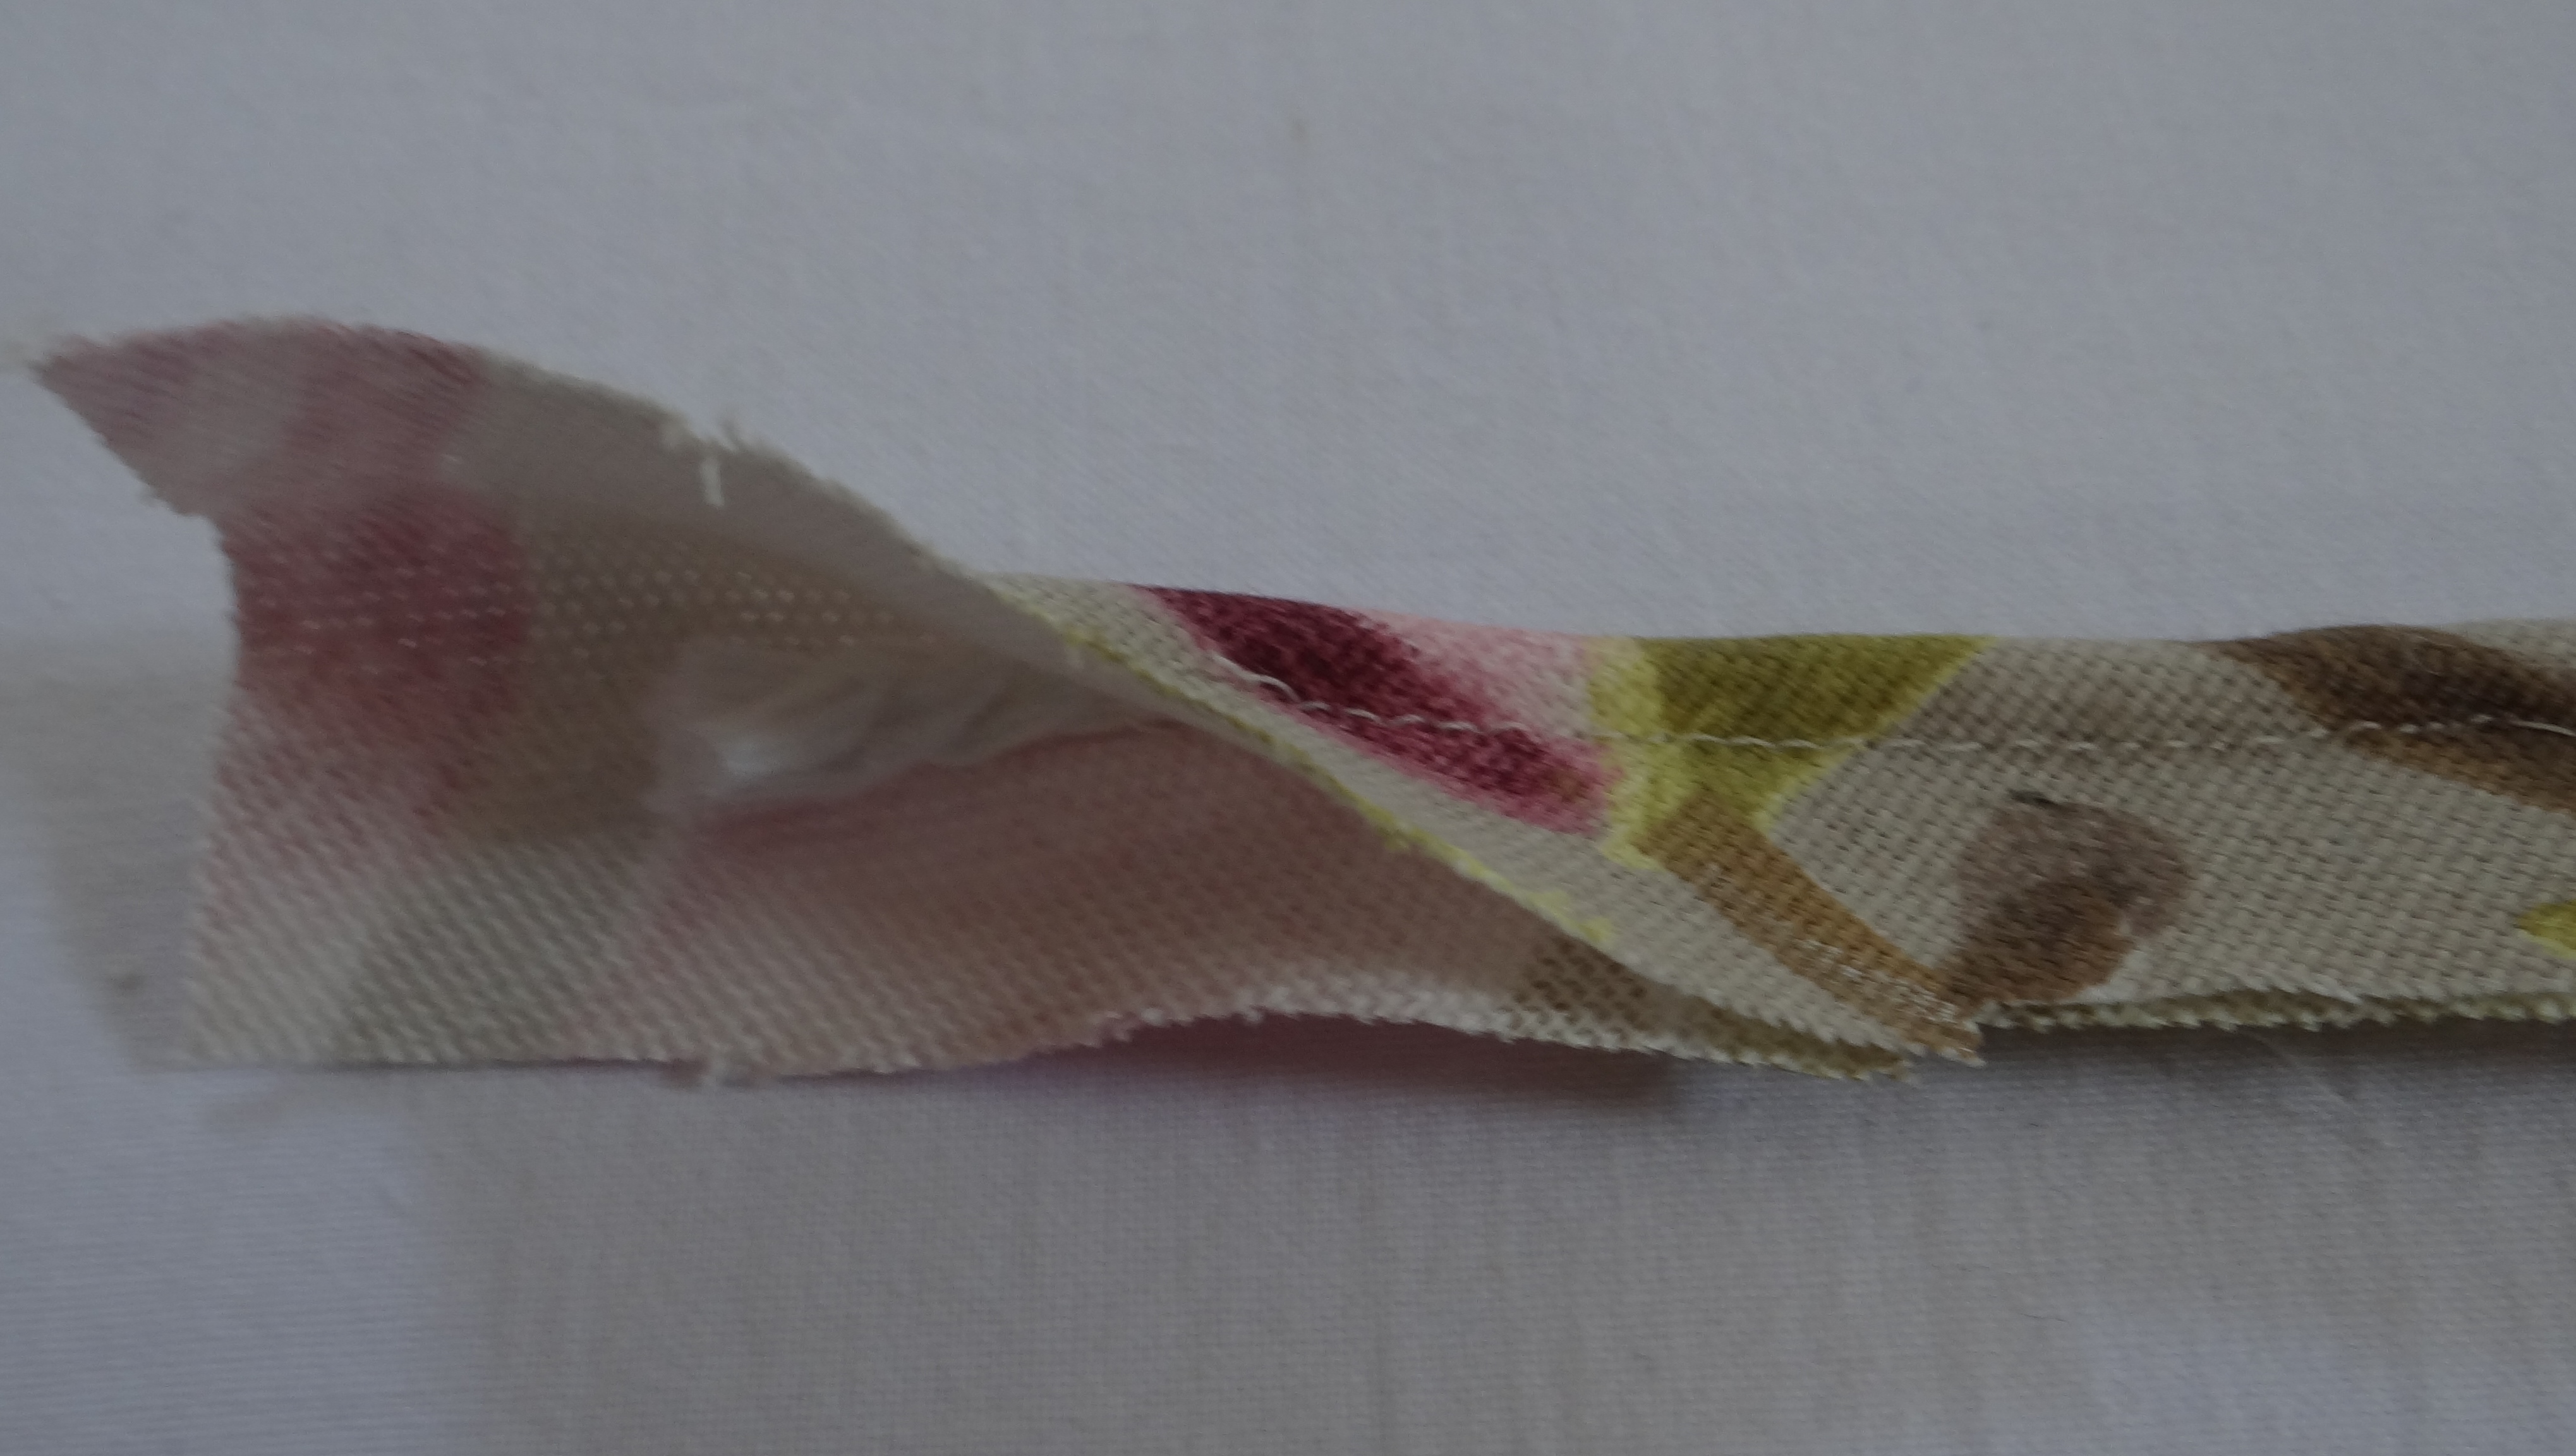
2. To attach the piping its best to use a zipper foot. You will need enough piping to go all the way around the edge of the cushion panel plus 6 inches to make the piping / welt joint. I’ve made my own piping using some bias strips from the cushion fabric. Here’s a quick picture of the inside so you can see it’s construction.
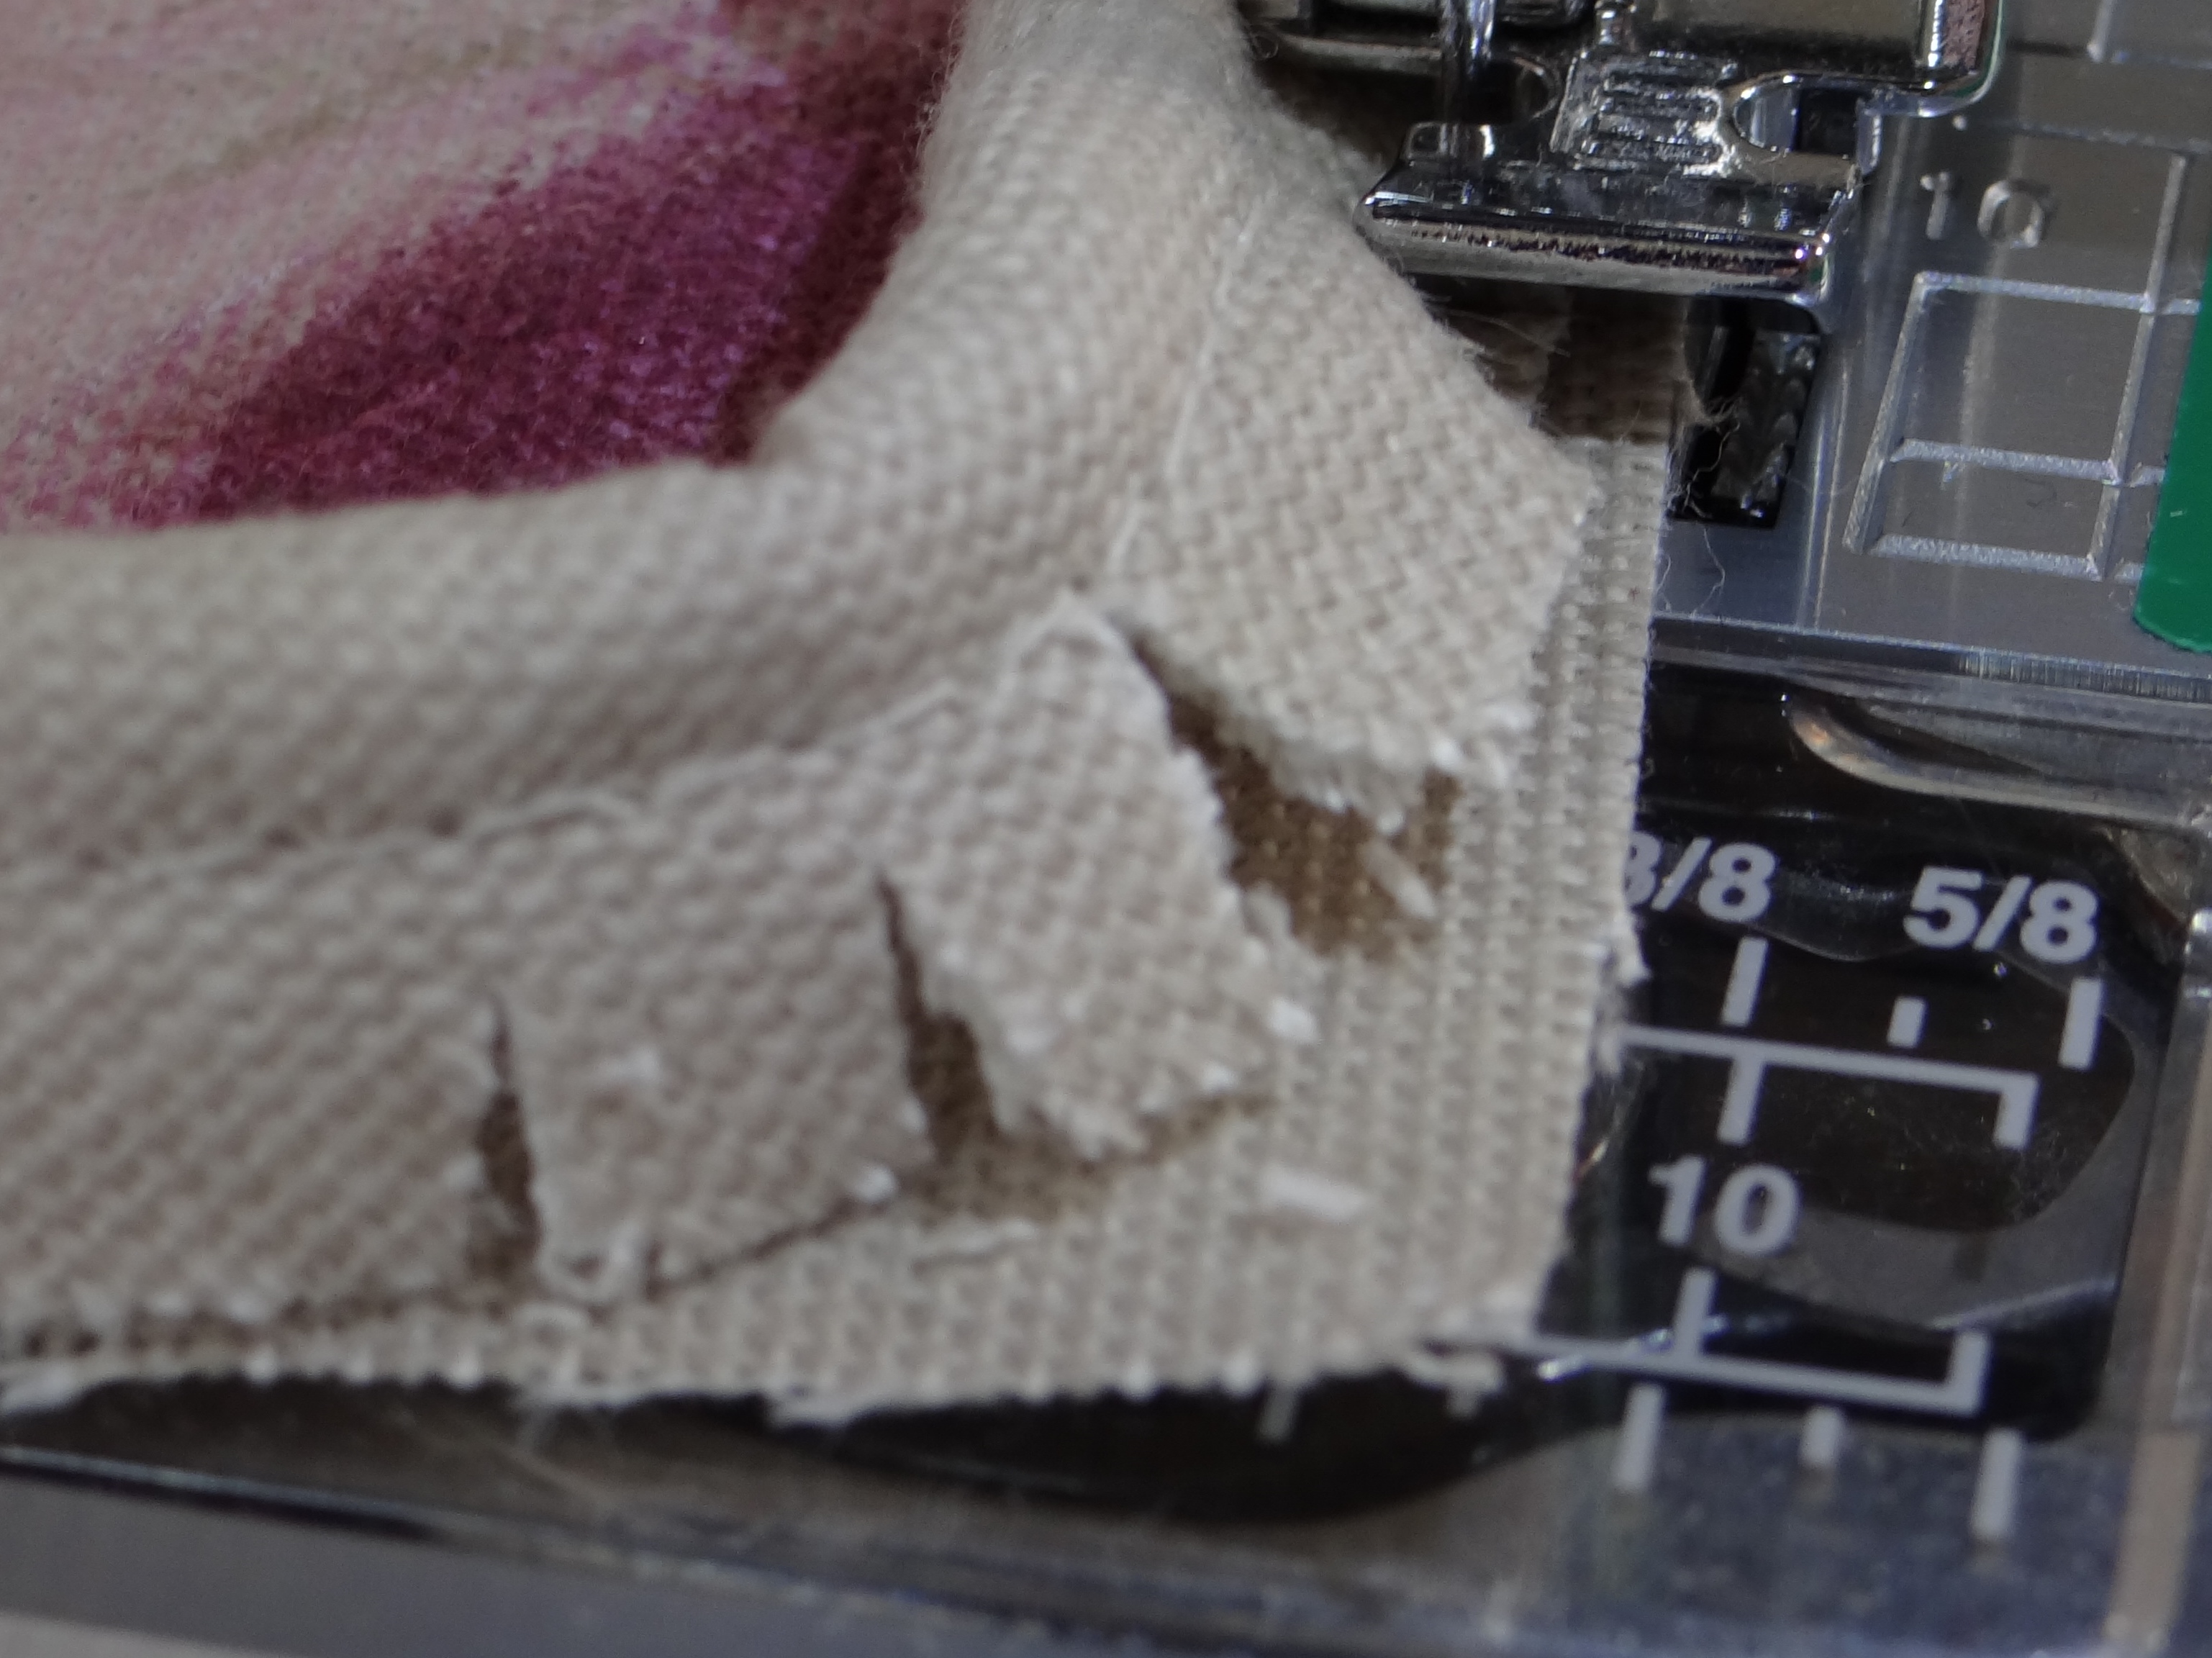
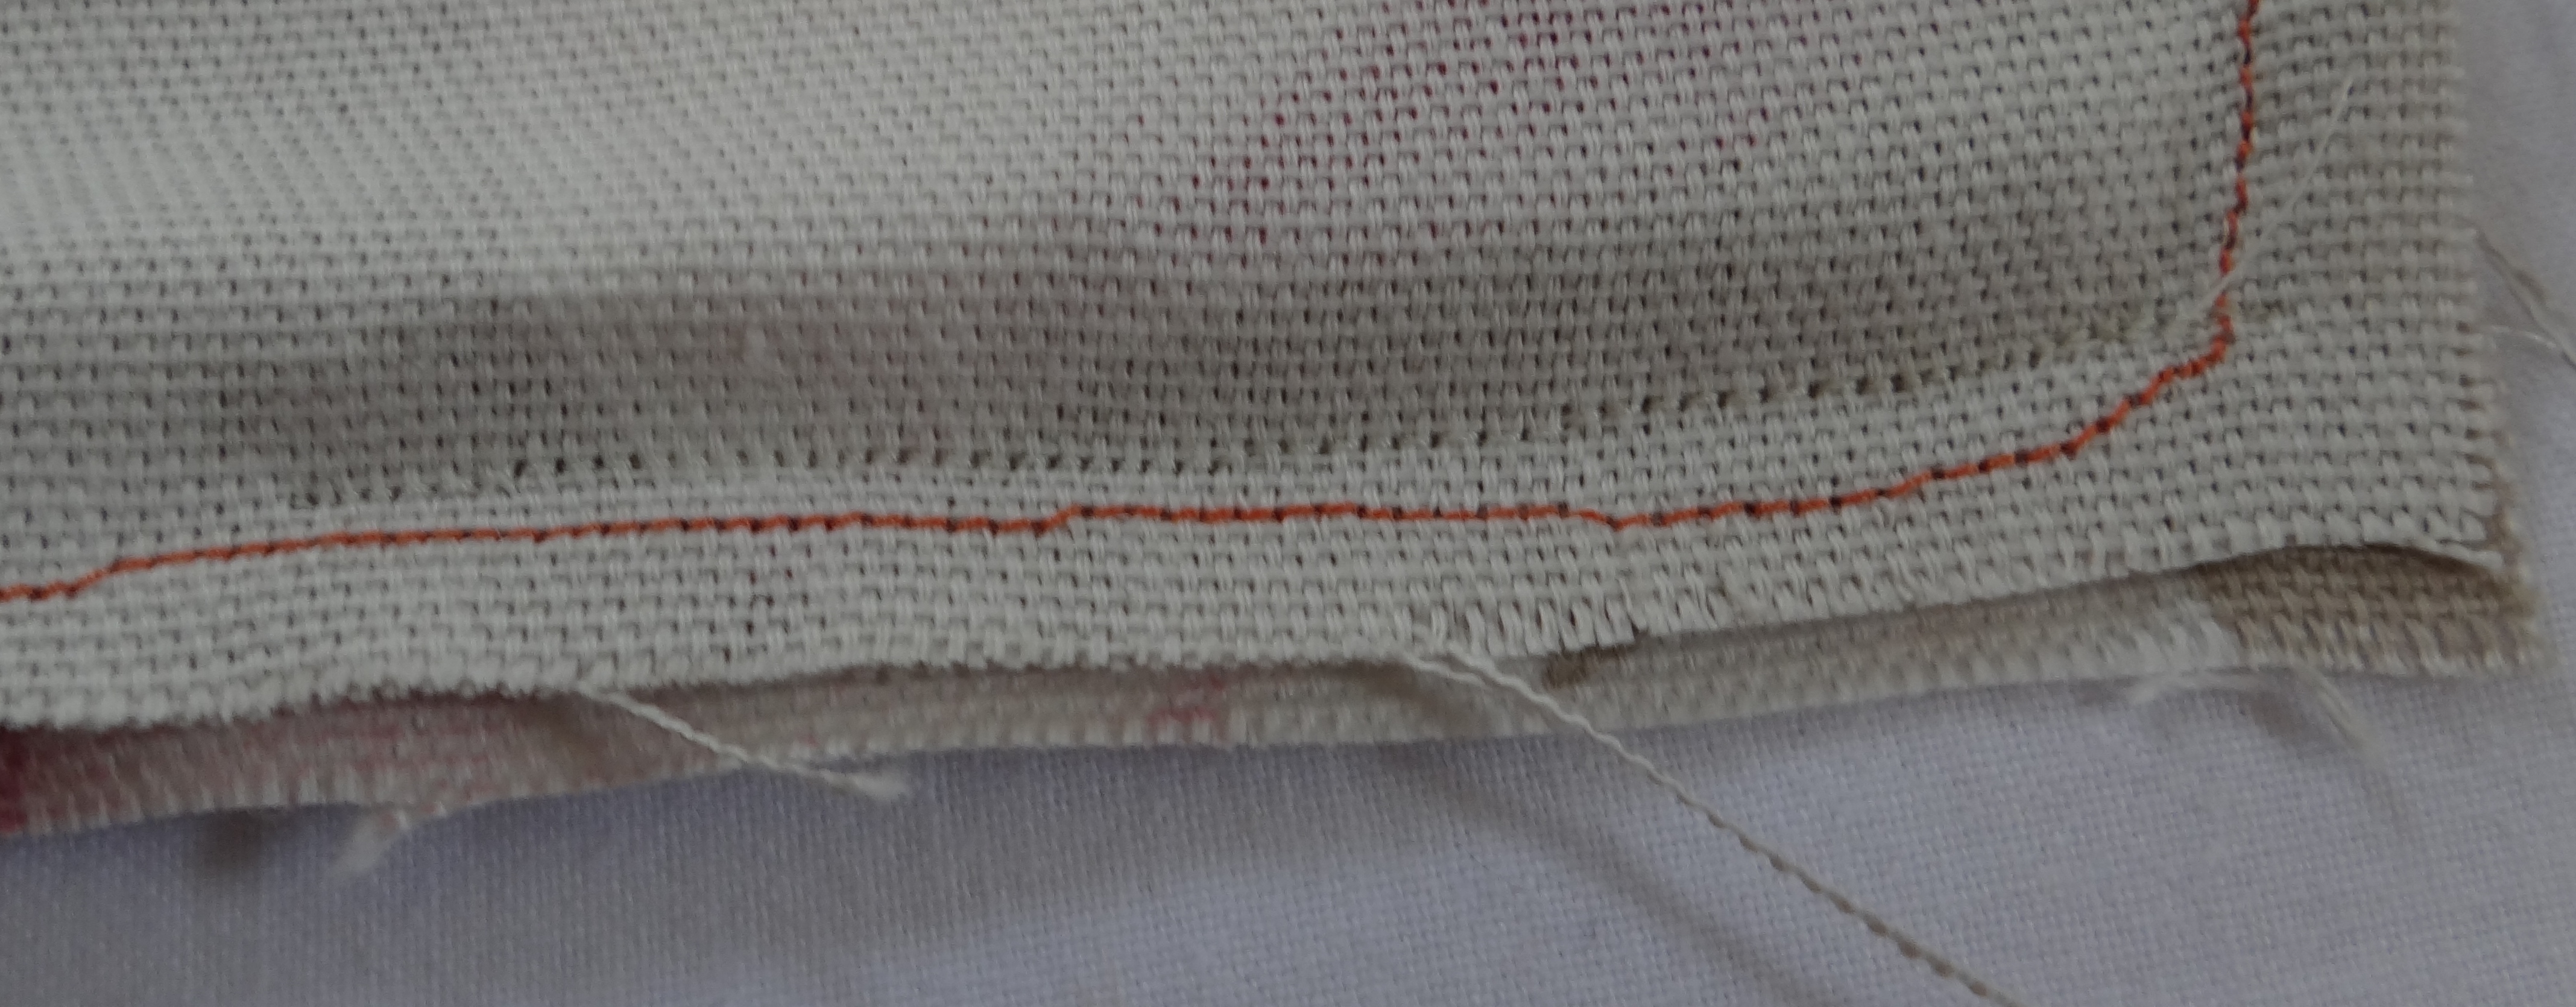
When the piping is sewn to the cushion panel use a bobbin thread colour that will show up on the wrong side of the fabric as it will make it easier to see where to sew when the cushion panels are joined together. I’ve used orange thread.
The piping is laid on the right side of the front panel with the raw edges facing the outside. Start sewing at the bottom edge of the panel – leave a 3 inches piece of piping at the beginning. Sew along the stitching line of the piping – you may need to move your sewing machine needle over a little to get as close as you can.
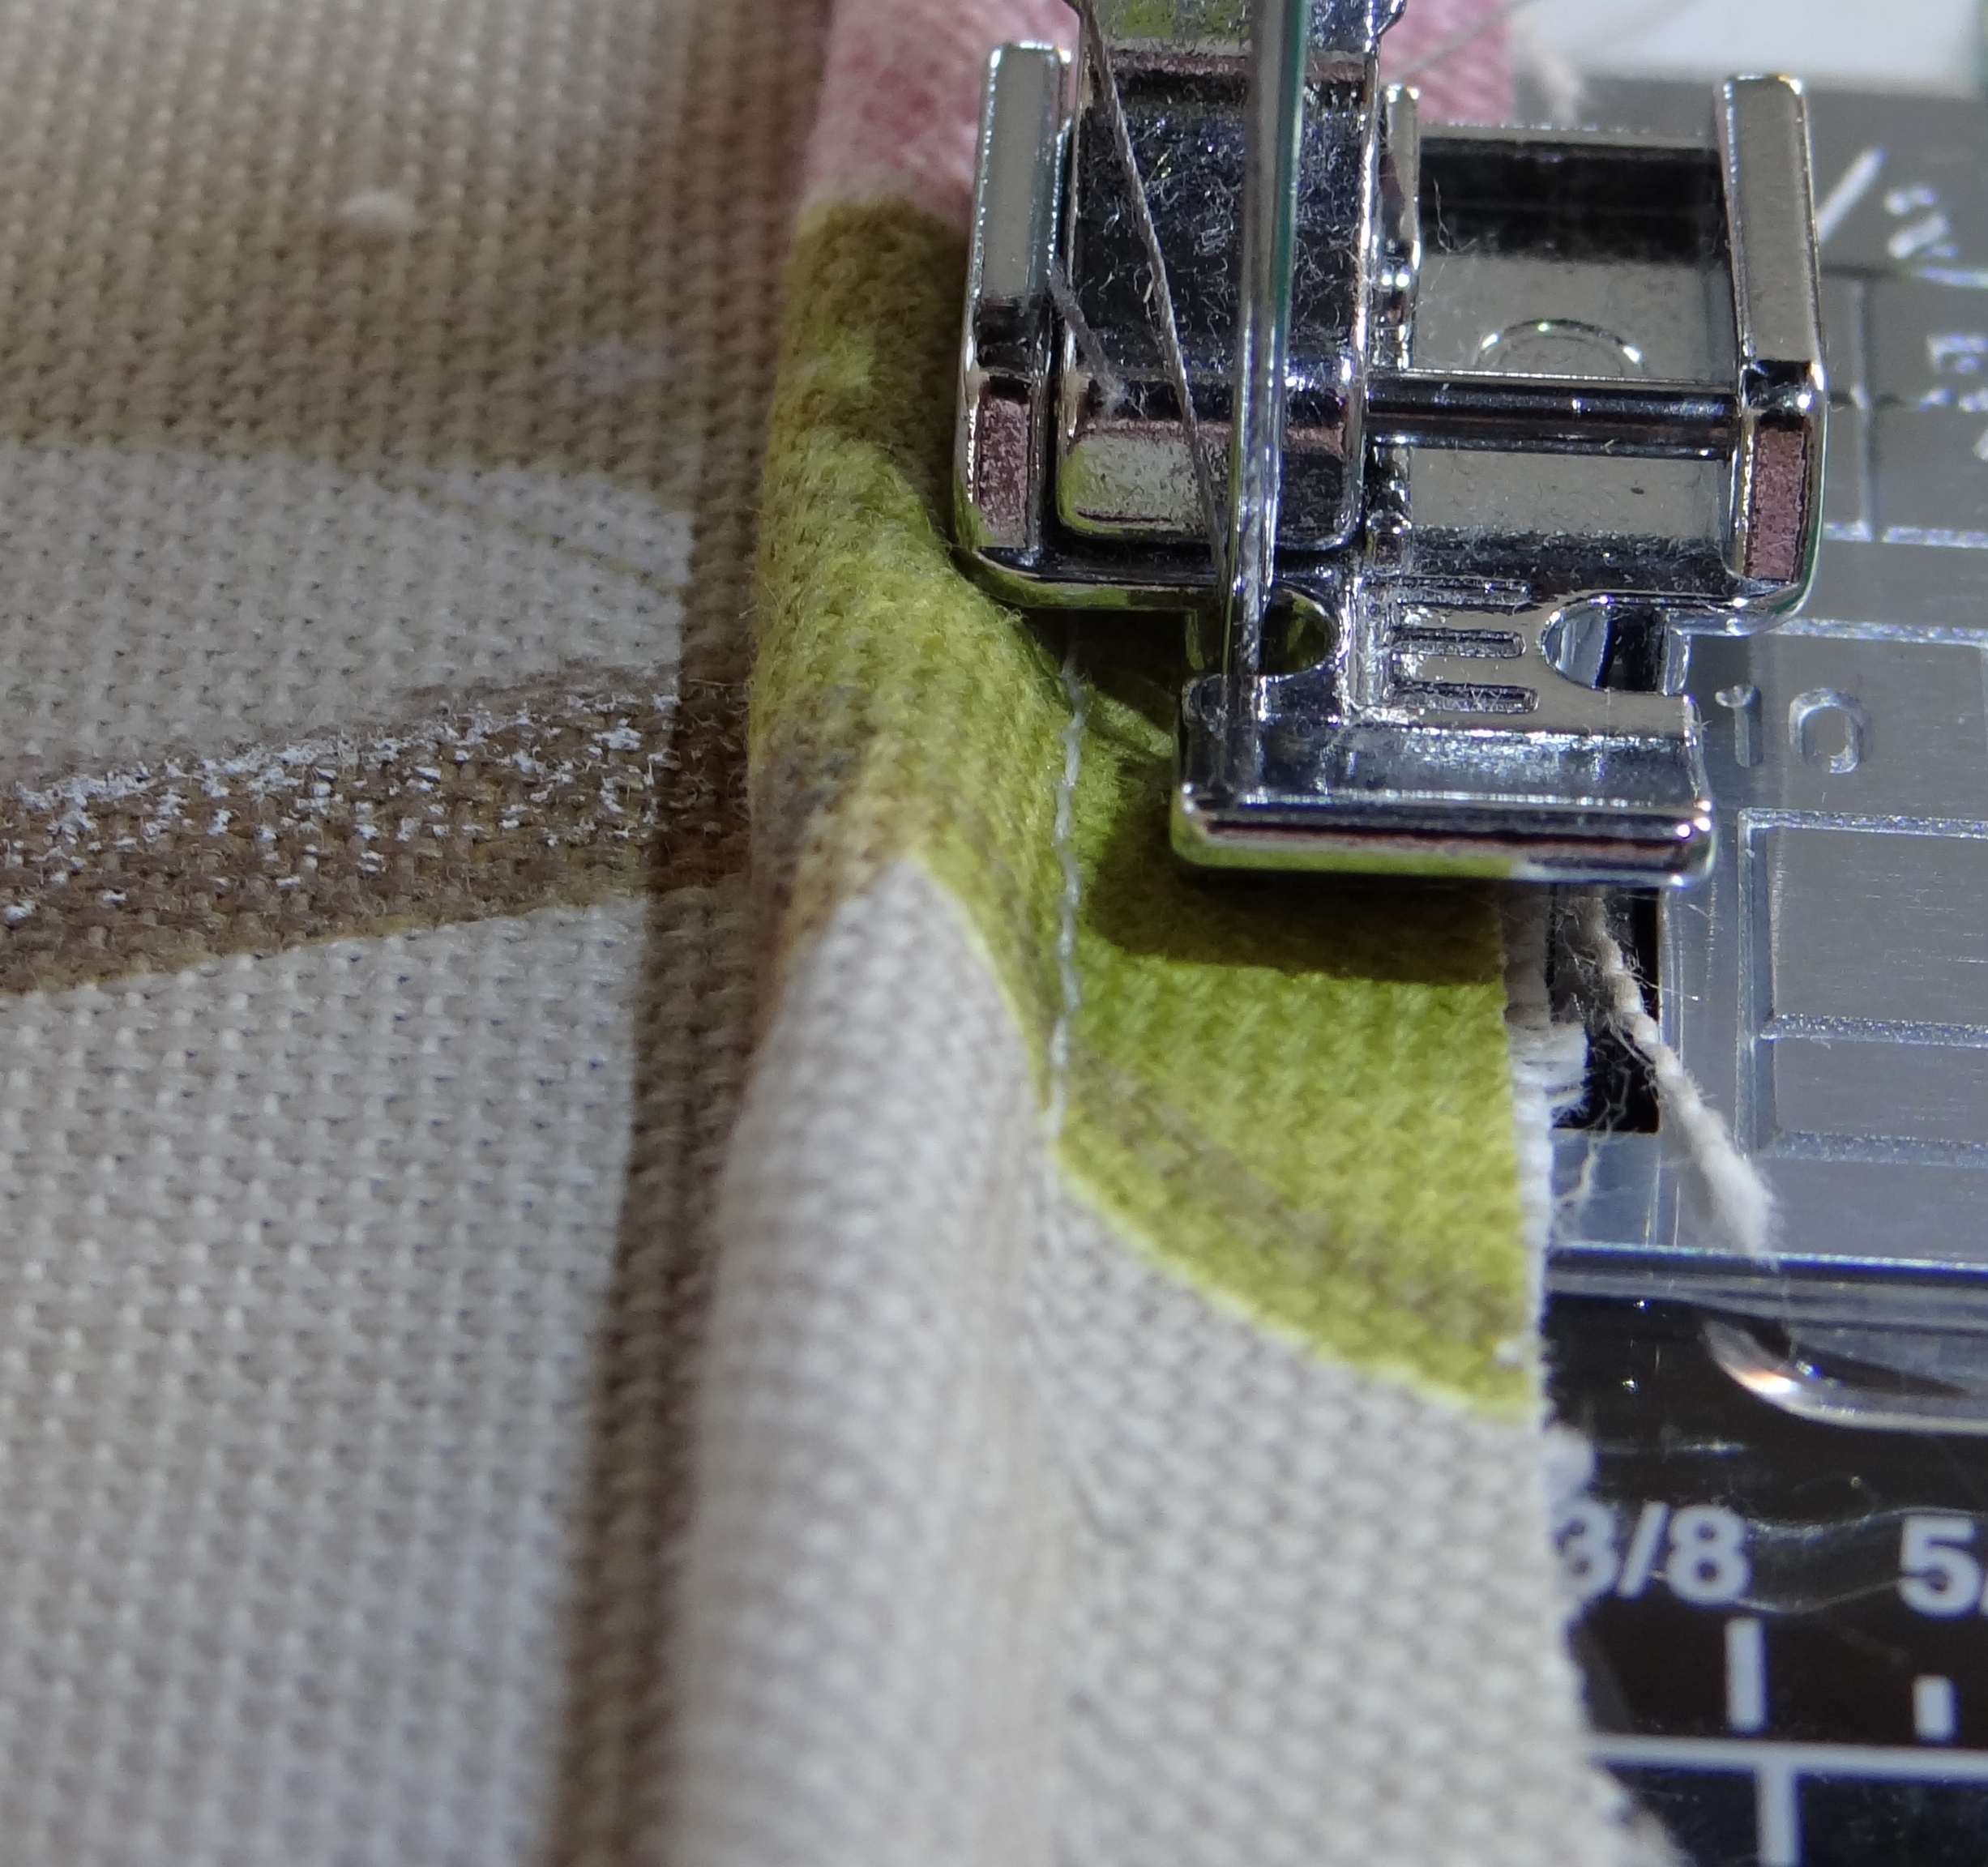
3. At the corner of each panel make 3 small cuts / snips into the piping, almost up to the casing stitching, to allow the piping to bend neatly around each corner.
4. Join the edges of the piping at the bottom edge. This YouTube clip by Recover Your World was really helpful in getting a professional finish. Here’s the front panel of the cushion cover with the piping sewn in place.
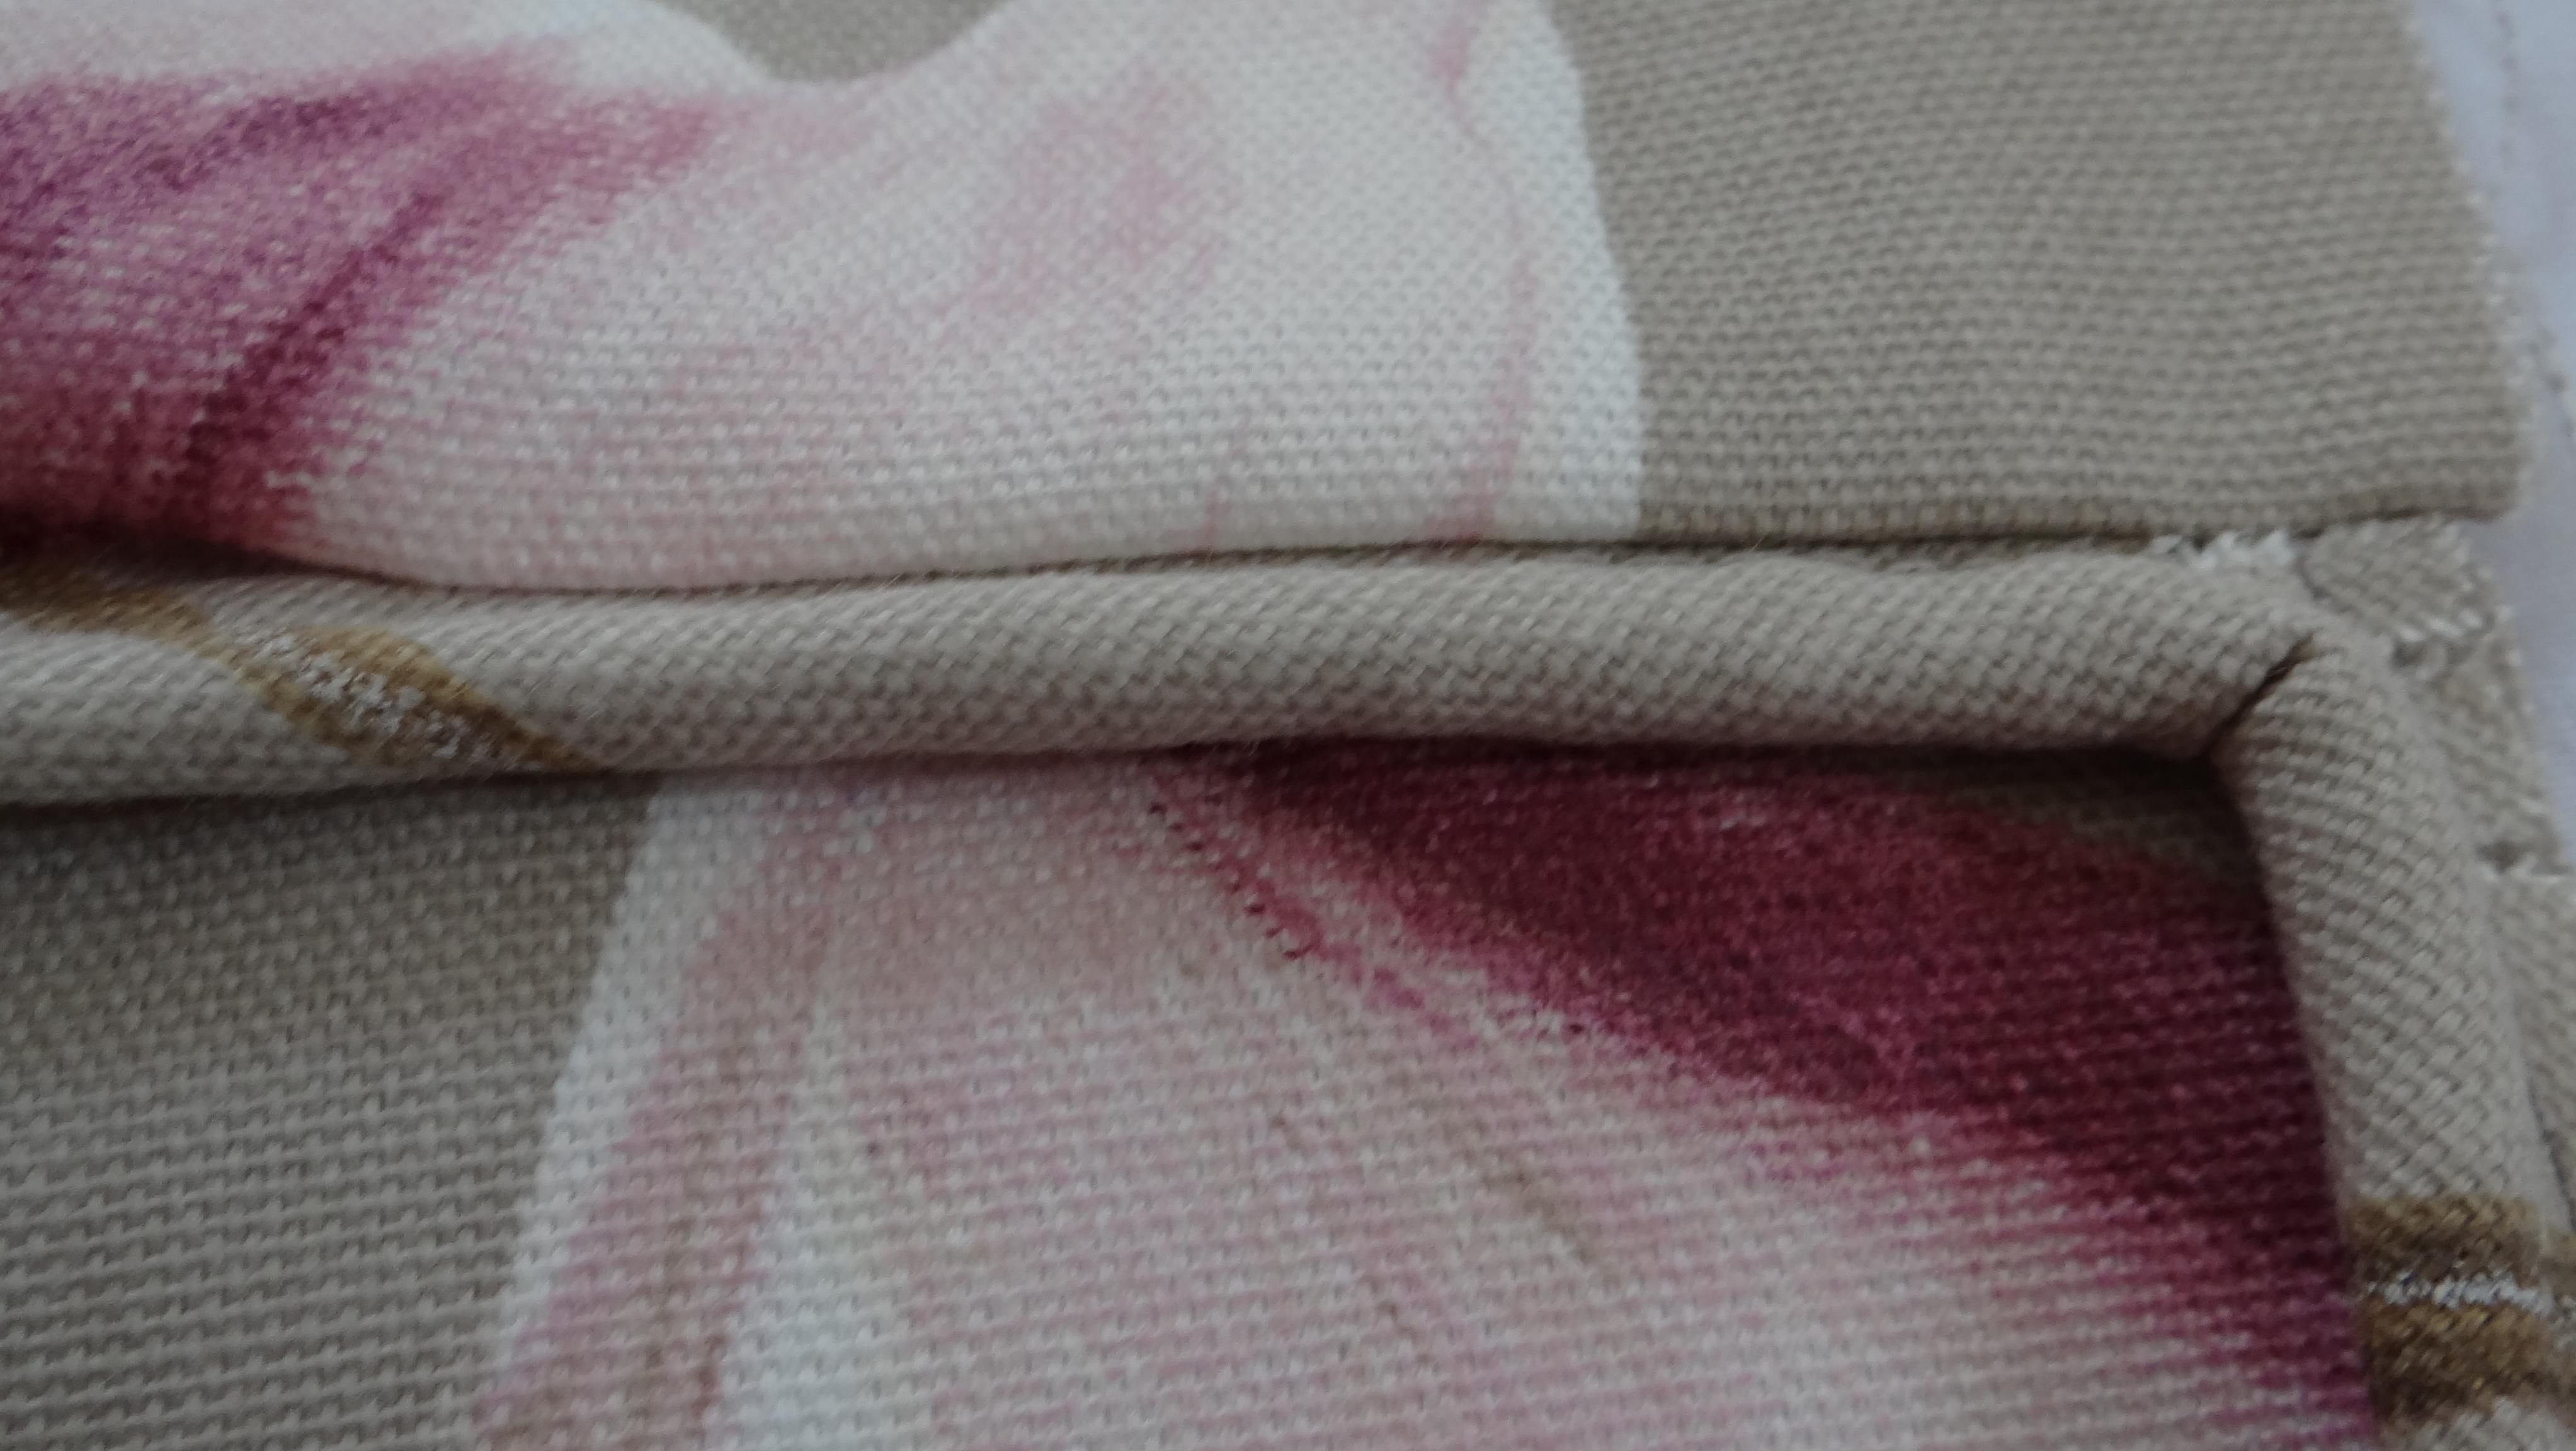
5. Lay the right sides of the cushion panels together. On the bottom edge, close to the piping, sew a straight 2 inch seam on both sides to create the zip opening. You should just be able to see the white stitching in this photo.
Here are the cushion panel’s with the zip opening from the right side.
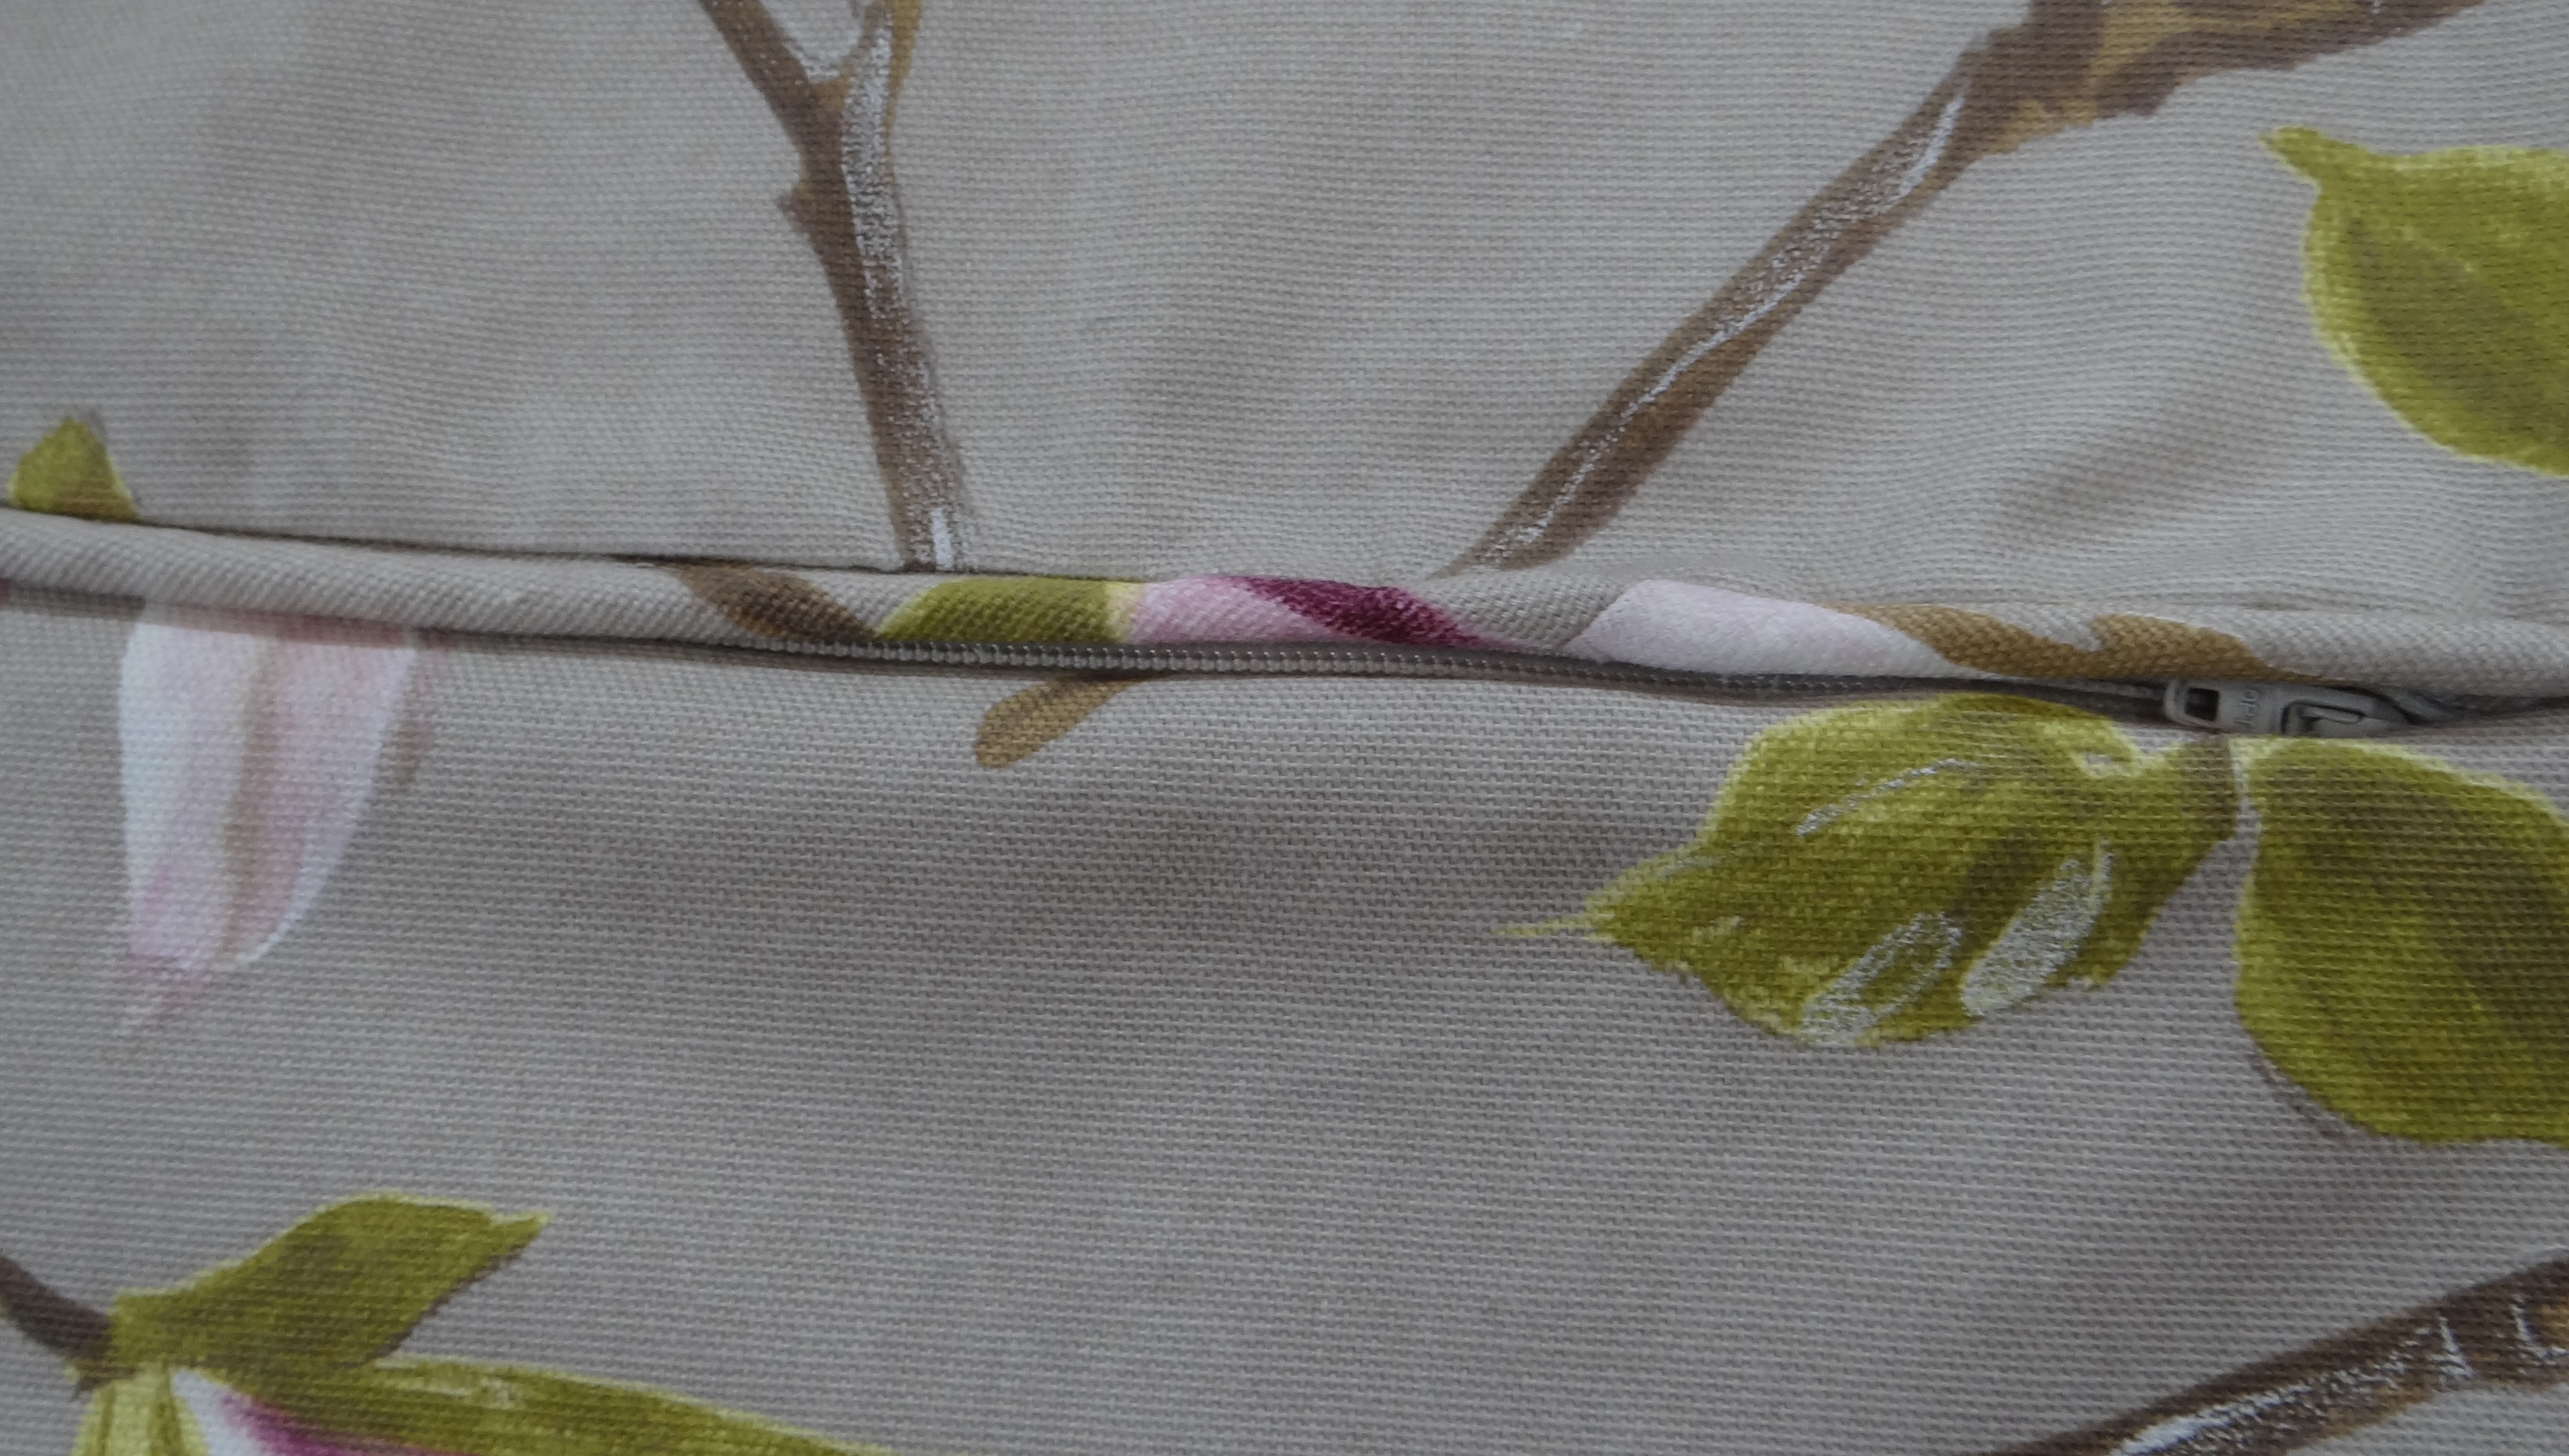
6. Lay the teeth of the zipper onto the top of the piping. Use a zipper foot to sew the zipper to the piping as close to the teeth and piping edge as possible. It really helps to use a zip that is longer than the cushion opening so the zipper head can be slid out-of-the-way.

7. Turn the cushion panels over and sew the second side of the zipper along the edge of the cushion panel without the piping. Cut off any excess zip. Here’s that zip sewn in place – I just love how you can hardly see it!
8. If you want to make a small flap to help conceal the zip, on the right side of the panel sew a straight line next to the zipper teeth of the non-piped panel. The stitches will be seen when the cushion is finished so keep that stitching straight!
9. Fold the cushion panels so the right side are together and pin to hold them in the right place. Make sure the zipper is open a little for turning through once its finished.

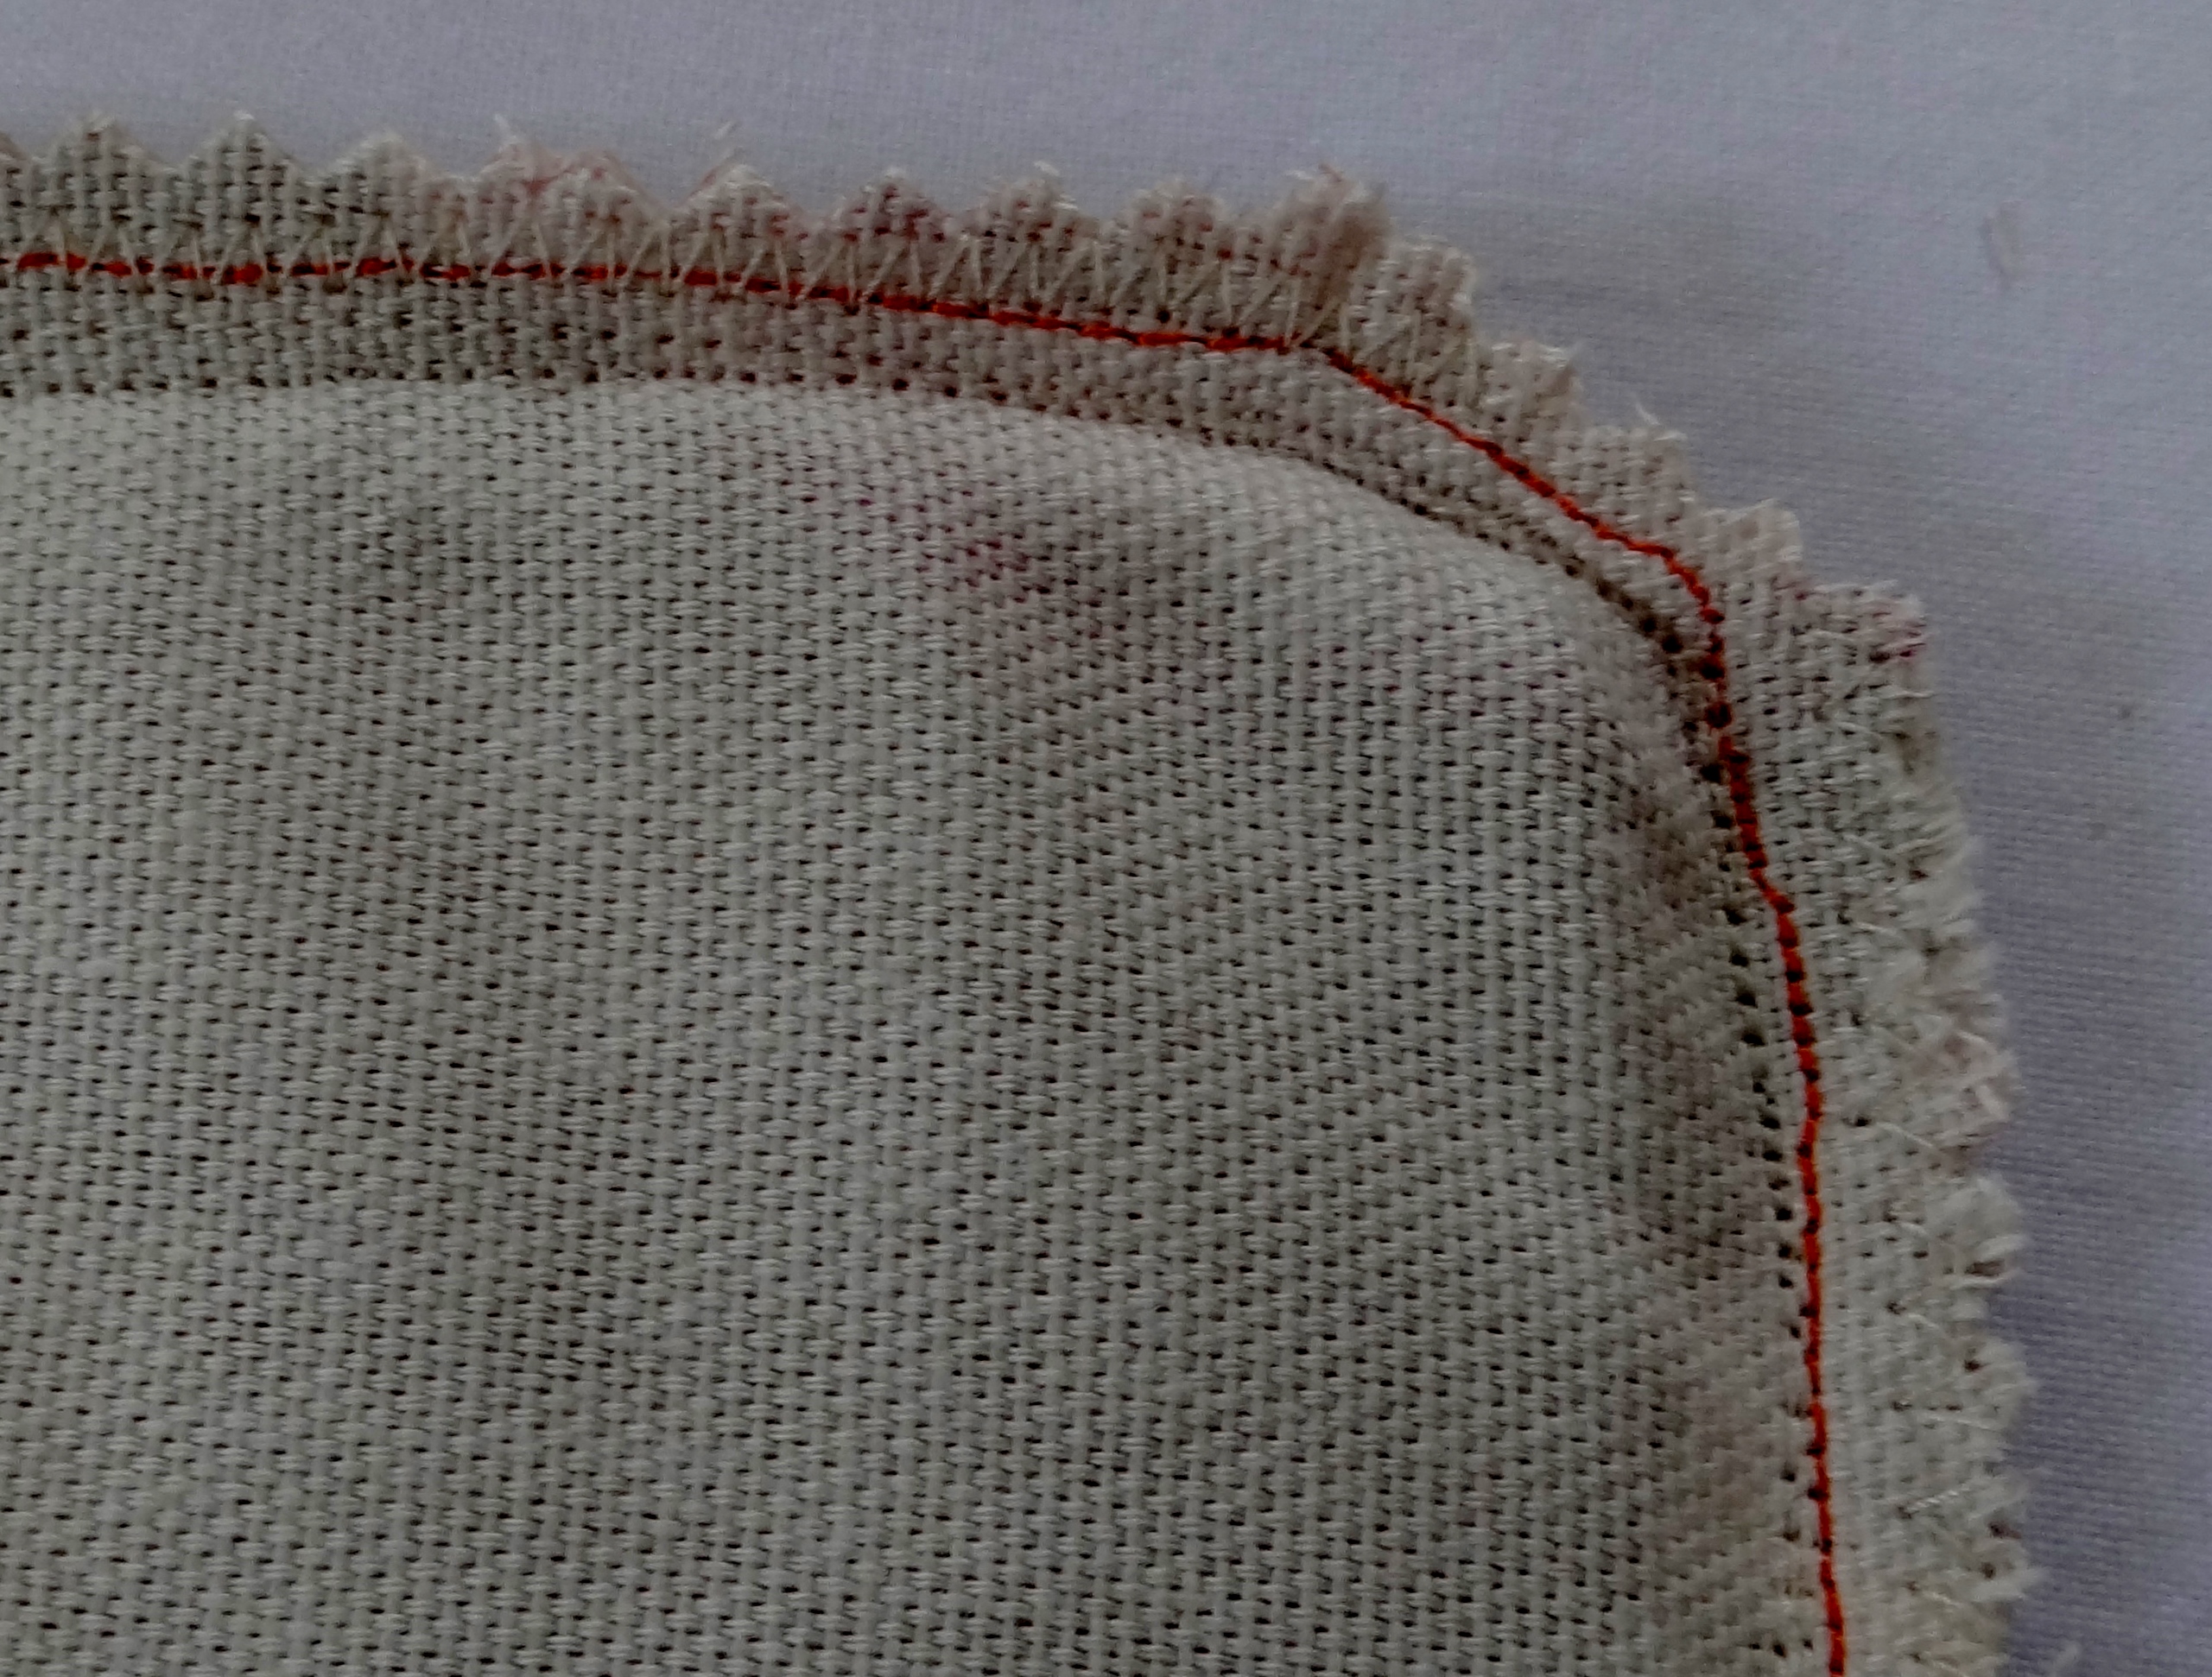
10. Starting at the 2 inch line on the bottom edge of the panel sew around the 3 remaining sides. Remember not to sew the zip opening! Sew the cushion pieces together with the bottom panel face up so you can see the coloured bobbin thread (can you see my orange line?). The stitching line needs to be either on top of this of just inside it so it’s as close to the piping as possible.

11. Neaten the edge of the cushion cover with a zig zag stitch and / or Pinking shears.
12. Turn the cushion cover the right way out, insert the pad and enjoy!


Pingback: First project on my new toy – Losing Threads
This is such a great, easy to follow tutorial. Thank you for sharing!
THANKYOU FOR HELPING ME THEY LOOK GOOD .X
Beautiful material!where do you get it?
Thank you, I brought the fabric off ebay. It’s called Sayuri and comes in lots of different colours. X
I’ve re-blogged this…stunning…must try soon!
Reblogged this on Faber's Blog! and commented:
So clever and unique!
Pingback: How to Recover a Lined Fabric Lampshade | thestitchsharer
Reblogged this on Laura After Midnight and commented:
Lots of people in my classes asking about this technique recently. I shall be running a couple masterclasses soon (watch this space) but this tutorial is a great place to start.
Happy stitching!
Thanks for the reblog! X
No problem, it’s a great post! xxx
What excellent instructive photographs.
Thank you. X
great method, thanks for sharing 🙂